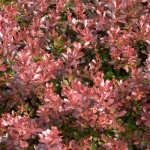
Few shrubs brighten a landscape like variegated dogwood. Those creamy-white and soft-green leaves, paired with vivid red or yellow winter stems, make Cornus cultivars indispensable in mixed borders and wildlife gardens alike. The best part: you do not need to buy a truckload to build a hedge or fill your beds. With the right approach, you can turn one healthy mother plant into an entire grove. In the guide below, you will learn how to propagate variegated dogwood cuttings successfully, from choosing the right wood at the right time, to setting up an ideal rooting environment, to nurturing young plants through their first season.
Why Multiply Variegated Dogwoods
Whether you garden for design, wildlife, or resilience, propagating your own shrubs pays off quickly:
- Cost savings: A single shrub can yield dozens of new plants each season.
- Clonal fidelity: Cuttings preserve cultivar traits such as leaf variegation, stem color, and growth habit.
- Landscape impact: Build hedges, mass plantings, and replacement stock on your own schedule.
- Learning and satisfaction: Rooting your own shrubs turns a landscape into a living laboratory.
Meet the Plants: Variegated Dogwood Basics
Variegated dogwoods grown as shrubs typically come from cold-hardy species and selections such as:
- Cornus alba (Tatarian dogwood) cultivars, for example, Elegantissima and Ivory Halo.
- Cornus sericea or Cornus stolonifera (redosier dogwood) and variegated forms like Silver and Gold or Gouchaultii.
- Cornus sanguinea (European dogwood) with striking winter stems in select cultivars.
These shrubs generally root readily from vegetative pieces, making them excellent candidates for home propagation. Because variegation is a clonal trait in most ornamental cultivars, cuttings retain the leaf pattern of the mother plant. Seed-grown dogwoods, by contrast, segregate and often lose variegation.
About Variegation and Stability
Most variegated dogwood cultivars exhibit chimeral variegation, meaning different tissues within the same plant express different pigments. While cuttings preserve this pattern, you may occasionally see reversion: shoots with solid green leaves that grow faster than variegated ones. Those should be pruned out at the base to maintain the pattern and to reduce shading.
Timing the Take: Softwood, Semi-hardwood, or Hardwood
Propagation success hinges on choosing the right material at the right stage of growth. Dogwoods respond to all three categories of cuttings, with varying timelines and techniques:
- Softwood cuttings: Taken late spring to early summer when new growth is flexible and green. These root fastest (often 2 to 6 weeks) but require careful humidity control.
- Semi-hardwood cuttings: Taken mid to late summer when stems firm up and partially lignify. Rooting takes slightly longer (4 to 8 weeks) but with higher resilience.
- Hardwood cuttings: Taken during winter dormancy from mature, leafless stems. They root more slowly (8 to 12+ weeks) but need less misting and resist wilting.
For most home gardeners, semi-hardwood is the golden mean: sturdy enough to handle, yet vigorous and willing to root. If you want the fastest pipeline from mother plant to new plants, try softwood early in the season and follow up with semi-hardwood rounds later.
Tools and Materials You Will Need
- Sharp, clean pruners or a horticultural knife
- Isopropyl alcohol or a bleach solution for tool sanitation
- Rooting hormone (IBA or a blend with NAA) in powder, gel, or liquid dip
- Propagation trays, cell packs, or small nursery pots (7–10 cm or 3–4 in)
- Well-drained, sterile rooting medium such as 50–70% perlite with 30–50% peat moss or coco coir; or perlite and vermiculite
- Clear humidity dome, plastic cover, or a zip-top bag
- Labels and waterproof marker
- Bottom heat mat with thermostat (optional but helpful)
- Mister bottle or fine rose watering can
- Gloves and eye protection when using hormones or bleach
Preparing the Mother Plant
Strong cuttings begin with a healthy donor. A month or two before you plan to cut:
- Feed lightly with a balanced, slow-release fertilizer. Avoid heavy nitrogen right before taking cuttings as it encourages soft, sappy growth that wilts.
- Water consistently to prevent drought stress. Turgid shoots root more reliably.
- Scout for pests such as aphids or scale and treat as needed. Do not take material from infested or diseased stems.
- Prune for light: Thinning can promote strong, well-spaced new shoots perfect for propagation.
How to propagate variegated dogwood cuttings: The Essential Steps
In this section, you will find a practical, repeatable workflow. Adjust details based on your conditions and whether you choose softwood, semi-hardwood, or hardwood material.
1. Sanitize Tools and Setup
Wipe pruner blades with isopropyl alcohol or dip in a 10% bleach solution (1 part household bleach to 9 parts water), then rinse and dry. Fill pots or cells with your rooting medium and pre-moisten until evenly damp but not sodden. Label containers with cultivar name and date.
2. Select and Take the Cuttings
- Length: Aim for pieces 10–15 cm (4–6 in) long, with 2–4 nodes.
- Position: Choose non-flowering shoots. If flower buds are present, remove them; flowers siphon energy from root formation.
- Cut angle: Make a clean, angled cut just below a node at the base; make a straight cut above the top node to avoid confusion later.
- Heel option: For semi-hardwood or hardwood, a small heel of older wood can boost success. Tear the side shoot off with a sliver of parent stem, then trim ragged edges clean.
Keep cuttings cool and shaded as you work. Slip them into a plastic bag with a barely damp paper towel to prevent moisture loss if you cannot stick them immediately.
3. Prepare the Cutting for Rooting
- Leaf management: Strip leaves from the lower half. Reduce remaining leaf area by half on softwood cuttings to curb transpiration.
- Wounding: Lightly scrape 1–2 cm (about 0.5 in) of bark on the lower side to expose cambium. This can speed callus and root initiation on semi-hardwood and hardwood types.
- Hormone application: Dip the basal end into rooting hormone. For softwood, 1,000–2,500 ppm IBA equivalent works well; for semi-hardwood, 2,000–3,500 ppm; for hardwood, 3,000–5,000 ppm. Tap off excess powder or let gel set before sticking.
4. Stick the Cutting in the Medium
Use a dibber or a clean pencil to make a pilot hole so you do not rub off hormone. Insert the cutting so that at least one node is below the surface and firm the medium gently around the stem. Space pieces so leaves do not touch and air can circulate.
5. Create a High-Humidity Microclimate
- Cover with a dome or clear plastic to hold humidity above 80% while allowing some airflow.
- Light: Place in bright, indirect light. Avoid hot midday sun that cooks tender cuttings.
- Temperature: Aim for 18–24°C (65–75°F). Bottom heat at 20–22°C (68–72°F) often improves rooting speed and uniformity.
- Misting: Mist as needed to keep leaves turgid, but avoid saturating the medium constantly.
6. Monitor Moisture and Venting
Keep the medium evenly moist but never waterlogged. Condensation on the dome signals adequate humidity; crack the cover daily for fresh air exchange. As cuttings perk up and do not wilt between mists, gradually increase ventilation to acclimate them to drier air.
7. Check for Roots
Typical rooting windows:
- Softwood: 2–6 weeks
- Semi-hardwood: 4–8 weeks
- Hardwood: 8–12+ weeks
Signs of success include new leaf growth, resistance to a gentle tug, and visible roots at drainage holes. Confirm with one sacrificial cutting if unsure.
Alternate Methods That Work
Water Propagation
Dogwood cuttings can root in water, especially softwood pieces. Place prepared stems in a clear jar of fresh water, changing it every 2–3 days and keeping the jar in bright, indirect light. Once roots reach 2–5 cm (1–2 in), pot up carefully into a well-drained mix and maintain high humidity for a week. Note that water-formed roots are often fragile and must re-adapt to soil.
Sphagnum Baggie Method
Moisten long-fiber sphagnum, squeeze out excess, and wrap the basal ends of prepared cuttings. Slip them into a labeled zip bag, inflate slightly, and seal. Keep warm and bright but not sunny. Inspect weekly for callus and roots, then pot up with care.
Direct Outdoor Sticking
For large numbers, especially hardwood pieces, set up a shaded nursery bed with sharp drainage. Stick cuttings in late winter or very early spring. Mulch lightly, keep evenly moist, and wait. This low-tech approach is slower but scales easily.
Rooting Hormones: Choosing and Using Safely
Rooting hormones based on indole-3-butyric acid (IBA) and sometimes naphthaleneacetic acid (NAA) increase both speed and uniformity of rooting in dogwoods. You can use powder, gel, or liquid dip:
- Powder: Easy and clean. Dip and tap off excess.
- Gel: Adheres well to wounded surfaces and minimizes contamination.
- Liquid quick-dip: Consistent dosing for large batches; follow manufacturer rates carefully.
Wear gloves and avoid inhalation or ingestion. Store products sealed, cool, and dark for longevity.
Creating the Ideal Rooting Environment
Success with any technique rests on balancing moisture, warmth, and oxygen:
- Medium: Use sterile, airy components such as perlite and peat or coco. Avoid garden soil that compacts and harbors pathogens.
- Air: Roots require oxygen. Overpacked or waterlogged media suffocate new root initials.
- Humidity: High around leaves, moderate in the medium. Domes and light misting prevent wilting while roots form.
- Light: Bright shade or filtered light fuels photosynthesis without heat stress. 12–14 hours under LED shop lights also works indoors.
- Heat: Bottom heat encourages faster, more uniform rooting. Do not exceed mid-70s°F (mid-20s°C) at the root zone.
Potting Up and Aftercare
When to Pot Up
Once roots are 2–5 cm (1–2 in) long and branching, it is time to move cuttings into a growing mix. Delaying too long tangles roots; moving too soon risks setbacks.
How to Pot Up
- Containers: 0.5–1 liter (quart-size) nursery pots with drainage.
- Soil: A quality, peat- or coir-based potting mix with perlite for drainage.
- Handling: Tease cuttings from the propagation medium gently, holding by the stem just above the root zone. Do not pull by leaves.
- Planting depth: Set at the same depth they rooted. Firm lightly.
- Watering: Water to settle the mix, then allow the top centimeter (half-inch) to dry between waterings.
Hardening Off
If you propagated indoors, acclimate new plants over 7–14 days. Start in bright shade outdoors, then gradually increase morning sun exposure. Protect against strong wind and mid-day scorch.
Feeding and Forming
- Fertilizer: After 3–4 weeks in pots, begin light feeding with a balanced liquid fertilizer at half strength every 2–4 weeks during active growth.
- Pinching: Lightly pinch tips to encourage branching once plants are established.
Overwintering Young Shrubs
First-year shrubs appreciate some protection:
- In cold climates: Heel pots into a protected bed, mulch, or overwinter in a cold frame. Keep barely moist.
- In mild climates: Plant out in early fall so roots establish before hard freezes. Mulch well.
Common Problems and How to Fix Them
Wilting and Collapse
Likely causes: Low humidity, too much sun or heat, insufficient rooting, or poor sanitation. Fix: Increase humidity, move to bright shade, reduce leaf area further, and re-sanitize tools and containers.
Leaf Yellowing
Likely causes: Waterlogged medium or nutrient deficiency after rooting. Fix: Improve drainage; once rooted, begin light feeding.
Rot and Fungal Issues
Likely causes: Constantly soggy medium and stagnant air. Fix: Let the surface dry slightly between waterings, add perlite for porosity, and vent domes daily. Consider a biological fungicide labeled for cuttings if losses persist.
Variegation Reversion
Symptom: Solid green shoots outgrowing variegated ones. Action: Prune reverted shoots at their origin. Maintain bright light to favor stable variegation.
Scaling Up: From Hobby to Hedge
To produce dozens at once, standardize your workflow:
- Batch timing: Schedule two or three cutting rounds per season (late spring softwood, mid-summer semi-hardwood, and if needed late winter hardwood).
- Uniform prep: Pre-cut labels and prepare hormone stations and sanitized tools before you start.
- Bottom heat and mist: A heat mat and a simple timer-based mist setup raise success rates and reduce labor.
- Graded pot-up: Move rooted cuttings into liners in waves rather than all at once to smooth workload.
Record-Keeping That Pays Off
Small notes drive big improvements. Track:
- Date and source of each batch
- Cutting type (softwood, semi-hardwood, hardwood) and any wounding
- Hormone strength and product brand
- Rooting time until first visible roots
- Losses and likely causes
Within a season or two, you will dial in an approach that works consistently in your microclimate.
Ethical and Practical Considerations
- Respect plant patents: Many cultivars are free to propagate, but some are protected. Check the plant tag or the patent database and obtain permission where required.
- Source health: Do not collect from wild populations. Use your own shrubs or share with neighbors and local plant swaps.
- Sanitation: Clean tools reduce disease transfer among plants.
Frequently Asked Questions
Is there a best month to take variegated dogwood cuttings?
For softwood, late spring to early summer is ideal, once shoots have extended but remain flexible. For semi-hardwood, mid to late summer is best as tissues firm up. Hardwood pieces are typically collected in late winter when shrubs are fully dormant.
Do I need rooting hormone?
It is optional but recommended. Dogwoods often root without it, but hormones improve speed, uniformity, and success rates, especially for semi-hardwood and hardwood pieces.
How long before I can plant rooted cuttings in the garden?
Plan on 8–16 weeks from sticking to a sturdy liner in a quart pot. Many gardeners grow them on in containers for one full season before planting out to ensure a robust root ball.
Can I propagate in pure perlite?
Yes. Pure perlite drains quickly and maintains high oxygen. Just watch moisture closely, as it dries faster than peat blends.
What light level is best during rooting?
Bright, indirect light. Outdoors, dappled shade works well. Indoors, use LED shop lights set 20–30 cm (8–12 in) above the canopy for 12–14 hours daily.
How do I keep cuttings from wilting?
Reduce leaf area, maintain high humidity, provide bright shade, and avoid heat spikes. Bottom heat warms roots without overheating tops, helping prevent wilt.
A Detailed, At-Home Walkthrough
Step-by-step guide: how to propagate variegated dogwood cuttings at home
- Set the stage: Clean your bench, sanitize tools, label pots, and moisten a 60% perlite, 40% peat mix.
- Choose material: On a cool morning, clip semi-hardwood side shoots 10–15 cm long. Avoid flower buds.
- Prep each piece: Strip lower leaves, halve remaining leaf blades, scrape a 1 cm window of bark at the base, and dip into 2,000–3,000 ppm IBA.
- Stick and space: Insert so one node is buried. Firm gently and space to allow airflow.
- Cover and place: Fit a clear dome. Place in bright shade at 20–22°C with bottom heat if available.
- Care and monitor: Mist lightly when leaves begin to soften. Vent daily. Water the medium when the top 1–2 cm dries.
- Wean from humidity: After you feel resistance to a gentle tug, crack the dome wider over 3–5 days.
- Pot up: Once roots reach 2–5 cm and branch, shift into a potting mix. Keep in bright shade for a week, then increase light.
- Grow on: Feed lightly after 3–4 weeks. Pinch to branch. Harden off before planting out.
Softwood vs. Semi-hardwood vs. Hardwood: Which Should You Choose
- Softwood: Fastest roots; demands tight humidity control; best for indoor benches or small batches with domes.
- Semi-hardwood: Balanced success and sturdiness; ideal for most home setups.
- Hardwood: Suited for low-input methods and bulk production; slower but tough; minimal misting needed.
Mixes That Root Dogwoods Reliably
- Perlite 60–70% + peat or coco 30–40%: Airy and consistent. Great with domes.
- Perlite 50% + vermiculite 50%: High moisture-holding and sterile; watch for overwet conditions.
- Perlite 80–100%: Excellent drainage; water more frequently and consider bottom trays to rehydrate evenly.
Whichever blend you choose, aim for a fluffy, sterile medium that never compacts. Dogwood cuttings appreciate oxygen around their bases while callus forms.
Light, Temperature, and Moisture Targets
- Light: 5,000–10,000 lux (bright shade). Indoors, set lights 20–30 cm above foliage.
- Air temperature: 18–24°C (65–75°F). Avoid large swings and afternoon spikes.
- Root-zone temperature: 20–22°C (68–72°F) on a heat mat for faster rooting.
- Humidity: 80–95% around leaves initially, tapering to ambient as roots develop.
- Moisture: Evenly damp medium; water when the top 1–2 cm begins to dry.
Shaping and Planting for Landscape Success
Once your young shrubs are growing strongly in pots, think ahead to form and placement:
- Spacing: For hedges, plant 60–90 cm (2–3 ft) apart. As specimens, give 1.2–1.8 m (4–6 ft) to show off color and winter stems.
- Sun: Full sun to part shade. Variegated foliage often shows best color with morning sun and afternoon shade in hot climates.
- Soil: Moist, well-drained loam is ideal. Dogwoods tolerate clay if drainage is reasonable; mulch to moderate moisture.
- Renewal pruning: For vivid stem color, remove a third of the oldest stems at ground level each late winter to stimulate fresh, bright shoots.
Safety and Good Practices
- Protective gear: Wear gloves and eye protection when mixing bleach or using rooting hormone.
- Ventilation: Use hormones in well-ventilated areas.
- Disposal: Dispose of any contaminated media and clean trays between batches to limit disease.
Putting It All Together
With a clean workstation, a breathable medium, steady humidity, and the right timing, you can reliably produce trays of new shrubs from a single parent. The technique is forgiving once you master a few fundamentals. If you are looking for a simple, repeatable process and want to know how to propagate variegated dogwood cuttings in a home setting, start with semi-hardwood pieces in midsummer, apply a moderate-strength IBA dip, root under a clear dome in bright shade, and use bottom heat if possible. In 4–8 weeks, you will be potting up a future hedge.
Quick Reference Checklist
- Choose healthy, non-flowering shoots 10–15 cm long
- Strip lower leaves; reduce leaf area on softwood pieces
- Optional: Lightly wound the basal side
- Dip in appropriate-strength IBA
- Stick into airy, sterile medium and firm gently
- Maintain high humidity, bright shade, and steady warmth
- Vent gradually as roots appear
- Pot up when roots reach 2–5 cm and branch
- Harden off before planting out
Final Thoughts
Propagating shrubs can seem mysterious until you break it down into simple, testable steps. Dogwoods, particularly variegated cultivars, reward consistency and patience. As you refine your setup and notes, you will turn one plant into many and keep those crisp, contrasting leaves marching across your garden. If you came here to learn how to propagate variegated dogwood cuttings without special equipment, you now have a roadmap: clean tools, correct timing, suitable medium, managed humidity, and attentive aftercare. From that foundation, you can scale up confidently, share plants generously, and enjoy a brighter, more cohesive landscape for years to come.
Pro tip: Try a split-batch experiment this season. Root half your cuttings in 60% perlite and 40% peat under a dome with bottom heat, and the other half in pure perlite without heat. Track time to first roots and survival after potting up. One small trial can teach more than a shelf of manuals.
Happy propagating, and may your single variegated dogwood soon become a drift of color and texture across the seasons.