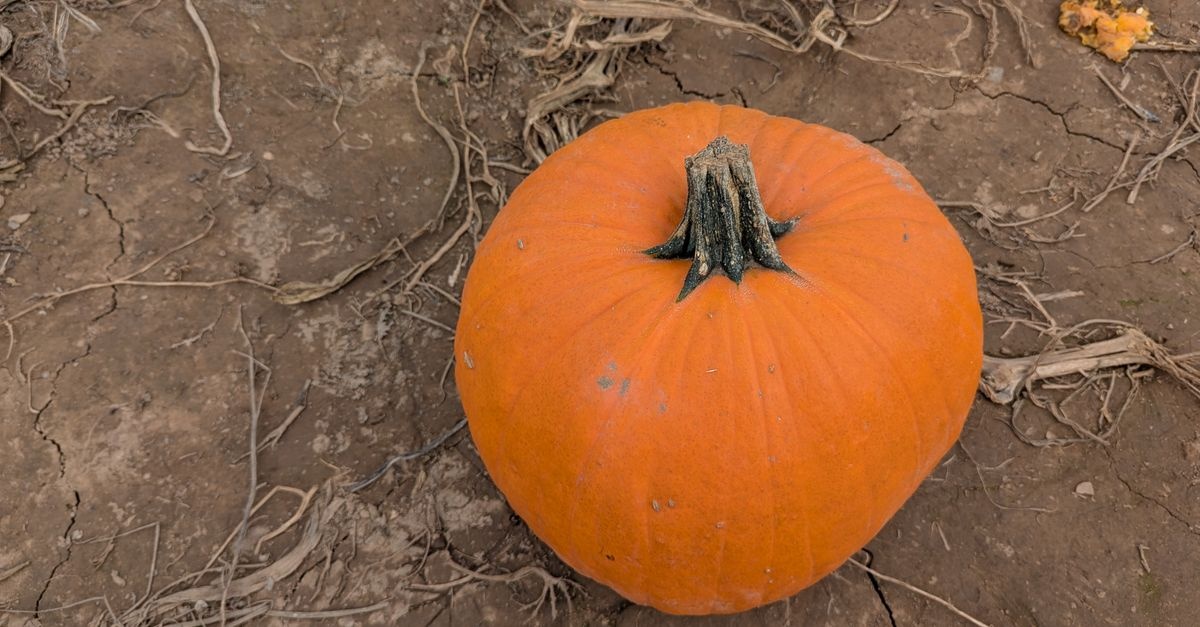
When autumn decorations fade and the garden quiets, there’s a beautiful way to carry that harvest warmth into winter: turn a dried pumpkin into a natural, rustic bird feeder. This approachable DIY adds cozy character to your outdoor space and offers vital calories to resident and migrating birds during the coldest months. Below, you’ll find an in-depth, practical guide—complete with material options, step-by-step methods, seed blend ideas, hanging techniques, maintenance tips, and troubleshooting. If you’ve been curious about how to make a bird feeder from dried pumpkin without fuss or fancy tools, you’re in the right place.
Why Upcycle a Dried Pumpkin as a Bird Feeder?
Repurposing a dried pumpkin is both eco-smart and delightfully charming. Instead of leaving gourds to languish in storage or the compost bin, you can turn them into a useful winter sanctuary for birds. Consider these benefits:
- Sustainability: Reuse an existing natural material, avoid plastic, and reduce waste.
- Seasonal Support: Winter birds burn extra energy to stay warm. A steady food source helps them thrive.
- Garden Aesthetics: The warm, organic tones of a pumpkin shell fit beautifully into winter landscapes.
- Budget-Friendly: Most supplies are inexpensive or already on hand (twine, a drill, a spoon).
- Beginner Friendly: With simple cuts and basic hardware, it’s a quick afternoon project.
- Compostable at End of Life: When the season ends, return the shell to the soil.
Understanding the Project at a Glance
Here’s the concise version of the idea before we go deeper: Clean and cure a dried pumpkin shell, add drainage and hanging points, fill it with a high-energy seed blend, and suspend it where birds can feed safely. That’s the heart of the project. In the sections below, you’ll learn multiple design variations and smart tips to make your feeder durable and bird-friendly.
Choosing the Right Pumpkin
Not every gourd will perform the same. Your dried pumpkin is essentially a natural bowl or pod. Look for:
- Firmness: A well-dried shell should feel hard to the touch with no soft or weeping spots.
- Shell Thickness: Slightly thicker walls offer better durability and weather resistance.
- Size: 6–10 inches (15–25 cm) in diameter works well for most backyard birds. Mini pumpkins can become accent feeders; large pumpkins make generous platforms.
- Shape: Round or slightly flattened pumpkins create stable bowls; gourd varieties with longer necks are great for hanging, side-entry designs.
If your pumpkin isn’t fully dried, allow it to cure in a cool, dry, ventilated area for 2–4 weeks. Wipe it periodically with a vinegar-and-water solution (1:5 ratio) to discourage mold while it finishes drying.
Tools and Materials
Core Supplies
- 1 dried pumpkin (or ornamental gourd) in good condition
- Cutting tool: Keyhole saw, serrated knife, or a small hand saw
- Drill with small bits (1/8–1/4 inch / 3–6 mm) for drainage and hanging holes
- Twine, jute, sisal, paracord, or weather-resistant cord for hanging
- Sandpaper (medium and fine grit) for smoothing cut edges
- Optional sealer: Food-safe mineral oil or pure beeswax; avoid heavily solvent-based coatings
- Non-toxic wood glue (optional, if attaching perches)
- Small sticks or bamboo skewers (optional perches)
- Hooks or S-hooks for suspension
- Seed mix or suet pellets (details below)
- Cleaning supplies: white vinegar, soft brush, cloths
What to Avoid
- Paint with heavy metals or harsh solvents. Choose non-toxic, craft-safe paints if decorating.
- Sticky glues near the feeding area. Birds can get feathers fouled by adhesive residue.
- Large decorative beads or strings that can tangle birds. Keep embellishments minimal and secure.
Prep: Clean, Cure, and Ready the Pumpkin
Proper preparation ensures your feeder lasts as long as possible and stays hygienic for wildlife.
1) Surface Cleaning
- Brush away dust and debris with a soft brush.
- Wipe the exterior with a light vinegar solution (1 part white vinegar to 5 parts water). Dry thoroughly.
2) Curing Notes
If the shell still feels slightly pliable, let it air-dry for an additional week in a dry, well-ventilated space. Elevate it on a rack so all sides receive airflow. Rotate every few days.
3) To Seal or Not to Seal?
A thin coat of food-safe mineral oil or pure beeswax on outer surfaces can slow moisture absorption and extend life. Avoid applying sealers to the interior feeding surface if you’re unsure of food safety. If you do seal inside surfaces, stick to food-contact-safe finishes and let them cure fully according to the manufacturer’s instructions.
Design Options: Three Ways to Build
There’s no single “right way” to create a pumpkin feeder. Below are three popular builds, each with unique benefits. All designs include essential features: safe edges, drainage, and stable hanging.
Option A: Open Bowl Feeder (Halved Pumpkin)
This is the simplest, most versatile design—perfect for seeds, nut mixes, and suet pellets.
- Mark the cut: Use a pencil to trace a horizontal line around the pumpkin’s “equator.”
- Cut carefully: With a serrated knife or keyhole saw, cut along the line to create two bowls. Choose the deeper half for the feeder.
- Clean the interior: Remove any loose fibers or remaining seeds. Lightly sand the rim to eliminate sharp edges.
- Add drainage: Drill 4–8 holes (3–6 mm) in the bottom so rain and snowmelt can escape. Space them evenly.
- Install hanging points: Drill 3–4 small holes around the rim, equally spaced. Thread twine or paracord through each hole and knot underneath so the bowl hangs level when cords meet at a central ring or knot.
- Test balance: Suspend the empty bowl, check for tilt, adjust knots as needed.
- Fill and hang: Add seed mix, then hang in a safe, visible location.
Pros: Quick build, easy cleaning, accommodates many foods. Cons: More exposed to rain; needs frequent checks after storms.
Option B: Side-Entry Gourd Feeder (Cut-Out Portal)
Ideal if your pumpkin is tall or gourd-shaped. Birds enter through a doorway to feed, sheltered from wind and snow.
- Mark a portal: Sketch a circle or oval (2–2.5 inches / 5–6.5 cm) on one side. Keep edges smooth and rounded.
- Cut the opening: Use a keyhole saw or a drill-and-saw combo to create the opening. Sand edges until smooth.
- Clean and hollow: If needed, remove interior pith carefully; avoid thinning the shell too much.
- Drainage and air: Drill several small holes in the bottom for drainage and a few tiny vents higher up for airflow.
- Perch (optional): Drill a small hole beneath the portal; insert a stick or bamboo skewer with a dab of non-toxic glue.
- Hanging hardware: Drill two small holes near the top, thread cord, and tie a secure knot. Alternatively, screw a small eyelet into the stem (only if it’s extremely secure and the shell is robust).
- Fill and hang: Spoon in seeds; hang in a semi-sheltered spot.
Pros: Weather protection, adorable look. Cons: Slightly more complex; interior can be harder to clean.
Option C: Platform-with-Roof (Two Halves)
Use the deeper half as a platform and the shallower half (or a second small pumpkin) as a roof above it.
- Prepare both halves: Smooth edges and add drainage to the bottom half.
- Add roof supports: Run two cords vertically: one from under the platform, up through the platform rim, over and through the roof, meeting at a top knot. The roof should sit 4–6 inches (10–15 cm) above the seed level.
- Stabilize: Add a few discreet knots or spacers to keep the roof from sliding.
- Fill and hang: Test balance, then install in a breezy yet protected spot.
Pros: Better weather resistance. Cons: More hardware; more time to assemble.
Safety and Comfort for Birds
- Smooth every edge: Sand cut rims thoroughly so feet and feathers don’t snag.
- Right opening size: For small songbirds, 2–2.5 inches (5–6.5 cm) is adequate; larger openings suit cardinals and jays.
- Non-toxic finishes: If decorating, use child-safe, non-toxic paints and sealers—and keep them away from seed contact areas.
- Drainage is non-negotiable: Wet seed can ferment or mold quickly in winter transitions.
Filling Your Feeder: Best Foods for Winter
Winter birds need calorie-dense, high-fat foods. Here are tried-and-true choices:
- Black oil sunflower seed: Universal favorite, thin shells for easy cracking.
- Peanuts (unsalted): Whole or chopped; high in fat and protein.
- Nyjer (thistle): Goldfinches and siskins love it; use in a mesh bag nested inside a pumpkin bowl to reduce waste.
- Suet pellets or crumbles: Energy-rich and cold-weather friendly.
- Safflower: Attracts cardinals and can deter some squirrels.
- Dried fruit: Raisins or chopped cranberries (in moderation), popular with robins, waxwings, and mockingbirds.
- Millet: Ground-feeding species (juncos, sparrows) appreciate white proso millet sprinkled nearby.
DIY Seed Blend Recipes
Try these balanced mixes depending on your local birds:
- All-Purpose Winter Mix: 50% black oil sunflower, 20% safflower, 20% peanuts (chopped), 10% suet pellets.
- Finch-Friendly: 70% nyjer, 20% fine sunflower chips, 10% millet.
- Cardinal Crowd-Pleaser: 40% safflower, 40% black oil sunflower, 20% peanuts.
- No-Mess Patio Blend: 60% sunflower hearts, 20% peanut splits, 10% suet crumbles, 10% dried fruit.
Tip: If your pumpkin bowl is shallow, favor larger pieces (sunflower seeds, peanut chunks) that won’t blow out easily. In very wet climates, present suet pellets more often than loose seeds to reduce spoilage.
Where and How to Hang Your Feeder
Placement can be the difference between a thriving bird hub and a rarely visited ornament. Follow these principles:
- Predator safety: Position 5–10 feet (1.5–3 m) from dense cover so birds can dart to safety, but not so close that cats can ambush.
- Height: Aim for 5–7 feet (1.5–2 m) above ground; higher if squirrels are bold.
- Collision reduction: Keep 3 feet (1 m) from windows or use decals/screens to minimize strikes.
- Wind and weather: A semi-sheltered spot under a limb or eave helps keep seed dry.
- Visibility: Birds find feeders faster if visible from common perches.
Hanging Hardware and Knots
- Cord choice: Jute looks rustic but breaks down faster; paracord or polypropylene lasts longer in harsh weather.
- Knots: Lark’s head for attaching to rims, double overhand for stopper knots, and a bowline or figure-eight on a bight for the top loop.
- Hooks: Use S-hooks or carabiners for easy removal during storms and cleanings.
Ongoing Care and Hygiene
Winter feeding is a commitment. Cleanliness protects bird health and keeps your pumpkin from degrading prematurely.
- Weekly check: Dump damp or clumped seed. Brush out debris and refill fresh.
- Monthly clean: Soak the interior with the vinegar solution (1:5), scrub gently, and dry thoroughly before refilling.
- After storms: Empty puddled seed immediately and rinse the bowl.
- Rotate feeders: If possible, run two pumpkin bowls and alternate them so one dries while the other is in use.
Decorating Your Pumpkin Feeder (Optional but Fun)
If you want to add a little whimsy, do it with wildlife in mind:
- Natural accents: Wrap the rim with grapevine or attach small pinecones using twine.
- Subtle color: Use non-toxic craft paint on the exterior only; avoid the seed-contact zone.
- Stencils or woodburned tags: Label the year or a cheerful message on a wood tag tied to the hanger.
- Evergreen sprigs: Add around the hanging cord (not in the bowl) for a wintery look.
Step-by-Step: A Detailed Walkthrough
Ready to build? Here’s a consolidated, thorough process that works for most pumpkins and climates.
- Inspect and Plan: Choose your design (bowl, side-entry, or platform-roof). Sketch hole positions.
- Sanitize: Wipe down with diluted vinegar; let dry completely.
- Cut: Make clean, deliberate cuts using a serrated blade or saw. Keep hands clear; use a stable surface and slow strokes.
- Deburr and Sand: Smooth all edges. Check by running a cloth around the rim—snags mean more sanding.
- Drill Drainage: Multiple small holes are better than one large center hole. Aim for even spacing.
- Drill Hanging Points: Symmetry matters. Three or four rim holes help maintain level balance in bowl designs.
- Optionally Seal Outside: A light coat of beeswax or mineral oil; buff dry. Skip the inside unless you’re using a known food-safe finish.
- Thread and Knot: Install cords through rim holes; tie secure knots beneath. Gather cords overhead into a single loop.
- Test Hang: Load a cup of rice as a test weight. Adjust knots to level the feeder.
- Fill: Add your winter blend. Don’t overfill—seed should sit below the rim to reduce spillage.
- Place: Hang in a safe, visible, semi-sheltered spot with nearby perches.
- Maintain: Check seed condition every few days; refresh as needed.
Troubleshooting and FAQs
Birds Aren’t Visiting—What Now?
- Give it time: It can take 1–2 weeks for birds to discover a new feeder.
- Switch seeds: Try black oil sunflower or sunflower hearts as an irresistible invitation.
- Relocate slightly: Move 6–10 feet to a spot with a clearer line of sight.
Seed Gets Wet and Molds
- Increase drainage: Add 2–4 more small holes.
- Reduce fill volume: Top up more often with smaller amounts.
- Add a roof: Convert to the platform-roof design or move under partial cover.
Squirrels Are Raiding
- Switch to safflower: Many squirrels dislike it.
- Use baffles: Install a dome or torpedo baffle above/below the feeder.
- Increase distance: Hang at least 10 feet (3 m) from launch points like fences and branches.
The Feeder Tips or Spills
- Rebalance cords: Ensure holes are equidistant; adjust knot lengths.
- Use four cords: Four-point suspension is more stable than three in windy spots.
- Reduce fill height: Keep the seed level below the rim to lower the center of gravity.
How Long Will a Dried Pumpkin Last?
In cold, dry conditions, a well-prepped pumpkin feeder can last 1–3 months outdoors. Longevity depends on shell thickness, precipitation, and freeze–thaw cycles. Expect to retire it by early spring—or sooner if you notice soft spots or cracking.
Seasonal Strategy: From Harvest to Habitat
Your journey often begins in late autumn. Here’s a gentle timeline to guide you:
- Late October–November: Select promising pumpkins from your decor; start cleaning and curing.
- Early Winter: Assemble your feeder and introduce high-calorie blends as natural food wanes.
- Mid-Winter: Maintain regularly, prune nearby branches lightly to keep sightlines open.
- Late Winter–Early Spring: Retire and compost the shell; transition birds to nest-friendly offerings like pet-safe fiber or maintain seed until insects return.
Eco Footprint and End-of-Life
One of the joys of this project is its circular life cycle.
- Low-impact materials: Natural cordage and compostable shell minimize waste.
- Compost: Break the pumpkin into small pieces and add to your bin; it will decompose quickly as temperatures rise.
- Seed hulls: Rake beneath the feeder occasionally; hulls can create a dense mat. Add to compost or spread thinly elsewhere.
Kid- and Community-Friendly Adaptations
This winter craft translates well to classrooms, garden clubs, and neighborhood workshops.
- Pre-drill and pre-cut: Adults handle cutting; kids thread cords, decorate exteriors, and mix seeds.
- Observation journals: Encourage participants to document bird species and behavior.
- STEM tie-ins: Explore balance (cord lengths), weather effects (drainage), and ecology (food webs).
Common Birds You Might Attract
- Finches: American goldfinch, house finch, purple finch
- Titmice and Chickadees: Black-capped, Carolina
- Nuthatches: White-breasted, red-breasted
- Woodpeckers: Downy, hairy, and red-bellied (especially with suet or peanuts)
- Sparrows and Juncos: Dark-eyed juncos love millet scattered nearby
- Cardinals and Jays: Prefer sunflower, safflower, and peanuts
Advanced Tips for Durability
- Reinforce the rim: Wrap a narrow band of twine around the rim and tie snugly to reduce cracking from cord stress.
- Double-layer cord: Thread each hole with a doubled cord for redundancy.
- Micro-drainage: A few 1–2 mm pinholes can wick out moisture without losing small seed.
- Removable mesh liner: Cut a circle of stainless or plastic mesh to sit in the bowl; it improves airflow and seed dryness.
Quick Reference: Materials Checklist
- Dried pumpkin (sound shell)
- Cutting tool (serrated knife or keyhole saw)
- Drill + bits (3–6 mm)
- Sandpaper (medium/fine)
- Twine/cord + S-hook
- Vinegar, brush, cloths
- Optional: beeswax/mineral oil, non-toxic paint, small sticks for perches
- Winter seed blend or suet pellets
A Note on Terminology and Variations
Throughout this guide, we’ve used phrases like dried pumpkin bird feeder, DIY pumpkin feeder, and upcycled gourd feeder interchangeably. The steps are broadly the same: clean, cut, sand, drain, hang, and maintain. If you searched for how to make a bird feeder from dried pumpkin or “turn a pumpkin shell into a feeder,” this tutorial covers the complete, practical process without unnecessary complications.
Ethical Feeding and Local Guidance
Backyard feeding norms vary regionally. Check local wildlife advisories during disease outbreaks (e.g., avian flu) for any temporary guidance on cleaning frequency or feeder removal. Responsible feeding emphasizes hygiene, seed freshness, and moderation.
Putting It All Together
Transforming a dried pumpkin into a feeder is wonderfully accessible: a couple of tools, a handful of drains and knots, and a scoop of energy-rich seed. The result is a heartwarming focal point in your winter garden that genuinely serves local wildlife. Whether you build a simple open bowl or a cozy side-entry gourd, the craft blends beauty with purpose—exactly what winter needs.
Mini FAQ
Can I use a fresh pumpkin?
You can, but it deteriorates much faster. A truly dried shell lasts longer and holds shape in freeze–thaw cycles.
Is sealing necessary?
No, but it helps in wet climates. If sealing the interior, stick to food-contact-safe options and cure fully.
How often should I refill?
Every few days in cold snaps; daily in heavy bird traffic. Smaller, fresher refills beat large batches.
What if I see mold?
Discard all seed, scrub with vinegar solution, dry completely, then refill. Increase drainage or move to a more sheltered spot.
Your Next Step
Gather your gourd, a drill, and some twine. In less than an afternoon, you’ll have a picture-perfect, eco-friendly feeder that brightens winter days—one satisfied chickadee at a time.
In short: Clean, cut, sand, drain, hang, fill, and enjoy. That’s the essence of turning a dried pumpkin into a charming, functional bird feeder for your winter garden.