Imagine weekend afternoons filled with laughter, crafts, and imaginative adventures right in your backyard. With a little planning, basic tools, and a modest budget, you can transform humble shipping pallets into a sturdy, charming kids' playhouse that invites years of creative play. This in-depth guide shows you how to bring that vision to life, step by step, with a strong focus on safety, durability, and affordability.
Project at a Glance
- Skill level: Beginner to intermediate DIYer
- Time: 2 to 3 weekends for a solo builder or one weekend with helpers
- Estimated cost: Low to moderate, depending on how many pallets and materials you can source for free or cheap
- Footprint: Commonly 6 ft by 6 ft to 8 ft by 8 ft, plus roof overhang and steps
- Core idea: Use whole pallets for walls and floor structure, then skin with boards for a finished look
Whether you are curious about how to build a pallet playhouse for kids or you just want a fun family project that keeps costs down and creativity high, this guide provides all the details you need from planning to paint.
Safety First and Suitability
A playhouse should be as safe as it is fun. Keep these points front and center as you plan and build:
- Supervision and age range: Design for your children’s ages and abilities. Keep heights, ladders, and platforms age appropriate.
- Stable foundation: Level and secure the base to prevent rocking or racking during active play.
- Splinter and pinch points: Sand exposed edges and space slats carefully to avoid trapped fingers.
- Weather resistance: Seal wood and provide a reliable roof to protect the structure and its little occupants.
- Non-toxic finishes: Choose child-safe paints and sealers rated for exterior use.
- Local codes: Check any neighborhood association rules or permits if applicable, especially for larger structures.
Plan Your Playhouse: Size, Style, and Features
Before you pick up a saw, sketch a concept. A thoughtful plan will save time and materials.
Choosing the Size
- Small footprint: 4 by 4 ft for toddlers, quick to build and easy to tuck into a corner.
- Medium footprint: 6 by 6 ft for grade-school kids, space for a reading nook and a small bench.
- Large footprint: 8 by 8 ft for siblings and playmates, room for a mini table, storage, and more elaborate features.
Style Ideas
- Cottage charm with board-and-batten cladding, flower boxes, and soft pastel paint.
- Modern shed with clean lines, vertical slats, and a mono-pitch roof.
- Adventure fort with a lookout window, a small climbing wall, and a rope handle or handholds.
Must-Have Features
- Child-height doorway with rounded corners
- Two to four windows for light and cross-breeze
- Ventilation at roof level for hot days
- Sturdy floor with no flexing
- Drip edges and overhang to shed rain
A clear plan simplifies the core question many families start with namely how to build a pallet playhouse for kids with minimal stress. Clarity at the start means fewer changes mid-build.
Tools and Materials
Essential Tools
- Circular saw or handsaw
- Drill driver with bits and countersink
- Impact driver recommended for screws into pallet wood
- Measuring tape, speed square, carpenter pencil
- Orbital sander and sanding blocks
- Exterior wood glue, construction adhesive
- Pry bar and mallet if disassembling pallets
- Clamps for squaring frames
Materials List
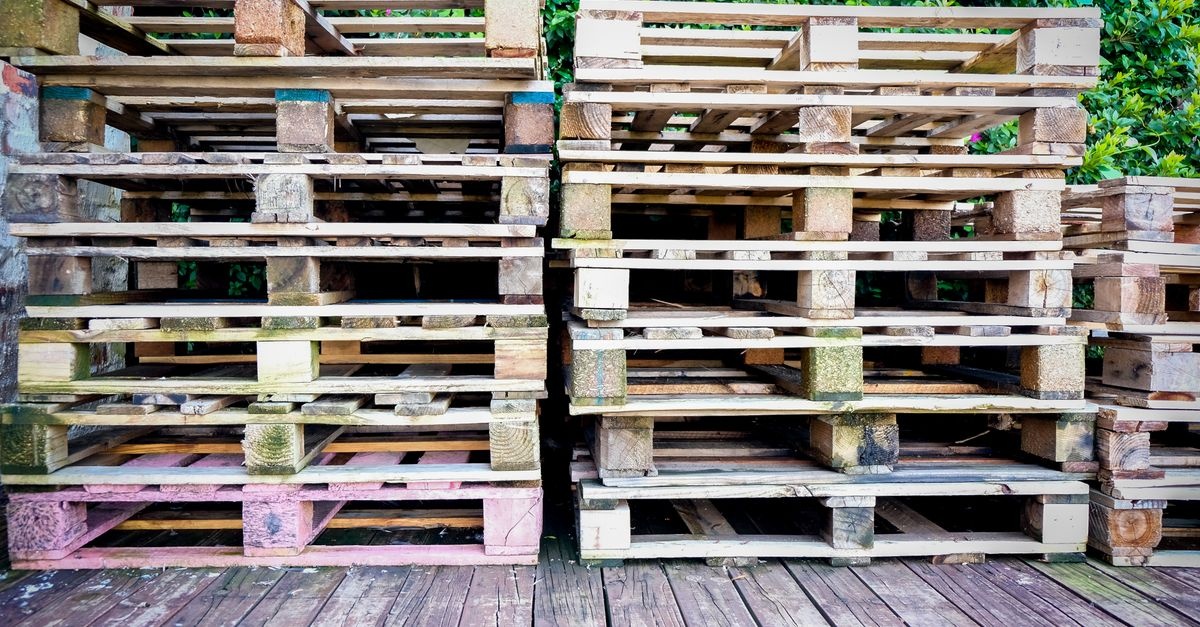
- Pallets in good condition, heat-treated with HT stamp, no chemical spills or odors
- 2x4 lumber for base, wall caps, and roof framing
- Decking screws and exterior wood screws
- Exterior-grade plywood or OSB for floor and roof sheathing as needed
- House wrap or building paper for weather barrier optional but recommended
- Siding boards made from reclaimed pallet slats or inexpensive fence pickets
- Roofing material such as asphalt shingles, corrugated metal, or polycarbonate panels
- Flashing and drip edge for roof
- Non-toxic exterior stain or paint, primer, and sealer
- Sandpaper in grits 80, 120, 180
- Hinges and latch for door and any window shutters
- Landscape fabric and gravel if creating a drainage bed
Where and How to Source Good Pallets
Pallets are not all equal. Choose wisely to keep kids safe and your playhouse sturdy.
- Look for HT stamps: HT means heat-treated rather than chemically fumigated. Avoid MB stamps that indicate methyl bromide treatment.
- Inspect condition: No rot, deep cracks, or oil stains. Avoid pallets that carried chemicals or show unknown spills.
- Choose consistent sizes: Matching dimensions make walls plumb and square. Common sizes include 48 by 40 inches.
- Ask permission: Many stores are happy to give away damaged or surplus pallets if you ask nicely.
- Clean and dry: Brush off debris and let pallets dry fully before sealing or cutting.
Site Selection and Simple Foundation
Location matters for safety, longevity, and kid comfort.
- Pick high ground: Avoid low spots where water pools. Aim for sun in winter, shade in summer.
- Mind setbacks: Respect property lines and neighbor views.
- Level the ground: A flat base is key. Scrape, rake, and tamp soil until level.
- Drainage layer: Consider landscaping fabric and a 2 to 3 inch gravel bed to prevent mud and rot.
- Foundation options: Concrete pavers, pier blocks, or pressure-treated skids are all budget-friendly and effective.
How to Build the Base and Frame
The base is the backbone of your project. Build it well and everything becomes easier.
Simple Skid Foundation
- Lay two or three pressure-treated 4x4 skids on your leveled site, parallel and spaced to support the pallets or floor joists.
- Check for level in both directions. Shim with composite shims or compacted gravel.
- Anchor skids with rebar stakes or ground anchors if your area is windy.
Floor Frame and Deck
- Assemble a 2x4 rectangle the size of your footprint, with joists 16 inches on center.
- Screw the frame to the skids with structural screws or metal ties.
- Top with 3 by 4 by 8 ft pallets laid flat or sheet with exterior-grade plywood. If using pallets, infill gaps with pallet slats.
- Sand the deck to remove splinters and high spots.
Many DIYers searching for how to build a pallet playhouse for kids start with the floor because it sets the square and keeps the rest of the structure aligned.
Wall Layout Using Whole Pallets
Using whole pallets for walls saves time and material. They are light enough to handle yet strong when tied together.
- Pre-fit on the ground: Arrange pallets to create front, back, and side walls. Mark door and window locations with chalk.
- Stand the first wall: Screw the bottom pallet rails into the floor frame. Add temporary braces at 45 degrees to hold plumb.
- Add corners: Butt adjoining walls and fasten with structural screws through solid pallet stringers. Add 2x4 corner posts for rigidity.
- Cap the walls: Run 2x4s along the top of pallet walls as a plate to tie everything together.
To create a doorway, leave a gap between two pallets or cut an opening in one pallet and reinforce with 2x4 framing.
Window Openings and Ventilation
- Cut window openings with a circular saw and handsaw for corners.
- Frame the opening with 2x2 or 2x3 to support shutters or plexiglass panels.
- Leave small triangular vents high on the walls or at the gable to help hot air escape.
Roof Options: Simple and Weather-Smart
A reliable roof keeps kids dry and wood healthy. Two simple choices work well on a budget.
Mono-Pitch Roof
- Front wall taller than back wall for consistent slope.
- Rafters made from 2x4 spaced 16 to 24 inches on center.
- Sheathe with OSB or boards, add underlayment, and finish with shingles or corrugated panels.
Gable Roof
- Classic look with two sloping sides meeting at a ridge.
- Build simple rafter pairs with a ridge board.
- Overhang 6 to 12 inches for drip protection.
Install drip edge and flashing where needed. A small overhang on all sides protects pallet walls from splashback and sun.
Cladding and Weatherproofing
Pallet walls can work as-is, but cladding adds polish and longevity.
- House wrap: Staple a breathable weather barrier to the outside of pallet walls to shed wind-driven rain.
- Siding choices: Reclaimed pallet slats, fence pickets, or low-cost exterior panels installed vertically or horizontally.
- Trim: Use 1x3 or 1x4 boards for window and door trim to hide raw edges and boost charm.
- Seal all cuts: Brush sealer on any end grain and cut edges before painting.
Door and Simple Windows
Kid-Sized Door
- Frame an opening approximately 24 to 28 inches wide and 48 to 52 inches tall for small children, larger for older kids.
- Build a door from pallet boards on a diagonal-braced frame to prevent sagging.
- Hang with two or three exterior hinges and add a simple latch out of reach of toddlers for safety.
Windows That Work
- Shutters: Hinged slat panels that open for airflow and close for rain.
- Acrylic panes: Lightweight and shatter-resistant, secured with stop moulding.
- Mesh screens: Keep bugs out while letting breezes in.
Surface Prep, Sanding, and Finishes
Comfort and safety grow with thoughtful surface prep.
- Sand hand-height surfaces and door edges thoroughly.
- Round over sharp corners with a sanding block.
- Prime and paint or stain with child-safe exterior products. A two-tone scheme body color plus trim looks great.
- Finish interior with a washable paint or water-based clear coat to control splinters.
The Full Step-by-Step Build Guide
This condensed walkthrough connects all the dots if you want a single roadmap for how to build a pallet playhouse for kids without guesswork. Adjust measurements to your chosen footprint.
- Design and measure: Sketch the layout, mark door and windows, and calculate pallet count plus extra slats for cladding.
- Prepare the site: Level the ground, lay landscape fabric, and spread gravel. Set skids or pier blocks level and square.
- Build the floor: Assemble a 2x4 frame, screw to skids, lay pallets or sheet with plywood, and sand smooth.
- Stand wall pallets: Anchor the first pallet wall, brace plumb, and continue around the perimeter. Tie corners with 2x4 posts and a top plate.
- Frame openings: Cut the doorway and windows; add framing and headers where necessary to keep walls rigid.
- Install roof framing: Choose mono-pitch or gable, set rafters, check overhangs, and secure with structural screws and metal ties.
- Add sheathing and roofing: Attach roof deck, underlayment, drip edge, and shingles or panels. Seal all penetrations.
- Wrap and clad: Staple house wrap over pallet walls, then add siding slats with small gaps or tight-jointed patterns.
- Build and hang door: Assemble a Z-braced door from slats, hang with exterior hinges, and add a safe latch.
- Finish surfaces: Sand, prime, and paint or stain inside and out. Use bright, playful colors kids help choose.
- Install extras: Interior bench, chalkboard wall, storage crates, flower boxes, and a small porch step or ramp.
- Final safety sweep: Check for proud screws, sharp edges, and wobbly spots. Add ground anchors if windy.
Follow this order and you will know exactly how to build a pallet playhouse for kids with confidence and fewer surprises.
Budget Breakdown and Cost-Saving Tips
Even a thrifty project benefits from a simple budget. Costs vary by region, but here is a ballpark approach.
- Pallets: Often free to a few dollars each when sourced from small businesses.
- Lumber: 2x4s for framing and roof support are typically the biggest purchase after roofing.
- Roofing: Asphalt shingles are economical; metal or polycarbonate can be worth the upgrade for longevity and light.
- Fasteners and hardware: Exterior screws, hinges, and latch add up; buy in contractor packs.
- Paint or stain: One gallon of exterior paint plus primer is common for a small build.
Money Savers
- Use reclaimed fence pickets for siding if pallet slats run short.
- Check community swap groups for leftover paint and shingles.
- Design to standard pallet sizes to minimize cutting and waste.
- Keep the roof simple a single slope is cheaper than a complex gable with valleys.
Because this guide focuses on how to build a pallet playhouse for kids on a budget, every decision leans toward low cost without sacrificing safety.
Smart Design Variations and Upgrades
- Translucent roof panel: Swap one roof panel for polycarbonate to brighten the interior.
- Rain gutter and barrel: Add a tiny gutter and a barrel for a watering station and science fun.
- Sandbox porch: Extend the base a foot or two and frame a sand area with edging boards.
- Climbing wall: Install a mini wall with real climbing holds and a thick landing pad.
- Magnetic chalkboard: Prime sheet metal, paint with chalkboard paint, and mount as a drawing wall.
Ergonomics for Little Builders and Big Fun
Kids feel ownership when you involve them in safe, age-appropriate steps.
- Let children help choose colors and decorate trim pieces.
- Have them sand with fine-grit blocks under supervision.
- Invite them to paint low sections with small rollers.
- Create a name sign or house number together.
Weatherproofing That Works
- Seal end grain: Brush on exterior sealer where slats are cut.
- Flash the roof edge: Use drip edge to move water away from siding.
- Elevate the base: Maintain a gap between ground and wood to avoid rot.
- Maintain a finish: Recoat paint or stain every couple of years.
Maintenance and Longevity
A few simple habits will maximize the lifespan of your pallet playhouse.
- Inspect screws and hinges twice a year; tighten as needed.
- Touch up chipped paint to keep moisture out.
- Clear leaves and debris from around the base to reduce moisture.
- Check roof after storms and replace damaged shingles promptly.
Common Mistakes and How to Avoid Them
- Using questionable pallets: If in doubt, throw it out. Choose clean, HT-stamped pallets.
- Skipping the level base: A wavy foundation makes walls crooked. Spend time leveling up front.
- Under-screwing: Use enough exterior screws at joints and corners to resist racking.
- Narrow doorways: Think ahead about kids carrying toys or chairs inside.
- No overhangs: Short eaves lead to soggy walls. Add at least a few inches of overhang.
Frequently Asked Questions
How long does it take to build
One to three weekends depending on size, features, and how many helpers you have.
Can I build without power tools
Yes, though it is slower. A handsaw, brace or hand drill, and manual screwdriver will work. Pre-drilling is essential in dry pallet wood.
How do I keep critters out
Seal floor gaps, close off low openings with hardware cloth, and keep the area around the base clear.
What is the best roof on a budget
Asphalt shingles on OSB or plywood sheathing are cost-effective and easy to install.
Is this project suitable for renters
Yes. Build on skids or pier blocks so it is freestanding and movable.
Weekend Build Schedule Example
Weekend One
- Finalize plan, gather tools and materials
- Prepare site and foundation skids
- Assemble floor frame and surface
Weekend Two
- Stand pallet walls, frame openings
- Install roof structure and sheathing
- Wrap walls and start cladding
Weekend Three optional for larger builds
- Finish cladding and trim
- Hang door and any shutters
- Sand, paint, and stage the interior
Following a clear schedule reinforces the practical flow of how to build a pallet playhouse for kids without losing momentum or overextending your budget.
Cut List and Fastener Cheat Sheet
Exact numbers depend on your chosen size, but this sample gives a starting point for a 6 by 6 ft playhouse.
- 2x4 skids or 4x4: two at 6 ft
- 2x4 floor frame: two at 72 inches long, four joists at 69 inches long for 16 inches on center spacing adjust as needed
- Top plates: four at 72 inches
- Rafters: seven to nine 2x4s cut to span with desired pitch
- Cladding slats: approximately 140 to 180 linear feet depending on overlap
- Decking screws: 5 to 8 pounds mixed lengths 1 and 5 by 8 inch, 2 and 1 by 2 inch, 3 inch
Interior Ideas Kids Will Love
- Low bench with storage cubbies made from milk crates or wooden boxes
- Chalkboard wall with a tray for chalk and eraser
- Pegboard for hanging costumes and tools
- Fairy lights or battery lanterns for cozy evening play
- Rug or outdoor mats for bare-foot comfort
Eco-Friendly Touches
- Use reclaimed or FSC-certified lumber for new wood components.
- Choose low-VOC primers and paints suitable for exterior use.
- Repurpose old windows with acrylic inserts for lightweight safety.
- Harvest rainwater from the roof into a small barrel for watering plants.
Anchoring and Wind Safety
Even a small structure benefits from anchoring in breezy regions.
- Ground anchors screwed into soil and connected to the floor frame with straps
- Concrete pier blocks filled with gravel and straps embedded for tie-downs
- Diagonal bracing inside walls to resist racking
Detailed Steps for Door and Trim Polish
- Build a Z door: Lay slats edge to edge, add two horizontal rails and a diagonal brace from bottom hinge side to top latch side.
- Hang and gap: Leave a 1 by 8 inch to 1 by 4 inch gap all around to prevent binding after rain.
- Window trim: Install flat trim first, then sill pieces with a slight slope to shed water.
- Corner boards: Cover siding edges with vertical trim for a finished look.
Painting Strategy That Lasts
- Prime bare wood and end grain thoroughly.
- Two topcoats of exterior paint or stain provide color and UV protection.
- Consider a contrasting trim color for doors, windows, and fascia.
- Label leftover paint for future touch-ups and store it properly.
Seasonal Use and Comfort
- Summer: Add shade cloth to a sunny wall or plant fast-growing vines nearby.
- Autumn: Sweep leaves and check roof after storms.
- Winter: Store fabric toys indoors; keep door latched to prevent wind damage.
- Spring: Inspect for fastener rust and repaint high-wear areas.
Quick Reference Checklist
- Confirm pallets are HT stamped and clean
- Level and anchor the base
- Secure wall corners with posts and top plates
- Install roof with adequate overhang and drip edge
- Wrap walls and add cladding
- Sand, prime, and paint with child-safe products
- Hang door and check latches operate smoothly
- Perform a safety sweep and round over any sharp edges
Bringing It All Together
By now, you have the planning steps, sourcing tips, and build sequence to confidently create a joyful backyard retreat. Perhaps most importantly, you understand how to build a pallet playhouse for kids that balances safety, style, and a realistic budget. Take your time on the base and roof, sand what little hands will touch, and involve the kids in decorating to give the space a sense of ownership.
In a world of screens and schedules, a handmade playhouse gives children a stage for stories, science, and quiet moments. The pallets that once hauled goods can now hold memories. Gather your tools, sketch your plan, and turn reclaimed wood into a place your family will love for years.