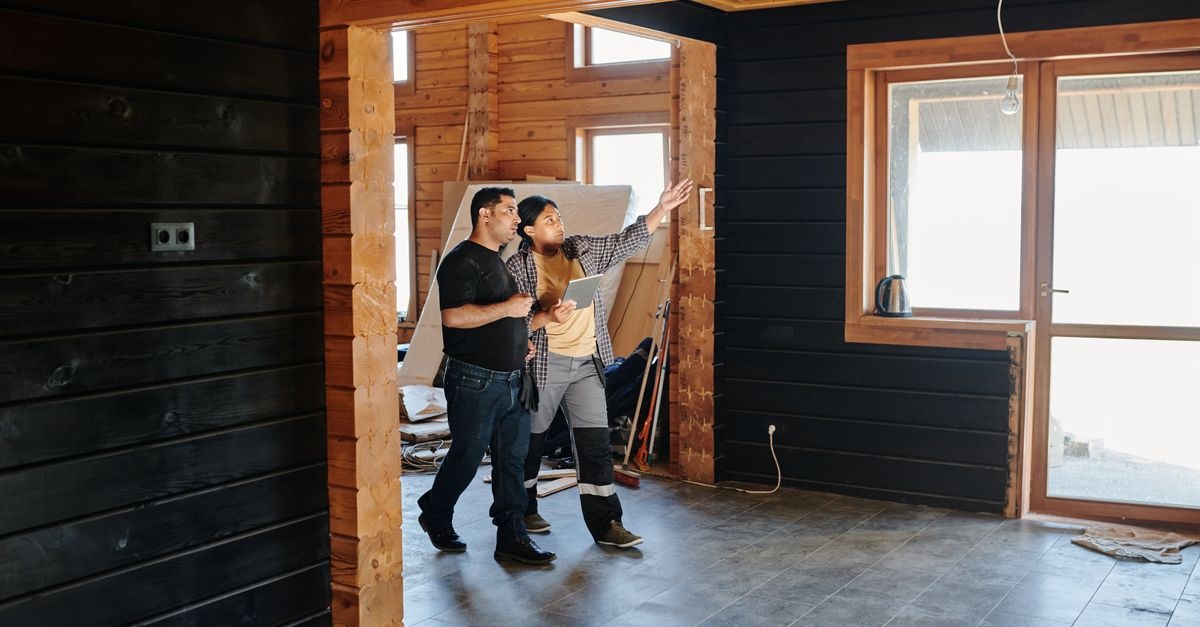
Every dream home begins long before walls get painted or cabinets are installed. The defining moves happen early, in the ground and in the bones of the house, where a single choice can lock in decades of comfort, cost, and capability. That is why the smartest builders and owners focus on make-once decisions at the very start. When you understand the chain reaction of early choices, you avoid the regret that often follows rushed or poorly sequenced builds. In other words, you confront the reality of House construction–decisions you can’t undo while there is still time to get them right.
This guide distills field-proven practices for irreversible choices: where the house sits, which way it faces, how foundations drain and breathe, the structure that sets room sizes and ceiling heights, and the hidden rough-ins for plumbing, HVAC, electrical, and low-voltage. It maps the territory from soil to shingles so your money buys lasting performance rather than expensive rework.
Why Some Choices Are Permanent
In residential building, not all decisions carry the same weight. Finishes can be swapped. Furniture moves. Paint changes. But the site work, foundation, structural frame, and in-wall rough-ins are the commitments that define your home for life. The cost to alter them later is so high — cutting concrete, moving load paths, relocating stacks and vents — that the practical answer is almost always to live with what you have. That is the real meaning behind House construction–decisions you can’t undo: once you pour, bury, frame, or close it up, your options narrow drastically.
- Set in soil and concrete: site grading, pad elevation, footings, slab thickness, under-slab plumbing, radon mitigation, termite barriers, and drains.
- Fixed by structure: bearing walls, beam sizes, spans, stair location, roof pitch, and floor-to-floor heights that lock in ceiling heights and door proportions.
- Locked by rough-in: HVAC duct pathways, returns, bath vent routes, plumbing stacks, electrical panel capacity, and low-voltage conduits.
Everything downstream — from comfort and energy efficiency to resale value — traces back to these anchors. Nail them, and you own a house that works. Miss them, and you live with compromises.
Site, Orientation, and Placement
Survey, Setbacks, Easements, and Utilities
Your lot is more than a rectangle; it is a rulebook and a resource map. Confirm property lines, setbacks, height limits, utility easements, and drainage obligations with a current survey. Bring the civil engineer and builder together early so you choose a finished floor elevation that sheds water, not invites it. This is also the time to understand where services enter: water, sewer or septic, electric, gas, and communications. Frugal placements now avoid long trench runs, awkward meters, and driveways that fight topography.
- Place the house pad to promote positive drainage away from the foundation on all sides.
- Map existing trees and root zones you plan to preserve; adjust the footprint to avoid root damage.
- Locate the driveway for safe access, snow storage, and sight lines; coordinate mailbox and service vehicle access.
- Confirm septic field or stormwater features are compatible with the intended footprint and outdoor living spaces.
Sun, Wind, Noise, and Views
Good orientation is free performance. Use a simple sun path study: morning light for kitchens and play spaces, controlled afternoon light for family rooms, and shielded west elevations. Position bedrooms away from road noise. On windy sites, shelter outdoor rooms with the house mass. Preserve the best view with generous glazing while shielding harsh exposures with overhangs and tuned glass. These choices are a core example of House construction–decisions you can’t undo because rotating a finished house is not an option.
- Target passive solar gain with south-facing glass balanced by shading and appropriate glass coatings.
- Shape overhangs to control summer high sun while inviting winter sun deep into living areas.
- Use prevailing breezes for cross-ventilation; plan operable windows and clear air paths.
- Buffer noise sources with closets, garages, or dense interior partitions.
Groundworks and Foundations
Soil Testing, Drainage Strategy, and Radon
Start with a geotechnical report. Soil bearing capacity, expansive clay, high water tables, and frost depth drive the foundation type, footing width, and reinforcement. Decide on a drainage approach: perimeter drains, gravel layers, filter fabric, and daylight outlets or sump systems. Add a dedicated radon mitigation path if local geology suggests risk. Skipping this work invites settlement, damp basements, or chronic indoor air issues that are costly to remedy later.
- Capillary breaks under slabs and at sill plates to stop rising moisture.
- Perimeter drains wrapped in fabric, bedded in clean gravel, and pitched to daylight or a sealed sump.
- Radon tee and vent stack routed through the roof with an accessible location for an inline fan if needed.
- Termite protection or local pest barriers under and around the slab where required by code or climate.
Footprint, Foundation Type, and Ceiling Heights
Choose among slab-on-grade, crawl space, and basement based on climate, soil, budget, and use. This is where you set the home’s proportions: floor-to-floor heights define stair runs and ceiling heights, which in turn shape window sizes and door selections. Larger beams and longer spans demand deeper floor systems and can squeeze mechanical runs. These geometry choices reverberate throughout the design and fall squarely into House construction–decisions you can’t undo once concrete cures and framing begins.
Under-Slab and Below-Grade Embeds
The slab locks in whatever you bury. Before the pour, decide on plumbing locations, drains, conduit sleeves, radon vent routes, and any radiant heat tubing. Add insulation under the slab in cold or mixed climates to reduce heat loss. Ensure sleeve locations for future utilities like a detached workshop, hot tub, or exterior kitchen. Moving a toilet or main drain after the fact means jackhammering. Far cheaper to mark it right now.
- All toilet, tub, and shower drains correctly located and pressure tested.
- Main water and fire sprinkler feed penetrations with corrosion protection.
- Electrical conduits for island outlets and stairs; spare sleeves for future low-voltage.
- Radon vent stub and slab insulation where climate appropriate.
- Sump pit and backwater valve locations set before the pour.
Structure You Live With
Load Paths, Beams, and Bearing Walls
Open plans, wide glass walls, and big kitchens are wonderful, but they require deliberate structure. Choose spans, beam materials, and column placements with future furniture layouts in mind. If you ever hope to move a wall, make it nonbearing now. Plan shear walls early, especially with large openings. Oversized beams steal vertical space and can force bulkheads for ducts; right-size them with the mechanical plan in hand.
- Coordinate framing depth with mechanical runs to minimize soffits and dropped ceilings.
- Ensure shear walls are distributed to resist wind or seismic loads without awkward bracing in living areas.
- Plan pocket doors and large openings with proper headers and space clear of wiring and plumbing.
Staircase Placement and Geometry
The stair organizes circulation, day-lighting, and furniture moves. Its location shapes every floor. Headroom, riser-tread geometry, handrail returns, and landings are governed by code and comfort. Place the stair to deliver natural light from above if possible. If you want the basement finished later, place the stair and the egress strategy now. Relocating a stair after framing is impractical, making it a classic entry on the list of House construction–decisions you can’t undo.
Roof Shape, Pitch, and Attic Use
Roof pitch sets the home’s profile and controls water and snow behavior. It also determines whether you can vault ceilings or build a conditioned attic, and how easily you can mount solar. Complex roofs look romantic on paper but add leaks, ice dams, and cost. Simple is resilient. Decide now whether to use a vented or unvented assembly, how to insulate, and where to place skylights or dormers. These cuts are fixed once trusses land.
Envelope and Openings
Window and Door Size, Placement, and Type
Openings shape the mood and performance of your home. You are fixing rough openings in the frame, so choose carefully. Aim for daylight autonomy, framed views, and cross-ventilation. Select glass tuned to orientation: low solar gain on west, balanced on south with shading, high performance on north in cold climates. If noise is a factor, use laminated glass and tighter frames. Exterior doors need proper thresholds and sill pans to reject wind and water.
- Confirm egress windows in bedrooms with proper clear openings and well sizes.
- Use sill pan flashing and back dams under every window and door.
- Choose operable vs fixed glass by ventilation strategy, not only appearance.
- Select hardware and swing thoughtfully; door swings control furniture placement.
Wall Assembly and Control Layers
Walls do four jobs: control water, air, vapor, and heat. Decide the assembly before framing: 2 by 6 with dense-pack cellulose, advanced framing, exterior continuous insulation, or insulated sheathing. Define where the primary air barrier is and how it remains continuous at transitions. Plan for a rainscreen gap under cladding. If you want thin, elegant window trim with exterior foam, your builder needs that detail now, not later. Retrofitting these layers is extremely difficult and expensive.
Cladding, Flashing, and Details
Cladding is not the waterproofing; it is a rainscreen. Success relies on flashing and drainage. Commit to robust kickout flashing at roof-wall intersections, properly lapped window flashing, and weeps where needed. Get the door thresholds perfect. Once siding is up, leaks hide inside assemblies and reveal themselves as rot years later. Choose materials with honest maintenance needs and proven installation details.
Mechanical, Electrical, and Plumbing Rough-Ins
HVAC Strategy and Duct Layout
Pick the strategy first: heat pump with zoned ducts, mini-splits, radiant floors, or a hybrid path. Right-size equipment with Manual J, and lay out ducts with Manual D. Short, straight runs are quiet and efficient; returns in every major space help comfort. Integrate ventilation with an HRV or ERV and plan its duct routes. Dedicate space for filters you will actually change. Mechanical closet placement affects noise and service access for decades.
- Return air in bedrooms or transfer grilles for pressure balance.
- Duct pathways inside the thermal envelope to avoid energy loss and condensation.
- Condensate drains with traps and safe discharge locations.
- Line sets for heat pumps and mini-splits routed to avoid awkward exterior covers.
Plumbing Layout and Fixture Rough-Ins
Plumbing stacks, vent routes, and wet wall locations will dictate what you can change later. Stack baths and laundry to shorten runs. If you want a future accessory dwelling in the basement, rough in a bathroom and kitchenette now. Consider a hot water recirculation loop for distant baths. Choose locations for outdoor hose bibs that will not freeze and provide one near garden areas. Gas appliances, if used, need correct piping and shutoff placements.
- Centralize a manifold for flexible water runs and easier maintenance.
- Add drains and pans under water heaters and air handlers.
- Place cleanouts for easy snaking and maintenance.
- Rough in for a softener or filtration if local water is hard.
Electrical, Lighting, and Low-Voltage
Panels, circuits, and switching patterns feel invisible on plans, but once the drywall is up you live with the outcome. Size the main panel and include capacity for an EV charger, heat pumps, a future induction range, and a possible battery. If you plan solar, leave space for breakers and a feeder from the roof. Lighting should layer ambient, task, and accent with dimmers and smart controls where useful. Prewire ethernet to key locations and provide ceiling boxes with cat cable for wireless access points. Do not forget doorbell, security, shades power, and speaker rough-ins.
- Add a transfer switch or interlock for a generator or future battery system.
- Run conduit from the roof to mechanical space for solar-ready wiring.
- Place exterior outlets high in eaves for holiday lights and cameras.
- Install a whole-house surge protector and plan arc fault and ground fault protection correctly.
Safety, Health, and Resilience
Fire and Life Safety
Life safety is a set of early, permanent moves. Provide the right number and location of smoke and carbon monoxide alarms. In some jurisdictions, residential sprinklers are required; if you are close, install them anyway. Use tempered or laminated glazing near stairs, tubs, and doors. Ensure garage-to-house separations are fire rated and sealed tight to the air barrier. Egress windows and well dimensions must meet code in every sleeping room.
Moisture and Indoor Air Quality
Water is the enemy of buildings. Drain planes, flashing, and a continuous air barrier keep assemblies dry. Inside, continuous ventilation, local bath fan timers, and balanced makeup air for kitchen hoods maintain air quality. In humid climates, plan for whole-house dehumidification. Provide clean, drainable pans under mechanical equipment. Radon mitigation pathways belong in the foundation scope, not as an afterthought.
Acoustic Comfort
Sound control is cheap during framing and expensive later. Use resilient channels or sound clips on theater and bedroom walls. Add sound attenuation batts around bathrooms and laundry. Choose solid core doors for bedrooms and office spaces, and seal door jambs where privacy matters. Isolate mechanical closets from living areas.
Resilience to Climate Risks
Severe weather is more common, and resilience starts with structure. Install hurricane ties and hold-downs in wind regions, seismic anchors where required, and raised mechanical equipment in flood zones. Consider a safe room or interior shelter in tornado areas. If wildfire is a risk, harden the exterior with ember-resistant vents, noncombustible cladding, and defended landscaping.
Accessibility and Future-Proofing
Universal Design and Aging in Place
Designing for all ages does not detract from beauty. A no-step entry, wider doors, lever handles, and a main-level suite increase usability and resale. Frame bathroom walls with blocking for future grab bars. Plan curbless showers with gentle slopes and linear drains. Stack closets if a future elevator is possible. These are small costs now and major upgrades later.
Storage, Services, and Daily Life Flows
Clutter is a design problem. Create real storage: a pantry next to the kitchen, a mudroom with ventilation and durable finishes, a laundry with space to fold, and linen closets near baths. Consider trash and recycling centers with correct clearance. In the garage, set clear bay widths and depth for larger vehicles and add a dedicated EV charging location with panel capacity. These moves are subtle examples of House construction–decisions you can’t undo once walls close.
Technology and Energy Readiness
Even if you do not install every gadget on day one, rough-ins are cheap insurance. Conduit from the roof to the electrical room readies you for solar. Leave wall real estate for inverters and batteries. Prewire ethernet for office and media, and place ceiling boxes for wireless access points. Provide an exterior equipment pad and gas stub if you want a future backup generator. Allocate space and circuits for a heat pump water heater with a drain pan and condensate route.
Budget, Schedule, and Documentation
Specifications That Lock In Quality
Clear specifications translate intent into action. Write assembly-level specs: wall R-values and air barrier location, window performance, flashing methods, membrane types, and insulation strategies. List model numbers for equipment and fixtures. Define allowable substitutions. Provide a door and window schedule and hardware sets. The better your documents, the fewer on-site interpretations that lead to compromise.
Lead Times and Supply Risk
Windows, trusses, roofing, custom doors, panels, and electrical gear can carry long lead times. Order early and coordinate deliveries with the critical path. If substitution is necessary, understand the knock-on effects to performance, openings, or structure. Locking in these items early avoids costly downtime or forced redesign.
Change Management That Avoids Costly Rework
Changes after rough-in are the enemy of budget and schedule. Use pre-slab, pre-drywall, and pre-trim walk-throughs to confirm locations of drains, outlets, switches, lights, registers, and low-voltage drops. Snap photos of every wall after rough-in for a future reference archive. Align field markings with final plans and require approvals before closing up. This is how you respect the gravity of House construction–decisions you can’t undo and still allow design latitude where it is safe.
Inspection and Quality Control
Trust, but verify. Commission blower door and duct leakage tests. Inspect window flashing and waterproofing details as they happen. Survey foundation elevations. Check framing for plumb, level, and square. Use thermal imaging after insulation to find gaps. A simple punch list culture at each phase preserves quality.
Room-by-Room Irreversible Choices Checklist
- Entry and mudroom: door swing direction, closet depth, bench and cubby rough-ins, floor drain if snow and slush are common.
- Kitchen: island outlet conduits through slab, range location and vent path, appliance circuits, water lines for fridge and pot filler, task lighting zones.
- Living and dining: window sizes for views and daylight, floor outlets for lamps, media wall backing and conduit.
- Primary suite: layout that fits furniture, quiet duct and return placement, shower drain and linear drain slope, blocking for future accessories.
- Secondary bedrooms: egress window sizes, closet door swing clearance, data and power for desks.
- Bathrooms: toilet clearances and locations, niche framing, exhaust runs to exterior with backdraft dampers.
- Laundry: supply and drain box height, floor drain or pan, vent route or ventless strategy, folding area and outlets.
- Office: acoustics, daylight without glare, ethernet drops, dedicated circuits if heavy equipment.
- Garage: bay width and depth, overhead door heights, EV charger rough-in, floor slope to drain, freezer outlet.
- Exterior living: patio size and door placement, gas and power stubs for grills and heaters, hose bibs, lighting and speaker prewire.
- Basement or crawl: egress plan, dehumidification, insulation at rim joists, radon tee, future bathroom rough-ins.
Common Mistakes and How to Avoid Them
- Skipping soil tests: leads to cracked slabs or settlement. Commission a geotechnical report and follow it.
- Undersizing the electrical service: future heat pumps, EV charging, and induction cooking need capacity. Upsize now.
- Complex roofs without reason: cost, leak risk, and ice dams increase. Prefer simple, well-detailed forms.
- Ignoring water management: no capillary breaks, poor flashing, or flat grades lead to rot and mold. Prioritize drainage and air sealing.
- Forgetting rough-ins: missing conduits for islands, solar, shades, or media means cut-and-patch later.
- Uncoordinated structure and HVAC: ducts get squeezed into soffits. Coordinate early to keep ceilings clean.
- No documentation: undocumented product swaps and ad-hoc field changes undermine performance. Keep a living spec and photo log.
Working With Your Team
A great outcome is a team sport. The architect sets intent, the builder sequences and executes, the structural engineer protects load paths, and the energy rater targets comfort and efficiency. Invite your trades to a preconstruction meeting to review drawings, site logistics, and details that cross disciplines, like where the air barrier lives or how ducts will fit. Early alignment turns House construction–decisions you can’t undo into a confident plan rather than a gamble.
Timeline: Decisions Before the Concrete Sets
- Concept and schematic: site placement, orientation, room adjacencies, roof concept.
- Design development: structural grid, stair location, window sizes and types, wall assemblies, mechanical concept.
- Construction documents: specs for control layers, details for flashing, electrical and lighting plans, plumbing diagrams.
- Pre-groundbreaking: surveys, permits, soil report, final grading plan, utility plan, long-lead orders.
- Pre-slab: under-slab plumbing and conduit, radon tee, insulation, termite treatment, slab elevations.
- Framing: verify openings, shear walls, beam sizes, stair framing, roof ventilation strategy.
- Rough-in: HVAC ducts and returns, vent paths, electrical circuits and switching, low-voltage and smart prewire.
- Pre-drywall: photo documentation, insulation inspection, blower door if possible, corrections before close-up.
Conclusion: Set the Concrete, Then Relax
The most valuable square feet in any home are not the prettiest; they are the ones you never see again after move-in — under the slab, inside the walls, above the ceiling. Put your energy there. If you plan orientation, groundworks, structure, and rough-ins with intention, the rest of the build flows. You avoid costly change orders, finish with a home that breathes and performs, and set yourself up for comfortable living and straightforward maintenance. Approach these early phases with the seriousness they deserve, and you will master the art of House construction–decisions you can’t undo.
Print the checklists, walk the site with your team, and take your time before the concrete sets. The right moves now will echo as comfort, efficiency, and joy for decades in your forever home.