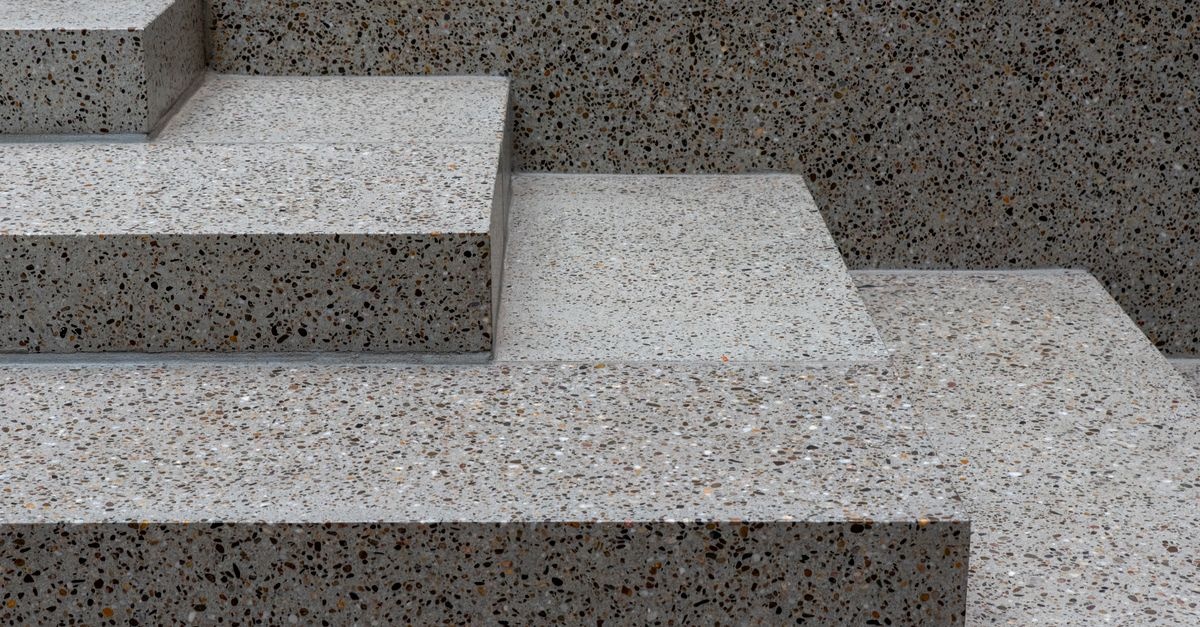
Ready to refresh your front entry without weeks of demolition, forms, and pour schedules? Precast concrete steps offer a fast, durable, and cost-effective path to curb appeal. In this weekend-friendly guide, you will learn how to choose the right step unit, prepare a long-lasting base that resists frost and settlement, and set your new stairs square and level so the door opens smoothly and the approach looks like it was always there. Along the way, we will focus on safe handling, smart drainage, code-compliant rises and runs, and clean finishing details so the upgrade looks professional from day one.
If you have been searching for practical, field-tested advice on how to build steps from precast concrete without surprises, you are in the right place. With careful planning on Friday evening and steady hands on Saturday and Sunday, most DIYers can complete the work with impressive results.
Why Precast Concrete Steps Make Sense
Precast steps are factory-made concrete stair units delivered to your home ready to set. They arrive as one-piece stairs or as modular blocks you can stack to create the total rise you need. Compared to cast-in-place work, these units eliminate form building, curing time, and weather risks. You get consistent quality, clean edges, and often a lightly broomed non-slip surface right out of the truck.
- Speed: Many installations finish in a single day once the base is ready.
- Durability: Controlled factory curing and steel reinforcement deliver strength and longevity.
- Consistency: Uniform riser heights and tread depths help meet code and feel comfortable underfoot.
- Value: Lower labor cost compared with site-built forms and pours.
Potential drawbacks include delivery logistics, weight and handling, and the need for a properly compacted base. With planning, these are easy to mitigate.
Understanding Parts, Terms, and Options
Knowing the language helps you compare products and follow steps accurately.
- Riser: The vertical face of each step.
- Tread: The horizontal surface you step on.
- Total rise: The vertical distance from finished grade to the threshold or landing you are reaching.
- Precast stair unit: A single piece with multiple treads and risers, sometimes with an integrated landing.
- Modular blocks: Individual step blocks stacked to build total rise, with or without pins or adhesive.
- Landing or stoop: The platform at the door. Your stair may land on a porch slab, a stoop, or directly at the threshold depending on design.
Precast products vary: you can select plain gray concrete, exposed aggregate finishes, integral color, nosing details for extra traction, or units with side cheek walls. Many suppliers also cast matching landings and porch caps to complete the look.
Planning for Safety, Comfort, and Code
Before ordering anything, confirm your layout meets local building codes. Requirements vary, but you will usually see:
- Riser height: Often 7 to 7.75 in per code; verify your local maximum and minimum.
- Tread depth: Often 10 to 11 in minimum.
- Uniformity: Variation between risers is typically limited to 3/16 in.
- Landing: A flat landing is required at the door, often at least 36 in deep.
- Handrails: Required above a set number of risers, commonly 3 or 4. Check both height and graspability rules.
- Width: Minimum clear stair width is commonly 36 in.
Also confirm permit needs. Some municipalities require a simple permit for exterior stairs. If railings will anchor into masonry or wood framing, check substrate thickness and fastener types. In cold climates, plan your base below the local frost line or design a floating system that moves uniformly to avoid differential heave against the foundation.
Materials and Tools
Gather everything before delivery day to keep momentum.
- Aggregate base: 3/4 in minus crushed stone or dense graded aggregate for a stable, well-draining base.
- Geotextile fabric: Optional but recommended to separate soil from base and improve longevity.
- Leveling medium: Washed concrete sand or fine screenings to create a uniform bedding layer over compacted stone.
- Compactor: Plate compactor, hand tamper, or both.
- Shims: Composite or stainless shims rated for masonry, used sparingly for fine adjustments.
- Drainage pipe: Perforated drain or weep outlets if tying into existing drainage at the stoop.
- Concrete adhesive: Exterior-grade polyurethane construction adhesive for bonding modules or nosing stones.
- Anchors: Sleeve anchors, wedge anchors, or masonry screws for rail posts and for securing the unit if specified by the manufacturer.
- Sealants and flashings: Polyurethane or silyl-terminated polymer sealant for joints; self-adhered flashing and foam backer rod as needed.
- Edging: Steel or plastic landscape edging if you are finishing with pavers or gravel beside the stair.
- Safety gear: Gloves, safety glasses, steel-toe boots, hearing protection, and a dust mask when cutting or drilling.
- Layout tools: 4 ft level, torpedo level, laser level or builder level, square, string line, stakes, tape measure.
- Digging tools: Shovel, mattock, trenching spade, wheelbarrow.
- Lifting aids: Pry bars, pinch bars, lifting straps, or a skid steer with forks if available. For heavy units, plan for professional delivery with boom or forklift.
Measure Your Site and Choose the Right Unit
Accurate measurement prevents awkward last risers and door swing problems.
- Find total rise: Measure from finished grade at the bottom of the stairs to the top of the landing or threshold you are reaching. If you plan to build up grade or add a pad, include those changes.
- Pick riser count: Divide total rise by a comfortable riser height. A classic stair formula is 2R + T about 24 to 25, where R is riser and T is tread. With precast, choose the factory riser height that gives the fewest whole steps with uniformity.
- Confirm tread depth and overall run: Make sure there is space for the stair footprint plus a comfortable apron at the bottom and a code-compliant landing at the top.
- Check door clearance: Doors should open without striking the nosing. Ensure a landing, not a step, is directly in front of the door swing.
- Assess foundation and siding: Look for weep holes, brick ledges, or siding that should not be buried. Plan an isolation joint so the stair does not bind against the house wall.
Once you know the rise and run, consult supplier charts. Many precast concrete steps come in 1, 2, 3, 4, and 5 riser configurations with standard widths of 36, 42, 48, or 60 in. If your layout requires an integrated landing, ask for a stair with a top platform.
Preparing the Base: The Heart of a Long-Lasting Stair
Most failures in exterior stairs trace back to poor base prep. Invest time here and your entry will stay level and tight for years.
Layout and Excavation
- Mark footprint: Use stakes and string lines to outline the stair and landing areas. Mark finished grades on stakes.
- Depth: Excavate to accommodate geotextile, 6 to 12 in of compacted crushed stone depending on soil and climate, plus a 1 in bedding layer. In frost-prone regions, dig deeper or build a frost-protected base that extends past the footprint and drains well.
- Shape the subgrade: Create a flat, firm subgrade sloped about 1 to 2 percent away from the house for drainage.
Geotextile and Stone Base
- Geotextile: Line the excavation with non-woven fabric to separate soil from base aggregate and reduce pumping in wet seasons.
- Place stone: Add 3 to 4 in lifts of 3/4 in minus crushed stone. Compact each lift with a plate compactor until it no longer leaves footprints.
- Check level and slope: The top of the base should be dead level side-to-side and very slightly pitched away from the house front to rear, generally 1 to 2 percent. Confirm elevation so the installed treads end at the desired finished grade.
- Bedding layer: Screed a 1 in layer of coarse sand or fine screenings over the compacted stone to create a uniform bearing surface.
If your steps will butt to a porch or slab, verify that water will not trap behind the unit. Plan a thin isolation joint with compressible foam and sealant to decouple the stair from the structure while keeping out water.
Delivery, Handling, and Staging
Precast stairs are heavy. A three-riser unit can weigh several hundred pounds or more; larger units may exceed a thousand pounds. Most suppliers offer delivery with a boom, crane, or forklift. Clear a path before they arrive.
- Protect surfaces: Lay down plywood to prevent ruts on lawns or damage to pavers.
- Positioning: Stage the unit as close to the installation area as safely possible, oriented correctly.
- Rigging: If you must move a unit, use manufacturer-approved lifting points or slings and follow their rigging diagram. Never place hands or feet under a suspended load.
How to Build Steps from Precast Concrete: Step-by-Step
Here is a field-tested sequence you can follow to set modular or one-piece precast concrete steps so they are safe, square, and long-lasting.
1. Dry Fit and Final Checks
- Confirm the bottom approach is flat and compacted.
- Lay out the stair footprint with a light dusting of sand or marking paint.
- Bring the unit close and simulate placement. Check door swing clearance and landing size one more time.
2. Isolation and Flashing
- At house interfaces, install a thin, compressible isolation strip against the foundation or stoop face.
- Apply self-adhered flashing above where the stair will sit if you are under siding. Keep siding bottoms at least 1 in above concrete, or follow local best practices.
3. Set the Unit
- Initial placement: Using the boom or lifting equipment, lower the unit onto the bedding layer. Keep fingers and toes clear.
- Rough leveling: Check front-to-back and side-to-side level with a 4 ft level. Shim with composite shims as needed under full bearing points; do not create point loads.
- Alignment: Sight along the front edge to ensure the nosing is parallel with the door or facade. Adjust before full bearing is achieved.
4. Verify Rise and Run
- Measure each riser. If the top riser at the landing differs from the rest by more than the code allows, adjust the stair elevation now by adding or removing small amounts of bedding material.
- Confirm bottom tread meets the adjacent walk or apron comfortably, without a trip lip.
5. Lock It In
- For modular blocks, apply beads of exterior-grade polyurethane adhesive between courses per manufacturer guidance.
- For one-piece units, some manufacturers specify pins or dowels into the base slab or into a cast footing. If called for, mark and drill holes with a masonry bit, blow out dust, and set anchors. Follow torque or embedment specs carefully.
- At house interfaces, leave a slender gap for movement and seal with backer rod and flexible sealant after the stair is fully set.
6. Backfill and Grade
- Backfill the sides with clean stone up to a few inches below finished grade to promote drainage.
- Top with soil and sod, or edge and fill with decorative gravel or pavers. Keep final grade sloped away from the house.
7. Railings and Guardrails
- Confirm if a handrail is required. If so, locate post positions on treads or sidewalls where concrete thickness supports anchors.
- Use stainless or hot-dip galvanized anchors and isolation washers. Pre-drill with a carbide bit, blow out dust, and set anchors to manufacturer torque.
- Seal penetrations with polyurethane sealant to keep water out around fasteners.
8. Finish and Seal
- Tool a clean joint where the stair meets the house or porch using backer rod for proper joint depth.
- Apply a breathable, penetrating silane-siloxane sealer after the concrete has dried and ambient conditions are suitable. This improves freeze-thaw durability and stain resistance.
Drainage and Frost: Design for the Climate
Water and freezing are the main enemies of exterior concrete. Good design pushes water away and gives it somewhere to go.
- Pitch away: Maintain a subtle pitch away from the house on treads where appropriate. Many precast treads already have a slight built-in slope.
- Stone skirts: Use free-draining stone around the sides of the stair, topped with landscape fabric and soil or gravel, to prevent water from wicking into clay-rich soils under the unit.
- Weeps and drains: Where stairs abut a stoop, consider a weep path or a short drain line to daylight so water cannot get trapped behind the unit.
- Frost line considerations: In regions with deep frost, either place the bearing on a frost-protected base or isolate the stair so that any seasonal movement is uniform and does not jam the threshold.
Integrating with Landings, Porches, and Walkways
Your new stair should flow naturally into the approach path and the entry. Consider the big picture.
- Top landing: If your door opens directly over the stair, add a landing platform. Many precast manufacturers offer integrated top pads or compatible porch caps.
- Walkway tie-in: Blend the bottom tread with your existing walk by adjusting grades or installing a small pad. Ensure there is no toe-stub lip.
- Siding and trim: Keep wood trim and siding off concrete to avoid moisture wicking. Add a drip cap or flashing where needed.
- Lighting: Plan low-voltage step lights along the path or within side landscaping for safety and style.
Common Mistakes and How to Avoid Them
- Skimping on base prep: Thin, uncompacted stone invites settling. Use proper thickness and compact in lifts.
- Burying siding: Concrete or soil against siding leads to rot. Maintain clearance and add flashing.
- Ignoring uniformity: A short top riser at the door is a classic trip hazard. Measure and adjust before final set.
- Trapping water: Flat grades against the house cause moisture problems. Always slope away.
- Wrong anchors for railings: Undersized or non-rated anchors can loosen. Use code-compliant systems and follow the manufacturer's instructions.
- Over-shimming: Point-load shims can crack concrete edges. Create full, stable bearing instead.
Timeline: A True Weekend Project
- Friday evening: Confirm measurements, place the order, and call utility locate services if you will be digging near lines. Stage tools and materials.
- Saturday morning: Excavation and base work. Install geotextile, compact stone in lifts, screed bedding layer.
- Saturday afternoon: Dry fit, flashing, isolation joint. If delivery is same day, set the stair and rough level.
- Sunday morning: Final leveling, anchoring, railing posts.
- Sunday afternoon: Backfill and grading, seal joints, cleanup. Optional sealer if conditions are dry and warm enough.
Cost, Sizing, and Supplier Tips
Pricing depends on size, finish, and delivery distance. A small two or three-riser gray unit may be a few hundred dollars, while wider, multi-riser units with integrated landings and decorative finishes cost more. Ask suppliers about:
- Lead times: Stock sizes may be available quickly; custom widths or colors can take longer.
- Delivery equipment: Will they place the stair within a few feet of final position, or curbside only?
- Anchor points: Get the rigging plan for safe handling, and ask for installation guides.
- Warranty: Learn the coverage on finishes, spalling, and structural issues.
Maintenance and Seasonal Care
Precast concrete steps are low maintenance, but a little care goes a long way.
- Cleaning: Sweep debris regularly. Wash annually with mild detergent and a soft brush. Avoid harsh acids.
- Sealing: Reapply penetrating sealer every few years, especially in de-icing salt environments.
- Ice control: Use calcium magnesium acetate or sand instead of rock salt to reduce surface scaling.
- Joint inspection: Check sealant joints and railing anchors each spring. Reseal and tighten as needed.
Advanced Upgrades and Design Ideas
- Radius entries: Some manufacturers cast curved units that soften the facade and add elegance.
- Stone overlays: Thin granite or natural stone caps can be bonded to precast treads; adjust for added thickness to keep risers uniform.
- Integrated planters: Frame the stair with low walls or planters built on their own footings to avoid loading the stair bearing.
- Lighting: Recessed riser lights or bollards along the approach path elevate safety and style.
- Heated approaches: Electric or hydronic snow-melt mats under adjacent pavers keep the apron clear in winter.
Troubleshooting: What If Something Is Off
- Rocking or hollow spots: If a corner does not bear, carefully lift and add or redistribute bedding sand to achieve full contact. Avoid thick stacks of shims.
- Out-of-level tread: Small corrections are possible with composite shims on solid bearing. For large errors, reset on a corrected base.
- Door rubs the nosing: Lower the stair slightly by removing bedding, or raise the threshold if practical and code-compliant.
- Water pooling: Adjust adjacent grading, add a shallow swale, or create weep paths along the sides to move water away.
Safety Essentials You Should Not Skip
- PPE: Gloves, eye protection, steel-toe boots, and hearing protection when compacting or drilling.
- Lifting safety: Use proper rigging, spotters, and stay clear of pinch points. Never work under a suspended load.
- Utility locates: Call before you dig. Exterior steps often require excavation near service lines.
- Tool handling: Use dust control and rated bits when drilling concrete. Follow anchor manufacturer torque specs.
FAQ
Do I need a footing below frost depth?
It depends on climate, soil, and whether the stair is isolated or tied into a frost-protected structure. In many cases, a thick, well-compacted, free-draining base that extends beyond the footprint and allows uniform movement is sufficient. For attached landings and heavy loads, a footing to frost depth may be required by code. Always check local rules.
Can I install railings on precast concrete steps?
Yes. Use rated anchors designed for cracked or uncracked concrete as appropriate. Confirm embedment depth and edge distances with the railing system manufacturer. Seal penetrations to prevent water intrusion.
How heavy are typical units?
Weights vary widely. A narrow two-riser might weigh a few hundred pounds; a wide four-riser with integrated landing can exceed a thousand pounds. Plan delivery and lifting accordingly.
How to build steps from precast concrete without special machinery?
Small modular blocks can sometimes be maneuvered with two to four people using straps and pry bars, but always prioritize safety. For one-piece multi-riser units, schedule delivery with a boom or rent equipment. Do not exceed safe manual lifting limits.
What do I do if the last riser at the door is not uniform?
Pause and re-check base height. It is usually a base elevation issue. Raise or lower the entire stair slightly so that the top riser matches the others within code tolerances.
A Concise Checklist You Can Take Outside
- Verify code requirements for riser, tread, landing, and railings.
- Measure total rise and choose a compatible precast unit.
- Call utility locates; plan drainage and isolation from the house.
- Excavate; install geotextile; compact stone base in lifts.
- Screed a 1 in bedding layer; dry fit the stair.
- Set the unit; level and align; confirm uniform rises.
- Bond modular courses if used; install anchors if specified.
- Backfill sides with stone; shape surface grades to drain away.
- Install railings and seal joints; clean and optionally seal concrete.
Bringing It All Together
With careful layout, a well-compacted base, and a deliberate set, precast concrete steps deliver a crisp, durable entry that instantly upgrades your home. You save days of forming and curing while gaining factory precision. Most of the craftsmanship happens before the stair ever touches down: planning the rise and run, preparing stable support, and setting drainage paths. The rest is alignment, anchoring, and finishing details that make the project look custom.
Use this guide as your road map for how to build steps from precast concrete the right way: safe, code-smart, and built to last. By Sunday evening, you can step back, admire your new front entry, and quite literally walk up to a job well done.
Resources and Next Steps
- Consult your local building department for stair, landing, and railing codes.
- Ask precast suppliers for product data sheets, weights, and placement diagrams.
- Review anchor manufacturer guides for railing post installation in concrete.
- Plan landscaping touches to frame your new entry and keep water away.
Whether it is a small two-step porch upgrade or a wide, welcoming stair with an integrated landing, this weekend project can dramatically improve safety, function, and curb appeal. Solid planning and solid concrete make a solid entry.