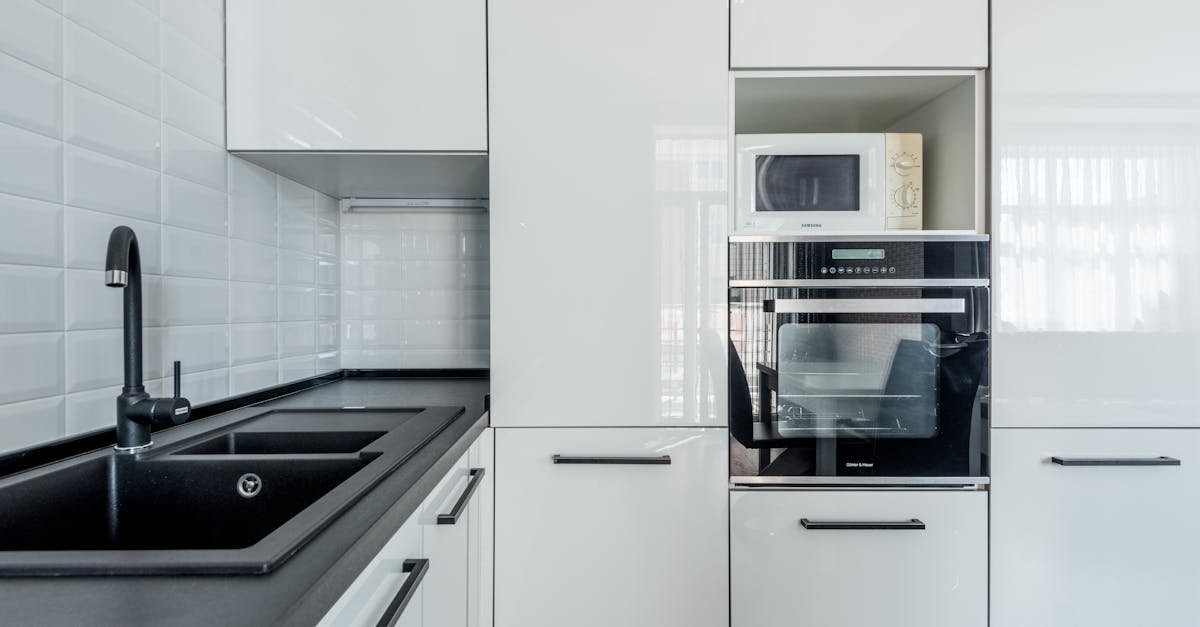
Seamless Kitchen Upgrade: Install an Undermount Sink the Easy, Weekend Way
If you crave a cleaner countertop line, effortless wipe-downs, and a modern, high-end finish without tackling a full renovation, upgrading to an undermount sink is one of the smartest weekend projects you can do. With the right prep and a methodical, mess-minimizing approach, even first-time DIYers can achieve professional results. Think of this as Under‑mount kitchen sink installation made simple: practical steps, clear decision points, and pro tips to keep your project on schedule and stress-free.
Why Choose an Undermount Sink?
Undermount sinks attach beneath the countertop rather than sitting on top of it. The sink rim is hidden, creating a sleek, continuous surface that’s easy to clean. You can sweep crumbs and spills straight into the basin without a raised rim catching debris. Beyond everyday convenience, undermounts deliver a premium look that pairs beautifully with stone, quartz, and solid surface counters.
- Cleanability: No rim lip means faster wipe-downs and a more hygienic prep area.
- Timeless style: A minimalist transition from counter to sink suits modern and traditional kitchens alike.
- Space optimization: Undermounts often offer a bit more usable counter edge and better ergonomics.
- Resale appeal: Prospective buyers love the polished, custom look.
This guide turns “under mount” know-how into one clear path you can complete over a weekend without specialized stone tools. Wherever extra precision is required—especially with stone countertops—we spell out your options and safety notes.
Project at a Glance
- Skill level: Intermediate DIY (basic plumbing, careful measuring, methodical pacing)
- Total time: One weekend (Day 1: removal and prep; Day 2: installation, cure, and plumbing)
- Cost range: Moderate; depends on sink type, faucet, and if you add a disposal or new strainer
- Core tasks: Template and align; support and bond; clamp and cure; reconnect plumbing; leak test
- Countertops: Ideal for stone, quartz, and solid surface; special considerations for laminate
Our goal: Under‑mount kitchen sink installation made simple, from choosing the right reveal to tightening the last compression nut without a drip.
Plan First: Measuring, Compatibility, and Reveal Choices
Before you turn a wrench, confirm that your new sink fits your cabinet and complements your countertop material. Most 33-inch (about 84 cm) sinks fit a 36-inch cabinet, but always verify the manufacturer’s minimum cabinet width and bowl depth. Ensure that your plumbing rough-ins, disposal, and dishwasher drain all have clearance.
Countertop Compatibility
- Granite, quartz, and solid surface: Perfect for undermounts. Use neutral-cure silicone; some stone installs also use epoxy adhesives or mechanical sink clips.
- Laminate: Traditionally not suited to undermounts due to moisture risk, but specialized systems exist. Check the sink and mounting system are designed for laminate.
- Butcher block: Possible with strict sealing and robust support to prevent moisture damage and warping.
Pick Your Reveal: Positive, Zero, or Negative
The reveal is how much of the sink rim or bowl edge you see from above after installation.
- Positive reveal: Counter cutout is slightly larger, so a thin strip of sink rim is visible. Pros: easier to clean rim; Cons: visible edge can collect grime if neglected.
- Zero reveal: Counter and bowl align flush. Pros: ultra-clean look and easy wipe-down; Cons: requires very accurate alignment.
- Negative reveal: Counter overhangs bowl edge. Pros: hides rim; Cons: inside edge of stone needs frequent cleaning and careful sealing.
For a first-time DIYer, a slight positive or zero reveal offers a forgiving and clean outcome.
Tools and Materials You’ll Need
- Hand tools: Adjustable wrench, basin wrench, screwdrivers, pliers, utility knife, putty knife, caulk scraper
- Plumbing: Bucket, rags, PTFE tape, new supply lines (if needed), new P-trap or gaskets, basket strainer(s)
- Adhesives and sealants: 100-percent silicone (neutral-cure for natural stone), optional two-part epoxy per stone fabricator guidance, plumber’s putty (if compatible with your strainer)
- Mounting: Manufacturer’s clips/rails or an aftermarket sink support system; bar clamps or under-sink jack supports
- Cleaning and prep: Denatured alcohol or acetone for degreasing, painter’s tape, shims, lint-free cloths
- Safety: Eye protection, cut-resistant gloves, hearing protection if using power tools
Always follow the sink manufacturer’s template and mounting instructions. Where countertop work is needed, consult your fabricator or a pro to avoid damage.
Day 1: Remove the Old Sink and Prepare the Opening
Preparation lays the foundation for a fast, clean installation. Take your time removing the old unit to avoid chipping the counter or damaging plumbing you plan to reuse.
1) Shut Off Water and Power
- Turn off hot and cold shutoff valves. Open the faucet to relieve pressure.
- Unplug the garbage disposal and, if needed, switch off the circuit breaker.
2) Disconnect Plumbing
- Place a bucket under the P-trap; remove the trap and tailpiece. Keep track of washers.
- Disconnect dishwasher drain and air gap tubing if present.
- Loosen supply lines at the shutoffs and faucet (use a basin wrench as needed).
- Remove the disposal per manufacturer’s quick-release collar or mounting ring.
3) Free the Old Sink
- Cut old caulk around the rim with a sharp utility knife.
- Release sink clips or mounting brackets.
- Lift out the sink. For top-mounts bonded to stone, use gentle, even prying with a putty knife to avoid chips.
4) Clean and Inspect the Cutout
- Scrape away old sealant and adhesive until the rim area is smooth and clean.
- Degrease with alcohol or acetone and let dry.
- Inspect for chips, cracks, or water damage at the substrate or cabinet rails.
If your counter was not previously cut for an undermount, consult your fabricator: undermount cutouts often include a polished inner edge and, where needed, a reinforced underside. This guide focuses on installing a sink beneath an existing, compatible cutout.
Dry-Fit and Support: The Key to a Flush, Even Finish
Undermount sinks rely on both adhesion and mechanical support. Dry-fitting lets you confirm reveal, orientation, and plumbing alignment before applying adhesive.
Set Temporary Supports
- Cross-rails or a support frame: Install adjustable support rails spanning the cabinet or use a temporary 2-by structure beneath the sink. Some aftermarket kits thread rods through the flange to pull the sink tight.
- Clamps from above: If the countertop is accessible, bar clamps can gently pull the sink to the underside using sacrificial wood blocks to protect the stone.
Whichever method you choose, aim for stable, adjustable support that allows micro-adjustments to the reveal on all sides.
Dry-Fit the Sink
- Center the sink using cabinet and cutout centerlines.
- Confirm the faucet holes, sprayer, and soap dispenser align with bowls and accessories.
- Check the reveal: use playing cards or credit-card-thickness shims to gauge uniform gaps.
- Mark light reference ticks with painter’s tape on the underside of the slab as a guide.
When you are satisfied with the position and support, remove the sink to prep the bonding surfaces.
Sealants and Bonding: Choose the Right Chemistry
A durable undermount depends on the proper sealant applied to clean, dry, dust-free surfaces. Choosing the correct product prevents stains and ensures a lasting bond.
Silicone Sealant (Primary Choice)
- Neutral-cure silicone: Safe for natural stone and quartz. Avoid acetic-cure silicones that can etch stone or cause adhesion issues.
- Color: Clear is common; color-matched silicone can disguise any squeeze-out for negative or zero reveals.
- Bead size: A continuous, even bead about the thickness of a pencil produces a watertight seal without excessive squeeze-out.
Epoxy and Hybrid Systems
- Some fabricators use two-part epoxy plus mechanical clips to secure sinks under heavy stone. Follow the stone shop’s specified product and cure time.
- If your manufacturer provides a clip or rail kit, combine proper torque with silicone for a belt-and-suspenders approach.
Plumber’s Putty and Basket Strainers
- Use plumber’s putty for metal basket strainers unless the strainer maker specifies a silicone gasket. For composite sinks and some finishes, non-staining putty or silicone may be required.
Day 2: Step-by-Step Installation
The following sequence provides a controlled, repeatable approach that keeps things aligned and clean. It embodies the spirit of Under‑mount kitchen sink installation made simple.
-
Final Clean and Mask
Wipe the underside of the countertop around the cutout with denatured alcohol or acetone. Clean the sink flange thoroughly. Apply painter’s tape along the inner edge of the countertop to catch any squeeze-out for a crisp finish. -
Dry-Fit One More Time
Position the sink on its supports or clips. Confirm centerlines and reveals with your reference marks. Make micro adjustments now. -
Apply the Sealant
Lower the sink slightly, then run a continuous bead of neutral-cure silicone around the underside of the countertop where the rim will contact. If using clips, apply a thinner bead on the sink flange as well. -
Seat and Align
Raise the sink gently into contact with the countertop. Using a helper, nudge the sink until your reveal is uniform on all sides. Check with a small mirror and flashlight to verify coverage and contact. -
Clamp and Secure
Tighten mounting clips evenly in a cross pattern or snug your rail/clamp system in small increments to avoid shifting. Do not overtighten: you want firm, uniform pressure without distorting a stainless bowl or starving the silicone bond. -
Check and Clean Squeeze-Out
Inside the bowl area, gently tool any small squeeze-out with a gloved finger or a caulk tool. Remove excess before it skins over. Peel painter’s tape while the silicone is still wet for a crisp edge. -
Allow Proper Cure Time
Follow the sealant’s instructions. Many silicones set in several hours but require 24 hours to fully cure. Keep weight and water out of the sink during this window.
Reconnect Plumbing Without Leaks
Once the bond has cured, reconnect your drain system, disposal, and water supplies methodically. A meticulous leak test now saves headaches later.
Install the Basket Strainer
- Roll plumber’s putty into a rope and seat it beneath the strainer flange (or use the included gasket if specified). Press the strainer into the drain opening.
- From under the sink, add the rubber gasket, friction ring, and locknut. Tighten evenly to compress the putty until a small bead appears inside the sink. Trim excess putty.
- Attach the tailpiece to the strainer body. Use a slip-joint washer and nut; hand-tight, then a slight snug with pliers.
Reconnect the P-Trap and Dishwasher
- Dry-fit the trap to ensure alignment and proper slope to the wall drain. Replace any brittle washers.
- Connect the dishwasher drain line to the disposal’s inlet or to an air gap fitting as required by local code. Use a clamp to secure the hose.
Reinstall or Add the Disposal
- If installing a new disposal, knock out the dishwasher plug if using that inlet.
- Mount the disposal per manufacturer instructions and ensure the mounting ring is fully locked.
- Connect the discharge to the trap assembly; ensure gaskets are seated correctly.
Faucet and Supply Lines
- Set the faucet per the manufacturer’s deck requirements, adding the gasket or bead of sealant if called for. Tighten the mounting nut from below.
- Attach new braided stainless supply lines if the old ones show wear.
- Wrap PTFE tape on male threaded connections where applicable; compression fittings generally do not need tape.
Leak Test in Stages
- Cold water only: Open the cold valve and check every joint. Then test hot water.
- Fill the sink completely and pull the stopper to stress-test the strainer and trap under full flow.
- Run the disposal while water flows; check for vibration loosening or weeps.
Wipe each joint with a dry paper towel to spot even tiny leaks. Re-snug slip nuts a quarter-turn at a time; do not overtighten.
Finishing Touches for a Professional Look
- Trim and tool caulk lines: If needed, run a fine interior bead along the joint for a flawless edge. Minimal is best—let the main bond do the work.
- Polish and protect: Clean the bowl with a non-abrasive cleaner. For stainless, follow the grain; for composite, use manufacturer-recommended products.
- Reinstall accessories: Soap dispenser, air switch, water filter faucet, and sink grids.
Step back and inspect the reveal uniformity. The sink should sit square, with smooth, continuous contact to the underside of the counter. That is Under‑mount kitchen sink installation made simple in action: clean lines, reliable seals, and no drama.
Common Mistakes and How to Avoid Them
- Skipping the dry-fit: Leads to misaligned reveals and stress on plumbing. Always dry-fit and mark reference positions.
- Using the wrong silicone: Acetic-cure products can harm natural stone. Choose neutral-cure.
- Overtightening clips: May deform thin stainless bowls or squeeze out too much silicone, weakening the seal.
- Rushing the cure: Water load or plumbing assembly too soon can shift the sink or create leaks.
- Neglecting support: Large or heavy sinks need robust, adjustable support, not just adhesive.
Troubleshooting: Quick Fixes That Work
Minor Leak at the Strainer
Loosen the locknut slightly, add fresh putty or the specified gasket, and retighten evenly. Wipe away squeeze-out and retest.
Weeping at Slip Joints
Disassemble, inspect the beveled washer orientation, and reassemble hand-tight plus a quarter-turn. Replace hardened washers.
Uneven Reveal After Cure
If the misalignment is small and purely aesthetic, consider leaving it. For significant issues, you may need to release clips, cut the silicone with care, and reset with new sealant. When in doubt, consult a pro.
Sink Sagging Over Time
Add or upgrade to a dedicated undermount support rail system. Remove old silicone, clean thoroughly, and rebond. Some heavy fireclay or cast-iron sinks require permanent ledger supports.
Silicone Discoloration
Use a stone-safe, non-bleach cleaner for routine care. If the bead has failed or stained, carefully cut it out and recaulk with neutral-cure silicone.
Care and Maintenance for the Long Haul
- Routine cleaning: Non-abrasive cleaners and a soft cloth keep finishes pristine. Avoid steel wool.
- Prevent mineral build-up: A quick white vinegar wipe (rinse after) helps, but test on natural stone finishes outside the seam.
- Protect the bond: Avoid harsh chemicals pooling at the seam. Recaulk if you ever notice gaps or mildew you cannot remove.
- Check hardware yearly: Lightly retighten accessible clips or supports if the manufacturer recommends it.
Time, Budget, and Smart Upgrades
Expect to spend part of Day 1 on removal and surface prep, and Day 2 on mounting, cure, and plumbing. Adding a new faucet, filtration, or disposal adds time but pays dividends in convenience.
- Value upgrades: Pull-down faucet, deep bowl grid, quiet garbage disposal, air switch.
- Budget tips: Reuse traps and supply lines only if they are in excellent condition; otherwise replace to prevent leaks.
- Pro tip: Photograph plumbing before disassembly and label parts for a faster reassembly.
Safety and Sustainability Notes
- PPE: Wear eye and hand protection. Stone edges can be sharp; cut-resistant gloves help.
- Ventilation: Use sealants in a well-ventilated area; choose low-odor, low-VOC options when available.
- Electrical safety: Unplug and de-energize the disposal circuit if required.
- Water savings: Consider a faucet with a flow-optimized aerator while you are upgrading.
FAQs: Your Top Questions Answered
Can I install an undermount sink on laminate?
Traditional laminate is not ideal for undermounts due to moisture vulnerabilities. Specialized sinks and mounting systems exist, but follow the manufacturer’s instructions closely, seal meticulously, and understand that longevity may vary compared to stone or solid surface.
Do I need epoxy, or is silicone enough?
For many stainless and composite sinks under stone or quartz, a high-quality neutral-cure silicone plus mechanical clips or support rails is sufficient. Some fabricators specify epoxy for heavy sinks or large cutouts—follow your fabricator’s guidance.
How long before I can use the sink?
Allow at least 24 hours for silicone to cure before loading the sink with water or weight. Cooler, more humid conditions may extend cure time; check the product label.
What is the best reveal for DIYers?
A slight positive or true zero reveal is the most forgiving while delivering a clean look. Negative reveals demand precise stone finishing and rigorous cleaning habits.
What if my cabinet rails do not line up under the sink?
Install adjustable undermount support rails or a custom ledger system spanning the cabinet. This spreads the load and keeps the bowl stable, especially for heavy materials.
Is this a one-person job?
It is possible but not recommended. A helper makes alignment, lifting, and clamping far safer and more precise—especially with stone countertops or heavy sinks.
A Quick Checklist
- Confirm cabinet and countertop compatibility
- Choose reveal style and mark centerlines
- Gather neutral-cure silicone, clips/rails, and plumbing parts
- Turn off water and power; disconnect plumbing and disposal
- Remove old sink; clean and degrease the cutout
- Dry-fit, set supports, align reveal
- Apply silicone; seat, clamp, and clean squeeze-out
- Allow full cure; install strainer, trap, disposal, faucet
- Stage leak tests: cold, hot, full-basin, disposal
- Polish, recaulk touch-ups, and enjoy
Conclusion: A Weekend Project with Lasting Payoff
Upgrading to an undermount sink delivers instant visual polish and everyday practicality. By planning your reveal, building reliable support, choosing stone-safe sealants, and reconnecting plumbing with care, you can achieve showroom-worthy results in a single weekend. This guide has aimed to make Under‑mount kitchen sink installation made simple more than a slogan—now it is your reality. Enjoy the seamless look, easy cleanup, and the satisfaction of a pro-grade finish you installed yourself.
Bonus: Pro Tips for Flawless Results
- Mask meticulously: Painter’s tape along the inner edge delivers crisp, easy-to-clean lines.
- Use a mirror: A small inspection mirror helps verify even sealant contact around the entire rim.
- Warm the room: Slightly warmer temperatures can speed silicone curing within product guidelines.
- Test fit with the strainer installed: This prevents last-minute surprises in tailpiece and P-trap alignment.
- Keep a parts kit: Spare slip-joint washers, a universal P-trap kit, and extra PTFE tape save a late-night store run.
Follow these steps, and you will enjoy a rock-solid, beautiful installation. This is truly Under‑mount kitchen sink installation made simple: careful prep, clean chemistry, steady support, and a methodical finish.