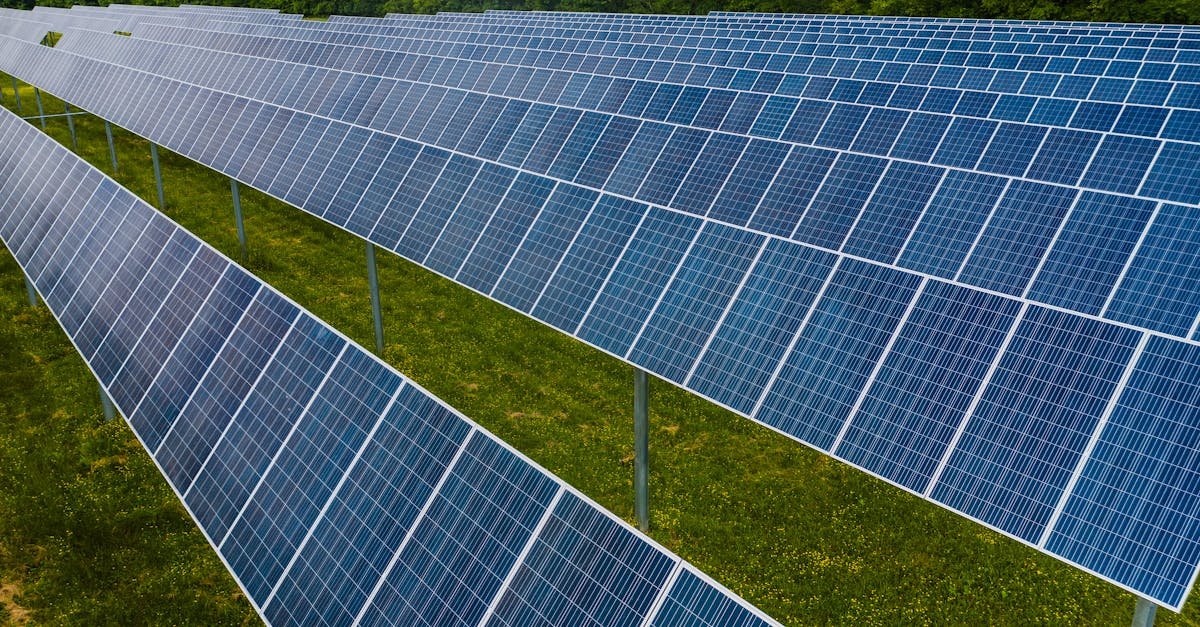
Right-sizing a solar array is part art, part analytics. Go too small, and you miss easy savings. Go too big, and you lock money into watts you rarely use. This practical guide shows you how to translate your home or business energy needs, climate, and budget into the perfect photovoltaic output. Along the way, you will see clearly how to determine optimal photovoltaic panel power without overpaying or underperforming.
Why right-sizing your solar system matters
Choosing the correct array capacity is more than a one-time design decision. It sets your energy costs, comfort, and carbon reductions for decades. Here is why right-sizing is worth the effort:
- Financial performance: A well-sized array maximizes self-consumption, trims your bill under modern net metering rules, and shortens payback while keeping lifetime value high.
- Technical fit: Matching PV output to your inverter, wiring, and roof layout avoids clipping, bottlenecks, and unnecessary balance of system costs.
- Tariffs and policies: Under time-of-use rates, demand charges, export limits, or reduced net metering, the best array size often shifts toward self-use rather than pure annual offset.
- Future readiness: Right-sizing anticipates near-future loads like an EV, heat pump, or planned electrification, so you do not outgrow your array in two years.
What right-size means in practice
There is no universal perfect size. The sweet spot depends on your goals, roof and electrical constraints, and the local solar resource. In broad terms, right-size means:
- Meeting a defined share of your energy: Offset 50, 80, or 100 percent of your annual use, or target the part of your load that is most expensive under your rate plan.
- Optimizing DC and AC capacities: Choose a DC array size and an inverter AC rating that work together across seasons without frequent energy clipping.
- Maintaining strong economics: Favor payback, internal rate of return, or levelized cost of energy rather than chasing a round number of panels.
How to determine optimal photovoltaic panel power step by step
The following eight-step method is a repeatable path to the right outcome. You will learn not only how to determine optimal photovoltaic panel power, but also how to balance the trade-offs behind that decision.
Step 1. Define your goals and boundaries
Start with a one-page brief that captures what success looks like. It is much easier to evaluate array sizes when everyone agrees on targets and constraints.
- Offset target: Do you want to cover all annual usage, only the most expensive hours, or a fixed array budget that yields the best return
- System type: Grid-tied net metered, grid-tied with export limits, or hybrid with battery storage to arbitrage time-of-use pricing and provide backup
- Site limitations: Usable roof area, setbacks, obstructions, structural limits, or a ground mount allowance
- Budget and payback: Preferred payback period, financing terms, and incentives you plan to capture
- Future loads: Planned EV charging, heat pump conversion, or process loads that change demand within the next three years
With goals clear, you can evaluate a small, medium, and large design against the same yardstick rather than guessing.
Step 2. Audit your energy use and load profile
Right-sizing begins with a precise understanding of consumption. A single annual kWh number is not enough. You want the shape of demand across days and seasons to align with solar production.
Collect the right data
- Utility bills: Gather 12 to 24 months of kWh usage and costs. If available, pull hourly or 15-minute smart meter data to reveal peak times.
- Tariff details: Note time-of-use windows, demand charges, fixed charges, export compensation rules, and any seasonal tiers.
- Submetering and logs: If you suspect large loads like irrigation pumps, refrigeration, or server racks, use temporary submeters to quantify them.
- Planned changes: New EV, home office equipment, or HVAC upgrades. Estimate their kWh and when they will run.
Build a load profile
Summarize consumption by hour and month. Even a simple chart of average weekday and weekend profiles for summer and winter is revealing. Look for:
- Daytime demand: Solar aligns naturally with mid-day usage like HVAC and process heat.
- Evening peaks: Consider battery storage, load shifting, or rate optimization when the sun is down.
- Seasonal swings: Heavy winter heating or summer cooling will shape the ideal array size and orientation.
This is the first checkpoint in how to determine optimal photovoltaic panel power. The better you know your demand, the more precise your array will be.
Step 3. Translate energy need into array size using local solar resource
Now convert annual kWh and your desired offset into the DC capacity you need. The backbone concept here is peak sun hours and performance ratio.
Key concepts and a practical formula
- Peak sun hours: The daily equivalent hours of full sun at your site. Multiply by 365 for the annual basis. For many climates this ranges from about 3 to 6 hours per day on average.
- Performance ratio: Accounts for real-world losses such as temperature, wiring, inverter efficiency, soiling, shading, and mismatch. A common planning range is 0.75 to 0.85 depending on climate and maintenance.
A simple first-pass formula for annual energy E from array capacity P is:
E approximately equals P times PSH annual times PR
Rearranged to find capacity:
P approximately equals Target annual kWh divided by PSH annual divided by PR
Where PSH annual is average daily peak sun hours times 365. Use realistic PR based on site design and losses. Many solar calculators embed location specific irradiance, but the logic above remains the same and helps you see the levers.
STC versus NOCT and temperature effects
Panel wattage is rated at standard test conditions that are cooler and brighter than most roofs. Real modules operate closer to nominal operating cell temperature. Warmer cells produce less power.
- Temperature coefficient: Typical modules lose around 0.3 to 0.5 percent power per degree Celsius above 25 degrees Celsius. Hot roofs reduce output in summer, which is why PR matters.
- Module efficiency: Higher efficiency panels yield more watts per square meter, not necessarily more kWh per dollar, but they help when roof area is tight.
Adjust expectations by reviewing NOCT or similar ratings and using a conservative PR. This makes your estimate closer to reality and is central to how to determine optimal photovoltaic panel power without surprises later.
Orientation, tilt, and shading
Orientation and shading often decide whether a system meets its target:
- Tilt and azimuth: South facing at a tilt near your latitude is a classic baseline in northern latitudes. East west mounts can broaden production across the day and sometimes fit more panels.
- Shading analysis: Use digital tools or on site instruments to quantify shade by month and hour. Even small midday shading can derail output and should be modeled.
- Row spacing and setbacks: On flat roofs, space rows to limit inter row shade in winter. Observe code and fire setbacks.
Step 4. Respect site constraints and layout realities
The best energy math fails if the array does not fit or wire safely. Evaluate the site early to guide the target capacity and module selection.
- Usable area: Measure roof planes, note obstructions like vents, skylights, and dormers, and map keep out zones.
- Structural and wind limits: Roof age, racking attachment options, ballast allowances, and snow or wind loading can cap the array size.
- Electrical service: Main panel busbar rating, breaker availability, and interconnection method influence maximum inverter AC size and DC AC ratio.
- Aesthetics and setbacks: Jurisdictional rules and homeowner association guidelines may restrict street visible modules or require margins from roof edges.
Step 5. Choose modules and compute the DC capacity
With a target capacity and a layout, choose modules that fit your roof geometry while aligning with budget and performance.
- Module wattage and dimensions: Select panel wattage that matches row lengths and roof planes. Sometimes a slightly smaller panel packs more total watts due to better fill.
- Module efficiency: High efficiency products can rescue tight roofs. If space is abundant, moderate efficiency panels often deliver better cost per watt.
- Product quality and warranty: Review degradation rates, linear production warranties, and reliability track record.
Sum the nameplate wattage to calculate the array DC capacity. This is the headline many people think of when they ask how to determine optimal photovoltaic panel power, but DC capacity alone is not the finish line. You also need to match it to the inverter and rate plan.
Inverter sizing, DC AC ratio, and clipping
Right-sizing the inverter is where engineering meets economics.
- DC AC ratio: Also called inverter loading ratio. Values around 1.1 to 1.4 are common. Modest oversizing helps the inverter operate efficiently in mornings, evenings, and winter.
- Clipping: On bright, cool days your DC can exceed inverter AC limit. Limited clipping is acceptable and often wise financially, but frequent clipping wastes energy.
- String design: Respect inverter MPPT voltage and current windows. Check minimum and maximum string lengths at expected cold and hot temperatures.
- Microinverters versus string inverters: Module level power electronics can help with complex roofs and shade, and they simplify rapid shutdown, but they add electronics count and cost.
The sweet spot minimizes lifetime energy loss from clipping while holding costs in check. Run a few scenarios and compare net present value, not just kWh.
Step 6. Battery storage, rate design, and self consumption
Batteries change the right answer. In regions with reduced export compensation or steep time-of-use peaks, storage can increase self consumption and improve economics even with a smaller array.
- Backup priority: If backup is a goal, size storage for critical loads and plan your array so it can recharge the battery during outages under permitted operating modes.
- Rate arbitrage: Use batteries to shift mid day PV into evening peaks. This often favors arrays sized to fill the battery daily in shoulder seasons.
- Demand charge management: For commercial customers, storage sized to trim short spikes can outperform extra PV capacity.
If batteries are not in the budget now, decide whether to prewire and reserve space for future installation. This future proofing can influence inverter selection and DC AC ratio today.
Step 7. Model cash flows and risk, not only kWh
Economics often pull the final size up or down. Compare a few close designs using the same financial lens.
- Incentives and policies: Federal or regional tax credits, rebates, accelerated depreciation for businesses, and net metering or export tariffs shift the return curves.
- Levelized cost of energy: Compute the present value cost per kWh delivered. Right-size the array where LCOE is low and stable.
- Payback and IRR: Balance quick payback against long term value. A slightly larger array with strong self consumption may win on IRR even if payback is similar.
- Degradation and maintenance: Panels slowly lose output, typically around 0.3 to 0.7 percent per year. Include cleaning, monitoring, and inverter replacement in cash flow.
- Export uncertainty: Where policies are changing, avoid oversizing purely for exports that may be devalued later.
Financial modeling is integral to how to determine optimal photovoltaic panel power in today’s tariff landscape. A perfect technical design that loses money is not right sized.
Step 8. Stress test for the future
Finally, test the array against plausible changes:
- Load growth: Add an EV or a heat pump in your model and see if the system can be expanded or if it already accommodates the new demand.
- Weather variance: Dry or smoky years can reduce irradiance. Confirm that cash flows tolerate a low production year.
- Rate shifts: Simulate a steeper time-of-use spread or reduced export rate to ensure the array still performs financially.
If the design holds under these stresses, you have likely found the balance point.
Worked example for a typical home
Let us illustrate the method with a simplified example. Imagine a detached home with the following profile:
- Annual consumption 9,000 kWh, with higher use June to September due to cooling.
- Time-of-use tariff with expensive 4 to 9 pm peak, low midday off peak export compensation.
- South and west roof planes available, minor vent obstructions, no tall trees.
- Goal of around 80 percent bill reduction and room for a future EV.
Step A. Convert energy need to DC capacity
Local average peak sun hours are 5.2 per day. Assume a performance ratio of 0.80 after accounting for temperature, wiring, inverter, soiling, and modest shade.
PSH annual equals 5.2 times 365 which is approximately 1,898 hours. Needed DC capacity for 9,000 kWh at 80 percent coverage equals 7,200 kWh divided by 1,898 divided by 0.80 which is approximately 4.74 kW DC.
Round to 4.8 to 5.2 kW DC to allow for layout options and slightly faster degradation early years.
Step B. Layout and module choice
The roof can fit three rows of seven modules on the south plane with some vents to work around. Two module choices:
- Economy 370 W panels, 21 units equals 7.77 kW DC.
- Premium 430 W panels, 18 units equals 7.74 kW DC, slightly better aesthetics and fewer units to install.
Both exceed the 4.8 to 5.2 kW DC first pass. Why That is because the roof easily accommodates a larger array, and time-of-use with weak export makes west facing modules attractive to boost evening shoulder production. The designer proposes a split south west layout totaling around 7.7 kW DC to improve self consumption during late afternoon.
Step C. Inverter selection and DC AC ratio
Choose a 6 kWac string inverter with two MPPTs, one for south and one for west strings. DC AC ratio equals about 1.29. Modeling shows limited clipping in spring but improved annual kWh per dollar compared to a 7.6 kWac inverter. Microinverters are evaluated but add cost without a shade problem to solve.
Step D. Production and bill impact
Energy modeling with orientation and shading indicates about 11,000 kWh per year produced. Because export is compensated poorly mid day, the homeowner shifts dishwasher and laundry to mid afternoon and sets the HVAC to pre cool. Self consumption rises to 65 percent. The remaining 35 percent is exported, still delivering savings. The result is an 82 percent bill reduction, a payback of around seven years with incentives, and high resilience to tariff changes.
Even though the array is larger than the first pass, it is better aligned with the tariff and roof reality. This is a practical example of how to determine optimal photovoltaic panel power by integrating resource, load profile, and economics instead of chasing a bare kilowatt target.
Common pitfalls and how to avoid them
- Using only annual kWh: Ignoring hourly and seasonal patterns leads to arrays that export when rates are low and leave you buying during peaks.
- Forgetting temperature effects: Hot roofs lower output. Include temperature coefficient and realistic PR, especially in warm climates.
- Oversizing for weak export rates: If export compensation is small, target self consumption first or add storage rather than pushing pure annual offset.
- Underestimating shading: Model obstructions precisely. One vent casting shade at noon can reduce string output disproportionately without module level electronics.
- Ignoring future loads: Plan for an EV or electrified heating. A small amount of headroom can avoid costly rework.
- Misaligned inverter: A DC AC ratio that is too high or too low reduces lifetime value. Simulate clipping and part load efficiency.
- Skipping rate modeling: TOU, demand charges, and export rules can swing the ideal size by 20 percent or more.
Secondary considerations that sharpen your design
- Soiling and maintenance: Dusty or maritime environments may justify a slightly larger array or planned cleaning to maintain yield.
- Snow and tilt: Steeper tilt can shed snow and increase winter yield at the cost of summer peak. Balance for your climate.
- Module bifaciality: On ground mounts or light colored roofs, bifacial panels can add rear side gain. Model conservatively.
- Rapid shutdown and code: Module level electronics may be required by code, and they influence cost and performance trade offs.
- Curtailment and export caps: Some utilities cap export power. In those cases, a higher DC AC ratio plus storage may beat more AC.
Mini FAQ
How often should I use the exact phrase for my research
You only need to ask yourself how to determine optimal photovoltaic panel power a few times during the process. Focus instead on the inputs that drive the answer: your load, solar resource, losses, tariffs, and layout.
Is 100 percent offset always the right target
No. Under modern net metering with low export value, a slightly smaller array that maximizes self use can produce higher returns than chasing full annual offset.
What DC AC ratio should I pick
Typical ranges are 1.1 to 1.4. Use location specific modeling to see where marginal clipping flattens the value curve.
Do higher efficiency panels pay off
They pay off when roof space is the constraint or when labor and soft costs dominate. If space is ample, moderate efficiency panels often deliver lower cost per kWh.
How do batteries change the right size
Storage increases the value of mid day production by shifting it into evening peaks. With batteries, an array sized to reliably fill storage can be more profitable than a larger array that often exports at low rates.
A concise checklist to get your size right
- Gather 12 to 24 months of bills and, if possible, hourly smart meter data.
- Map your tariff including TOU windows, demand charges, and export rules.
- Set a clear target for offset, payback, and backup priorities.
- Obtain site specific irradiance or peak sun hours and estimate performance ratio.
- Measure roof planes, note obstructions, and confirm structural and electrical constraints.
- Pick module options and draft layouts that maximize roof utilization where it matters.
- Size the inverter and test DC AC ratios for clipping and efficiency.
- Model with and without battery storage if tariffs favor load shifting.
- Run financials including incentives, degradation, O and M, and replacement cycles.
- Stress test for future loads, weather variance, and tariff changes.
Work through this list, and you will naturally uncover how to determine optimal photovoltaic panel power for your situation.
Putting it all together
Right sizing is not about memorizing a single formula. It is about tracing a clean line from your goals and load profile to the physical and financial shape of your solar system. You begin with consumption, adjust for local sun and losses, fit the array to your site, and fine tune with inverter pairing and tariffs. Add storage if it meaningfully raises value. Then validate with cash flow.
By following this approach, you will answer the question of how to determine optimal photovoltaic panel power with confidence. You will buy exactly the watts that deliver the most resilience and return, and avoid the trap of both underbuilding and overspending.
Advanced pointers for pros and power users
- Performance ratio decomposition: Break PR into modeled losses for temperature, mismatch, wiring, inverter, soiling, shading, and availability. This clarifies where design changes yield the most improvement.
- Hourly simulation: Use hourly or subhourly irradiance and temperature data to capture TOU value, clipping, and shade dynamics rather than relying on annual averages.
- Rate aware optimization: Build a value of energy curve by hour. Size toward hours with the highest avoided cost, not just kWh.
- Curtailment strategy: Where export caps exist, consider DC oversizing with battery absorption to convert otherwise curtailed energy into evening value.
- Degradation and warranty stacking: Align inverter lifetime, battery cycles, and panel degradation in the financial pro forma to avoid hidden cliff years.
Conclusion
There is a method to the magic. Start with your energy profile and your goals. Ground your design in local solar resource and real world losses. Respect site and code realities. Pair DC and AC power intelligently. Model economics under your tariff, consider storage, and stress test the future. If you follow these steps, you will discover that learning how to determine optimal photovoltaic panel power is both rigorous and rewarding, and you will land on a solar design that fits your life for decades.