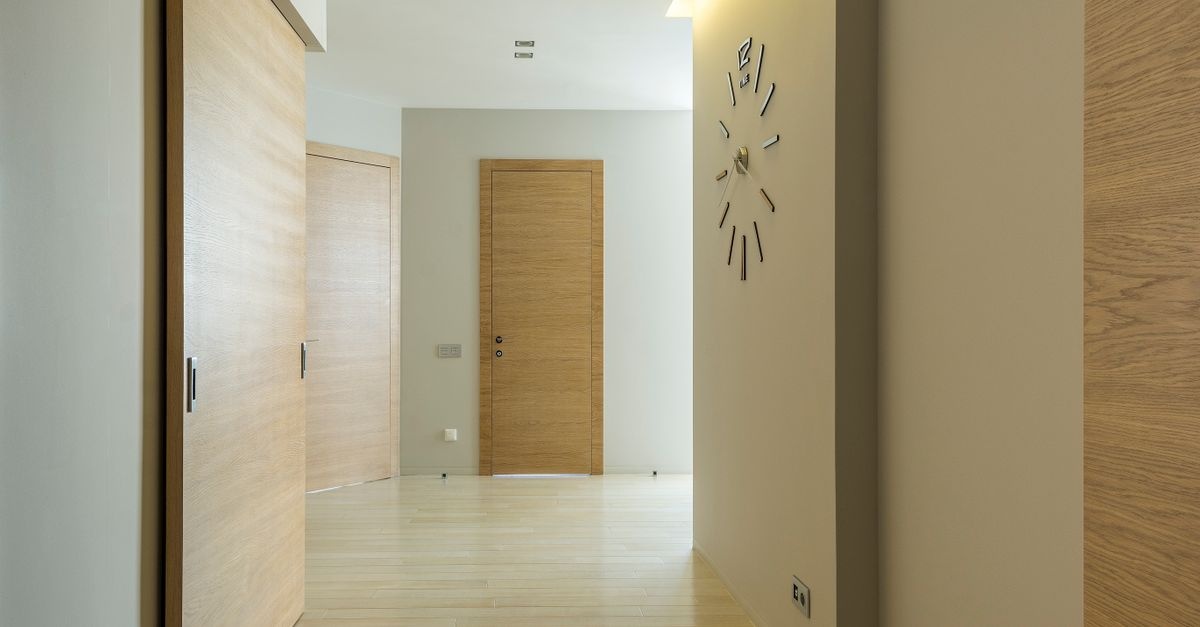
Your hallway is the runway of your home—narrow, busy, and unforgiving of surface flaws. If yours has dips, humps, or a slope that throws off door thresholds and finished flooring, this comprehensive DIY guide shows you exactly how to achieve a flat, durable base with self‑leveling underlayment. We’ll cover planning, tools, subfloor prep, mixing, pouring, and curing, with tips tailored to long, narrow corridors and tricky transitions. If you’ve wondered How to pour a self‑leveling floor in a hallway without waves, cold joints, or pinholes, you’re in the right place.
What Is a Self‑Leveling Floor, and Why It Matters in Hallways
A self‑leveling floor—more accurately, self‑leveling underlayment (SLU) or self‑leveling compound—is a cementitious or gypsum‑based product that flows to create a flat, smooth, and load‑bearing surface. It’s not a final wear layer (unless explicitly specified); instead, it prepares the subfloor for finishes like tile, engineered wood, laminate, and luxury vinyl plank (LVP).
Hallways amplify small imperfections because they are long sightlines with high traffic. A 3 mm ridge can telegraph through thin finishes, cause lippage in tile, or create hollow spots under click‑lock flooring. A carefully poured SLU corrects unevenness, reduces floor squeaks by filling voids, improves adhesion, and simplifies transitions to adjacent rooms.
When Your Hallway Needs Leveling
- Visible dips or crowns you feel underfoot or see with a straightedge.
- Door binding or inconsistent gap under doors across the corridor.
- Tile lippage or planks rocking on highs and lows.
- Finish failures like cracked grout, popped planks, or adhesive oozing unevenly.
- Water pooling after mopping—telltale of low spots.
Self‑leveling underlayment brings the subfloor into flatness tolerance so your finish materials perform as intended.
Plan First: Hallway Geometry, Tolerances, and Moisture
Before you learn the nuts and bolts of how to pour a self‑leveling floor in a hallway, nail the fundamentals.
Check Flatness and Slope
- Straightedge method: Place a 6–10 ft straightedge along and across the hall. Mark all gaps greater than 1/8 in (3 mm) or peaks higher than 1/8 in in 10 ft (typical tile spec) and 3/16 in in 10 ft for resilient flooring.
- Laser or rotary level: Shoot elevations every 12–24 in along the corridor to map highs/lows. Note total rise/fall—SLU can correct flatness; correcting significant slope may require additional carpentry or a ramping plan.
Assess Moisture
- Concrete: Use ASTM F2170 (in‑situ RH) or F1869 (MVER) if installing moisture‑sensitive finishes. Many SLUs allow up to 85–95% RH with the right primer; check the data sheet.
- Wood subfloors: Verify 7–12% MC and that the space is conditioned; stabilize HVAC 48 hours before and after the pour.
Define Finished Floor Height
Hallways tie several rooms together. Decide target elevation relative to adjacent floors, stair nosings, and thresholds. Map the thickness per lift allowed by your SLU (e.g., 1/8–1 in neat; more with aggregate). Plan damming and transitions accordingly.
Tools and Materials You’ll Need
Gather everything before you start; once mixing begins, the clock is ticking.
- Self‑leveling underlayment (cement‑based for most residential hallways)
- Primer recommended by the SLU manufacturer
- Mixing pails (at least two 5‑gal) and a high‑torque drill with a paddle
- Gauge rake (adjustable) and spiked roller
- Margin trowel, smoother, and flat trowel
- Spiked shoes for walking on wet SLU
- Damming materials: foam sill sealer, weatherstrip tape, caulk, and duct tape
- Crack repair (epoxy or polymer‑modified patch) and filler for voids
- Vacuum with HEPA filter, broom, scraper, and grinder (with shroud)
- PPE: safety glasses, gloves, hearing protection, and a respirator suitable for dust
- Measuring pail for precise water dosing
Coverage tip: One 50 lb (22.7 kg) bag typically covers about 40–50 sq ft at 1/8 in (3 mm). Measure your hallway’s square footage and average fill depth to estimate the number of bags. Buy 10–15% extra to avoid running short mid‑pour.
Choosing the Right Self‑Leveler for a Hallway
- Flow life and working time: Look for 10–20 minutes of flow to maintain a wet edge in longer corridors.
- Compressive strength: 3500–5000 psi is typical for residential; higher for heavy loads or rolling traffic.
- Thickness per lift: If you need more than 1 in, choose a deep‑fill product or add clean aggregate as specified.
- Substrate compatibility: Ensure suitability for concrete, plywood/OSB, or existing tile.
- Primer system: Use the matched primer(s) for porous/non‑porous substrates and for multi‑lift pours.
- Radiant heat compatibility: Many SLUs work over hydronic or electric radiant systems—confirm with the data sheet.
- Moisture tolerance: For concrete, confirm max RH and whether a moisture‑mitigating primer is needed.
- Low‑VOC formulation: Prefer low‑odor, low‑VOC products for enclosed hallways.
Subfloor Preparation: The Make‑or‑Break Step
Excellent prep yields an excellent pour. Skimp here, and you’ll fight fisheyes, debonding, or cracks.
General Cleaning and Soundness
- Remove contaminants: Scrape adhesives, paint, and sealers. Grind glossy surfaces. Vacuum thoroughly.
- Check for deflection: For wood subfloors, stiffen joists if needed; excessive flex can crack the leveler.
- Repair cracks: On concrete, route and fill structural cracks with epoxy; bridge non‑structural with SLU as directed.
- Fill voids and holes: Patch larger gaps so the leveler doesn’t disappear into cavities.
Substrate‑Specific Prep
- Concrete: Must be cured, sound, and free of laitance. Shot‑blast or grind if dense or contaminated. Prime per label.
- Plywood/OSB: Screw down squeaks; add underlayment grade plywood if needed. Tape seams where leakage is possible. Use a wood‑rated primer.
- Existing tile/stone: Degrease, abrade or grind for tooth, vacuum, and prime with non‑porous primer.
Edge Damming and Leakage Control
- Perimeter isolation: Apply foam sill sealer along walls to allow slight movement and create a clean edge.
- Doorways and vents: Tape or foam dam across thresholds, floor registers, and stair openings.
- Gaps: Seal under baseboards, at wall penetrations, and subfloor seams where leakage could occur.
Priming
- Use the manufacturer’s primer: It prevents pinholing, promotes bond, and equalizes absorption.
- Apply evenly: Roll or brush. Avoid puddles. On porous substrates, a second coat may be required.
- Dry time: Respect the recoat and overlay windows. Don’t pour over wet primer unless the data sheet instructs.
Door Casings, Thresholds, and Transitions
Hallways knit multiple spaces together. Think through the finished height and how the leveler meets adjacent rooms.
- Undercut casings: Use a flush‑cut saw so the new floor and SLU slide under for a clean look.
- Plan ramps: Where heights differ, design a ramp or use a tapered patch to avoid trip hazards.
- Transition profiles: Select reducers/T‑molds compatible with your final flooring thickness after leveling.
- Door clearance: Confirm that doors still swing freely after the pour and finish installation.
Mixing: Consistency and Timing Are Everything
Perfect mixing is central to success when learning how to pour a self‑leveling floor in a hallway. Consistency batch‑to‑batch keeps the flow uniform so you don’t create ridges or cold joints.
- Water ratio: Measure precisely per bag—never eyeball. Too much water weakens strength and causes segregation.
- Two‑bucket leapfrog: Stage at least two mixing pails. While one is being poured, the next is mixing.
- Mix time: Typically 2–3 minutes with a high‑torque drill and paddle, scraping sides and bottom. Some products require a brief slake; follow the label.
- Temperature: Use cool water in warm conditions to preserve working time. Ideal ambient: 50–77°F (10–25°C).
- Clean tools: Rinse paddles and buckets before the next batch. Hardened bits seed lumps.
Step‑by‑Step: Pouring a Self‑Leveling Floor in a Hallway
Here’s a field‑tested sequence for a smooth, continuous pour that avoids trapped ridges and cold joints.
1) Stage and Rehearse
- Assign roles: Mixer, carrier, placer/finisher. For very short halls, two people can manage; longer halls benefit from a three‑person team.
- Set the path: Start at the far end and work toward your exit. Clear obstacles and protect adjacent finished floors.
- Dry‑run tools: Adjust the gauge rake height to the target depth. Place spiked roller and trowels within reach.
2) Establish Reference
- Mark levels: Snap or laser a control line at the planned finished underlayment height along the hallway walls.
- Depth planning: If correcting a crown, consider feathering thinner at the edges and thicker in the low field to avoid excessive build‑up.
3) Begin the Pour
- Prime check: Ensure primer is within its open time window.
- First batch: Pour in the far corner, allowing material to spread naturally.
- Gauge rake: Pull the rake gently to guide thickness, moving with the corridor’s length. Keep a light touch; allow the compound to flow.
4) Maintain a Wet Edge
- Overlapping pours: Add the next batch while the previous is still fluid. Avoid letting edges crust over.
- Feathering: Use a smoother or flat trowel at perimeters and around obstacles to blend.
5) De‑air With a Spiked Roller
- Timing: Roll within the working time, typically 5–10 minutes after placement. Make two passes at 90° if space allows.
- Footwear: Wear spiked shoes to avoid leaving tracks.
- Avoid overworking: Too much rolling can bring water to the surface and dull the finish.
6) Exit Cleanly
- Final pull: Use the smoother to erase last rake tracks near your exit.
- Remove drips: Wipe splashes from walls and trim immediately.
Strategy for Narrow Hallways
Narrow corridors can channel flow too quickly, creating a “river” with higher edges.
- Pour in short lanes: Alternate left‑center‑right ribbons so flow equalizes without building edge berms.
- Limit rake aggression: Gentle guidance prevents washboarding in tight spaces.
- Damming at side rooms: If there are door openings, dam them so material doesn’t escape or create shallow eddies.
Strategy for Long Hallways
- Batch sequencing: Pre‑stage bags and water along the hallway. Keep a strict cadence so overlaps stay wet.
- Control the joint: If a cold joint is unavoidable, end at a doorway dam with a slight bevel. Prime the edge per product instructions and resume as soon as possible.
- Thermal control: In warm homes, lower room temperature ahead of time to extend working time.
Curing and Aftercare
- Initial set: Most SLUs are walkable in 2–4 hours; avoid heavy traffic for 24 hours or per datasheet.
- Ambient conditions: Maintain stable temperature and humidity. Avoid direct drafts that can cause surface cracking.
- Surface inspection: Next day, scrape off minor nibs, then vacuum. If pinholes appear, apply a skim coat or primer plus a second thin pour as specified.
- Moisture and pH: Before moisture‑sensitive finishes, verify levels meet the finish manufacturer’s limits.
- Priming before finishes: Some adhesives require priming the SLU surface; check system requirements.
Troubleshooting: Common Issues and Fixes
- Ridges or trowel lines: Caused by moving tools too late or inconsistent batch flow. Lightly grind after cure; for deep ridges, skim or re‑level.
- Pinholes/fisheyes: Often due to trapped air or poor priming. De‑air properly and ensure primer is compatible and fully dry; skim coat if needed.
- Cracking: From substrate movement, over‑watering, or rapid drying. Verify deflection, mix correctly, and condition the space.
- Debonding: Usually a priming failure or contamination. Mechanically remove loose areas, reprime, and re‑pour.
- Segregation/bleed water: Over‑watering or overworking. Mix precisely and minimize excessive rolling.
Budget and Timeline
- Material cost: SLU runs roughly $30–$55 per 50 lb bag; primer $20–$40 per gallon equivalent. Expect $1.50–$3.50 per sq ft at modest depths.
- Tooling: Renting a high‑torque mixer and spiked roller/gauge rake may cost $30–$60/day each.
- Time: Prep (half day to 1 day), priming (1–2 hours plus dry time), pour (30–90 minutes), walk‑on (2–4 hours), finish install (next day to 72 hours depending on product).
Safety Essentials
- Dust control: Wear a respirator during grinding and mixing; use HEPA vacuums and dust shrouds.
- Skin and eye protection: Cement is caustic; use gloves and goggles.
- Lifting technique: 50 lb bags add up. Team lift or use a cart to avoid injury in tight corridors.
- Ventilation: Ensure adequate airflow, especially when using primer and adhesives.
Eco and Comfort Considerations
- Low‑VOC systems: Choose low‑odor primers and SLUs for indoor air quality.
- Acoustic performance: Leveling improves contact and can reduce hollow sounds under rigid flooring. Consider an underlayment designed for sound attenuation over the cured SLU.
- Thermal mass: Over radiant heat, SLU can enhance heat distribution. Follow maximum thickness guidelines for efficient response.
Frequently Asked Questions
Do I need to remove old adhesive before I pour?
Yes. Remove as much as possible mechanically, then prime with the manufacturer‑approved primer for non‑porous or contaminated surfaces. Adhesive residues can inhibit bond.
Can I pour over plywood in a hallway?
Yes, if the product is rated for wood. Secure the subfloor, limit deflection, tape seams, and use the correct wood primer. Some systems require metal lath—check the data sheet.
How thick can I go in one pass?
Most standard SLUs allow 1/8–1 in neat. For deeper fills, use a deep‑fill SLU or add aggregate per instructions, or plan multiple lifts with re‑priming.
When can I install tile or LVP?
Often after 16–24 hours for many products, but always follow the specific cure times and moisture/pH limits for your SLU and adhesive.
Do I have to use a spiked roller?
It’s highly recommended. Rolling releases trapped air and blends overlaps, especially important in long hallways with many batch interfaces.
What if my hallway slopes significantly?
SLU corrects flatness, not structural slope. For pronounced slopes, consult a carpenter or engineer, or design a controlled ramp that meets code and safety needs.
Will the leveler crack under heavy traffic?
Properly mixed and applied SLU with adequate compressive strength and a compatible finish is durable. Cracks usually relate to substrate movement or improper installation.
Can I do this alone?
Short hallways may be DIY‑solo if you pre‑stage everything. For long corridors, a helper ensures continuous flow and better results.
Printable Hallway Self‑Leveling Checklist
- Map highs/lows with a straightedge and laser; plan target height.
- Verify moisture (RH/MVER for concrete; MC for wood) and condition HVAC.
- Secure subfloor, repair cracks/voids, and grind or abrade as needed.
- Vacuum thoroughly; seal gaps and dam doorways/vents.
- Select compatible SLU and primer; confirm thickness per lift.
- Undercut door casings and plan transitions.
- Prime per data sheet; allow proper dry time.
- Stage tools, water, and bags; assign roles.
- Mix with exact water ratios; maintain batch consistency.
- Pour from far end, guide with gauge rake, maintain a wet edge.
- Spiked‑roll within working time; exit cleanly.
- Protect during cure; scrape nibs and re‑prime if required.
- Verify moisture/pH; proceed with finish installation.
Putting It All Together
Mastering how to pour a self‑leveling floor in a hallway comes down to meticulous prep, disciplined mixing, and a steady pouring cadence. Respect the primer and product data sheet, keep overlaps wet, and let the compound flow rather than forcing it. In return, you get a hallway that feels solid underfoot, looks dead‑flat down the sightline, and provides the perfect foundation for any finish.
Ready to level up your hallway? Gather your materials, prime with purpose, and pour with confidence—the flawless base your home deserves is just one smart, well‑planned session away.