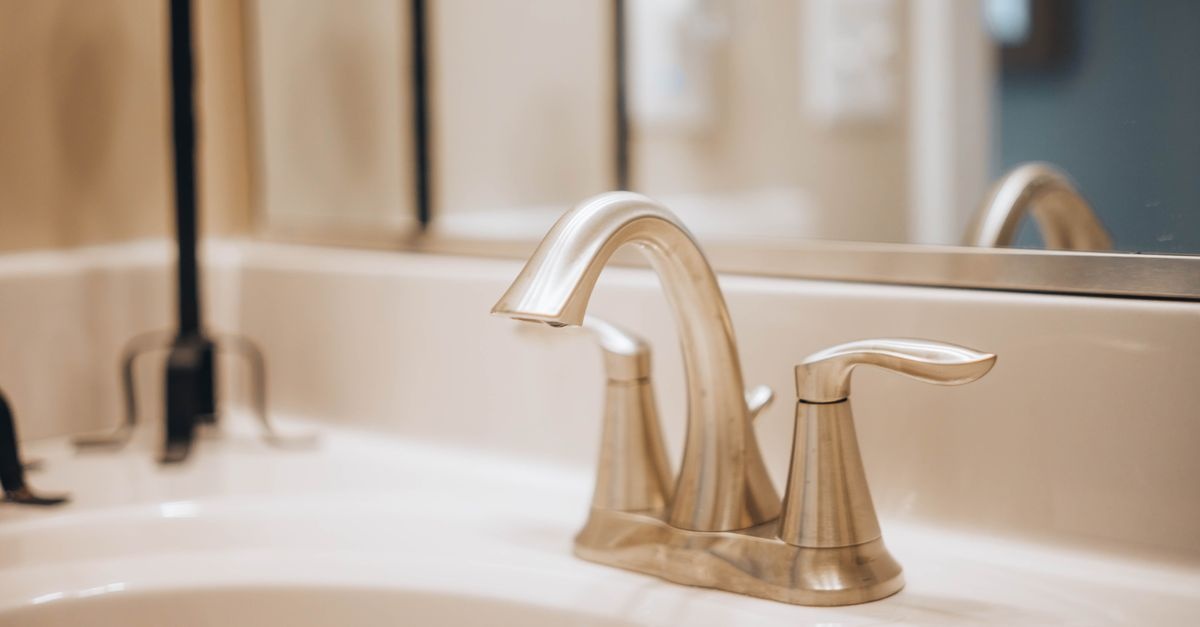
Upgrading the plumbing fixtures in your home does not have to involve noise, dust, or a mess of shattered tile. With the right strategy, you can refresh faucets, showers, toilets, and valves while the tile, drywall, and slab remain perfectly intact. This guide walks you through practical, proven techniques to deliver a sparkling, modern look using surface-accessible parts, universal trim kits, push-fit connectors, and smart cover plates. The result is a cleaner, calmer project you can complete in a weekend without chisels or chaos.
Why No-Chisel Upgrades Matter More Than Ever
Bathrooms and kitchens are the most renovated spaces in a home, and they also contain the highest concentration of finished surfaces you would prefer not to disturb. Tilework, stone, solid surfaces, and waterproof membranes all add risk, time, and cost when demolition enters the picture. A no-demolition approach keeps those investments safe while giving you the freedom to modernize the hardware you touch every day: faucets, shower trim, showerheads, tub spouts, supply valves, and even toilets.
Beyond aesthetics, these upgrades can boost water efficiency, improve accessibility and safety, and reduce maintenance headaches. Swapping in quarter-turn shutoff valves, braided stainless supply lines, and WaterSense-rated fixtures makes daily living easier and greener without opening a single wall.
Quick Answer: How to replace plumbing fixtures without chiseling
The fastest route is to work with what is already in your walls and counters. Keep existing rough-in valves and supply stubs, then refresh only the visible, serviceable parts. Use trim kits compatible with your rough-in valve, push-fit or compression connectors on copper or CPVC, flexible braided supplies, and escutcheons or remodel plates to cover old holes. For showers, swap the cartridge and trim matched to your valve brand, replace the shower arm and head at the drop ear, and use a diverter spout or shower arm diverter for hand showers. For sinks, choose deck plates to adapt hole counts. For toilets, reuse the flange and anchor points, install a new wax or waxless seal, and connect a new supply line. All of this is done from the finished side with standard tools.
If you are searching for practical steps on How to replace plumbing fixtures without chiseling, this guide details everything from planning to final leak checks.
Plan First: The Blueprint for No-Demolition Success
Great results come from thoughtful planning and a few targeted measurements. Before you click add to cart, confirm compatibility and make a short list of parts and tools.
Identify What You Have
- Faucet hole count and spacing: Bathroom sinks commonly use single-hole, centerset at 4 in, or widespread at 8 in and up. Kitchen sinks often have 1 to 4 holes. Your new faucet can include a deck plate to adapt more or fewer holes without drilling.
- Shower rough-in valve brand and model: Pop off the trim cap and look for markings on the cartridge or valve body. Brand matters for trim compatibility. Common systems include Delta MultiChoice, Moen Posi-Temp, and Kohler Rite-Temp.
- Supply stub type: Copper, PEX, CPVC, or galvanized. This determines whether you use compression, push-fit adapters, or specialized fittings.
- Stop valves: If your under-sink or toilet shutoffs are old multi-turn types, upgrade to quarter-turn compression or push-fit stops for reliability.
- Existing escutcheons and wall plates: Note their size to ensure new ones cover the same or larger footprints for a clean finish.
Measurements That Matter
- Shower valve stem depth: Verify the new trim’s allowable depth range. Most trim kits accommodate a range of finished wall thicknesses.
- Tub spout connection: Is it threaded or slip-on? Measure the pipe nipple length from the wall to the spout face requirement listed by the manufacturer.
- Toilet rough-in: Commonly 12 in from the finished wall to flange center. If your toilet is closer to the wall, choose a compact or 10 in rough-in model; this still avoids tile work.
- Counter and sink deck thickness: Ensure your faucet’s max deck thickness rating is sufficient for stone or composite tops.
- Supply line lengths and thread sizes: Most faucet and toilet supplies use 3/8 in compression to fixture and 1/2 in or 3/8 in at the stop. Confirm before buying.
Tools and Materials for No-Chisel Plumbing
- Adjustable wrench and basin wrench for hard-to-reach faucet nuts
- Screwdrivers, Allen keys, and a small socket set
- PTFE thread tape and thread sealant paste for threaded joints
- Plumber’s putty or 100 percent silicone as specified by the fixture manufacturer
- Compression stops or push-fit stops for shutoff valve upgrades
- Braided stainless supply lines with integrated gaskets
- Escutcheons and remodel plates to cover old holes
- Replacement cartridges matched to your shower valve brand
- Non-marring plumber’s strap or cloth to protect finishes
- Flashlight and inspection mirror for tight spaces
- Bucket and towels for controlled draining
The Core Techniques That Eliminate Demolition
Four families of techniques carry you from old to new without disturbing tile or drywall.
1. Compression and Push-Fit Connections
Compression fittings seal with a brass ferrule compressed by a nut. They are reliable, serviceable, and ideal for shutoff valves and under-sink connections. Push-fit fittings snap onto copper, PEX, or CPVC with internal O-rings and a stainless grab ring. They install in seconds without soldering and are removable with a simple tool. Use push-fit adapters to transition from older copper stubs to new stops or supply lines, then add decorative escutcheons.
2. Flexible Supply Lines and Adapters
Braided stainless supply lines tolerate gentle bends and simplify alignment between stops and fixture inlets. They come with integrated gaskets, reducing the need for paste or tape at the fixture end. Choose the correct lengths and end types, and hand-tighten plus a small quarter-turn with a wrench to avoid over-torque.
3. Cover Plates, Escutcheons, and Remodel Plates
When hole patterns do not align, cover plates save the day. Deck plates convert multi-hole sinks to single-hole faucets. In showers, remodel plates can conceal the opening left behind when moving from two or three handles to a single-handle trim, while leaving tile untouched. On the wall, oversized escutcheons tidy up old paint lines or gaps around pipes.
4. The Right Sealants in the Right Places
- PTFE tape: Wrap clockwise on male threads 3 to 6 turns for tapered pipe thread (NPT) joints like shower arms. Do not use on compression threads that seal on the ferrule or gasket.
- Pipe thread sealant paste: Useful on larger NPT joints or where vibration occurs. Choose a potable-water-safe formula.
- Plumber’s putty vs silicone: Putty stays pliable and is ideal under many metal drain flanges on stone or stainless sinks; silicone is preferred for some plastic components and where the manufacturer specifies it. Avoid putty on certain composite or plastic sinks that can stain; use silicone instead.
Step-by-Step Upgrades Without Opening Walls
The following walkthroughs cover the most common fixtures you can refresh entirely from the finished side. These methods are friendly to condos, apartments, and older homes where preserving finishes is the priority.
Bathroom Sink Faucet Swap
Goal: Replace a dated faucet with a modern single-handle or widespread model without changing the sink or counter.
- Shut off water at the under-sink stops. Open the faucet to relieve pressure.
- Disconnect supply lines from the stops and faucet inlets. Place a towel and pan to catch residual water.
- Loosen mounting hardware with a basin wrench. Remove the old faucet and clean the deck.
- Adapt hole count with a deck plate if going from 3 holes to 1. Conversely, choose a widespread model if the sink supports 8 in spacing.
- Install the new faucet per the instructions, placing gaskets or putty where specified. Hand-tighten nuts, then snug with a wrench without overtightening.
- Attach new braided supplies, ensuring correct hot left and cold right alignment.
- Turn on stops, check for leaks, and gently retighten if needed. Do not over-torque gasketed connections.
- Update the drain with the included pop-up assembly. Many modern drains use a gasket and hand-tightened nut, sealing with putty or silicone depending on materials.
Pro tip: If your sink is thin metal, add stabilizing washers beneath to prevent flexing when you operate the handle.
Kitchen Faucet Refresh
Goal: Upgrade to a pull-down sprayer faucet or touchless unit without modifying the sink.
- Shut off water and disconnect supplies as above. Unplug power if replacing a touchless faucet.
- Remove the old faucet using a basin wrench. Clean the deck and check hole count.
- Set the deck plate if converting from 3 holes to a single-hole look. Consider using a soap dispenser or air gap in spare holes.
- Install the new faucet, route the pull-down hose, and attach the counterweight at the marked location for smooth retraction.
- Connect supplies, then power up batteries or AC adapter for touchless models.
- Flush the faucet by removing the aerator, running water to purge debris, then reinstalling the aerator.
Pro tip: If you have low clearance at the back of the sink, choose a faucet with a forward-only rotating handle to avoid hitting the backsplash.
Shower Trim and Showerhead Upgrade Without Opening Tile
Goal: Modernize shower controls and spray performance without opening the wall.
- Identify the rough-in valve brand by removing the handle and trim. Note the cartridge shape and any markings.
- Purchase a compatible trim kit for your valve family. Many brands offer wide style ranges that fit the same internal valve platform.
- Shut off water to the bathroom. Open a lower faucet to relieve pressure.
- Replace the cartridge if included. This refreshes internal seals and improves mixing. Lubricate O-rings as instructed.
- Install new trim: attach the backing plate, handle, and temperature limit stop. Adjust the limit to prevent scalding, often around 120 F.
- Swap the shower arm and head: wrap PTFE tape on the male threads of the arm, screw into the drop ear, add the escutcheon, then thread on the new head with its included gasket.
Add a hand shower the no-chisel way using a shower arm diverter that feeds both the fixed head and a handheld on a slide bar. Choose an adhesive or non-invasive mount or use anchors in grout lines to avoid tile damage. Alternatively, install a retrofit shower panel that connects to the existing arm and offers multiple sprays without altering plumbing behind the wall.
Converting two or three handles to a single-handle look without demolition is also possible: use a universal-style remodel plate plus a compatible valve family trim designed for conversion kits. This covers extra holes and refreshes the control layout cleanly.
Tub Spout and Tub Drain Touch-ups
Goal: Stop leaks and modernize trim at the tub without exposing studs.
- Tub spout: Determine if you have a slip-on spout (secured with a set screw) or a threaded spout. For threaded models, measure the nipple length required by the new spout. For slip-on, ensure a smooth copper stub with the correct outer diameter. Install a new diverter spout to improve shower performance and prevent dribble from the tub when the shower is on.
- Overflow and drain trim: Replace the overflow faceplate and stopper mechanism from the tub side. For the drain, use a drain key tool to remove the old strainer and install a new one with plumber’s putty or silicone, depending on the tub material.
Toilet and Bidet Seat Upgrades
Goal: Improve flushing reliability, water efficiency, and comfort without moving the flange or tile.
- Turn off the stop, flush to drain most water, and sponge out the remainder from the bowl and tank.
- Disconnect the supply line and remove the tank-to-bowl and floor bolts as applicable.
- Lift the toilet straight up. Scrape off the old wax and inspect the flange ring. If it is below floor level, use a spacer ring or a waxless seal sized for the gap.
- Set the new toilet on the new seal, align with closet bolts, and torque nuts evenly to avoid cracking the base. Caulk around the base, leaving a small gap at the back to detect hidden leaks.
- Install a new quarter-turn stop if the old valve is sticky, then connect a braided supply line with integrated gasket.
Bidet seats install from the top using the existing seat holes, plus a T-adapter at the toilet tank fill valve. Many models include a quick-release plate and do not require any tile or wall modification.
Inside the tank, a simple new fill valve and flapper can resolve weak flushes and phantom refills. These parts swap out with hand tools only.
Laundry and Utility Room Improvements
- Replace rubber washer hoses with braided stainless to prevent bursting.
- Add water hammer arrestors at the laundry valve to quiet banging pipes.
- Upgrade to quarter-turn valves using compression or push-fit connections on exposed copper or CPVC stubs.
Outdoor Spigot Quick Wins
Exterior hose bibbs that drip can often be replaced from outside when they thread into a drop ear on the other side of the wall. Apply PTFE tape and thread in a like-for-like part. If an interior frost-free conversion is desired, verify you have inside access; otherwise, add a vacuum breaker and new valve stem packing. All of these steps are handled without chiseling exterior finishes.
Working With Old Houses and Mixed Materials
Legacy plumbing introduces unique considerations, but you can still upgrade without demolition.
- Galvanized to copper transitions: Use dielectric unions or specialty adapters to prevent galvanic corrosion where metals meet.
- Fragile tile or stone: Always choose oversized escutcheons and remodel plates to avoid tight tolerances. Never pry against tile edges.
- Low-pressure or well water: Select aerators and showerheads designed to perform across a broader pressure range.
- Aging stop valves: If stops will not fully close, plan to replace them using compression or push-fit solutions from the finished side. Shut off the main, then swap in quarter-turn stops and fresh escutcheons.
Finishes, Efficiency, and Everyday Usability
When you modernize hardware, match the finish and features to your lifestyle while scoring big water savings.
Choosing Finishes That Last
- PVD finishes like brushed nickel or matte black resist scratching and fingerprints better than older coatings.
- Unified finish palette across faucets, shower trim, and accessories creates a cohesive look.
- Easy-clean designs with minimal crevices reduce mineral buildup.
WaterSense and Performance
- Bathroom faucets at 1.2 gpm deliver great handwashing flow with less waste.
- Showerheads at 1.75 to 2.0 gpm with pressure-compensating tech give satisfying showers while saving water.
- Toilets with 1.28 gpf or dual-flush designs maintain bowl rinse while trimming consumption.
Accessibility and Comfort
- Lever handles and single-handle mixers are easier for all ages to use.
- Hand showers on slide bars accommodate users of different heights and make cleaning the shower faster.
- Bidet seats improve hygiene and can reduce paper use.
Safety, Codes, and Best Practices
- Anti-scald: Adjust the shower handle limit stop to cap hot water delivery around 120 F. Many valve trims include a simple rotational limiter.
- Vacuum breakers and backflow prevention: Use at exterior hose bibbs and hand shower hoses if not integrated.
- Dishwasher air gap or high loop: Keep dishwashers protected from backflow without wall changes.
- Electrical protection: GFCI for disposal or instant hot units under sinks where applicable.
- Local codes: Always check city or HOA rules. Most trim and fixture swaps do not require permits, but valve replacements inside walls do.
Troubleshooting Common Issues Without Opening Walls
Small Leaks at Compression or Push-Fit Joints
- Compression: Tighten the nut an eighth to a quarter turn. Do not use tape on compression threads; the seal is at the ferrule.
- Push-fit: Remove the fitting with the release tool, inspect the pipe end for burrs, cut square, deburr, and re-seat fully to the depth mark.
Low Flow or Uneven Temperature
- Clogged aerators or showerhead screens: Remove and rinse debris.
- Cartridge wear: Replace the shower cartridge with the brand-matched part. Lubricate O-rings with silicone grease.
- Supply valve not fully open: Ensure stops are completely open after installation.
Noisy or Banging Pipes
- Water hammer: Add hammer arrestors at quick-closing valves like washer and dishwasher lines.
- High pressure: Check static pressure. If above 80 psi, a pressure-reducing valve at the main line is recommended.
Tub Spout Diverter Leaks into the Tub During Shower
- Replace the tub spout with a high-quality diverter model designed for your pipe type and length. An ill-fitted spout will leak and rob the shower of pressure.
Budgeting, Timing, and Shopping Smart
- Time: Most faucet swaps take 60 to 120 minutes; shower trim takes 60 to 90 minutes; toilet replacement takes 90 to 150 minutes.
- Costs: Quality bathroom faucets range widely but mid-range models deliver excellent value. Trim kits are often more affordable than replacing valves. Braided lines, stops, and sealants are modest add-ons that pay dividends in reliability.
- Bundle buys: Consider combo packs that include supply lines, drain assemblies, or shower arms to ensure finish and fit consistency.
Case-by-Case Strategies That Keep Tile Intact
- Converting widespread to single-hole on a counter: Use a faucet with a wide deck plate that spans former holes, or replace the sink top rather than drilling or patching stone.
- Hiding oversized wall openings around pipes: Choose large, deep escutcheons or trim rings in a matching finish to create a polished look.
- Adding a hand shower to a tub-only valve: Use a tub spout with an integrated diverter port to feed the handheld without touching the in-wall valve.
Frequently Asked Questions
Can I install a single-handle shower trim on any existing valve?
Not universally. Trim must match the valve platform. Identify your valve brand and series, then select trims designed for that platform. Many brands maintain backward compatibility across years for this reason.
Will push-fit fittings last as long as soldered joints?
When used within ratings, on cleanly cut pipe, and not concealed where disallowed by code, push-fit connectors are durable and code-accepted in many regions. For permanent concealed work, confirm local code and manufacturer guidance. For accessible zones like under sinks, they are convenient and serviceable.
Do I need plumber’s putty or silicone for drains?
Follow the fixture instructions. Metal flanges on stainless or stone often use putty, while plastic parts frequently specify silicone. Avoid putty on materials that could stain or deform.
How do I avoid scratching new finishes during install?
Use a cloth or painter’s tape over wrench jaws. Tighten only as much as needed for a seal. Many connections rely on gaskets; overtightening can crush them.
Is there a way to install grab bars without drilling tile?
Some adhesive or surface-mount bars exist, but for true load-bearing support, drilling into studs with appropriate anchors is safest. For non-drilling convenience rails, verify the load rating and follow instructions exactly. Always prioritize safety.
Putting It All Together: No Chisels, No Chaos
You can modernize your kitchen and bath while keeping tile and walls pristine. Work with existing rough-in valves. Choose compatible trim kits and cartridges. Rely on compression or push-fit stops and braided supply lines for quick, clean hookups. Use deck plates, escutcheons, and remodel plates to reconcile old holes with new styles. These techniques bring you all the visual impact with none of the demolition headaches.
Whether you are a first-time DIYer or an experienced weekend remodeler, the steps above show exactly How to replace plumbing fixtures without chiseling using readily available parts and standard tools. Start with one faucet or shower, build confidence, then move room by room. Your home will look fresher, work better, and stay blissfully free of dust and debris.
Ready to begin Your cleanest upgrade yet is only a supply line, a trim kit, and a deck plate away.
Checklist Recap for Fast, No-Demolition Wins
- Measure hole counts, spreads, nipple lengths, and valve depths.
- Match shower trim to your valve brand and platform.
- Upgrade stops to quarter-turn compression or push-fit.
- Connect with braided supplies and appropriate adapters.
- Seal threads with PTFE or paste where needed, and use putty or silicone per instructions.
- Conceal mismatches with deck plates, escutcheons, and remodel plates.
- Test every joint, then retighten gently if required.
For homeowners who still wonder about the best approach to How to replace plumbing fixtures without chiseling, remember that planning and compatibility are everything. Choose proven no-chisel pathways, respect the details, and enjoy a high-impact transformation with zero demolition.