If you have ever stepped back from a newly tiled wall or floor only to notice wandering grout joints, drifting rows, or a backsplash that creeps out of level, you know the heartbreak of alignment errors. Tiles are unforgiving: a 1 mm mistake at the start often becomes glaring by the end. The good news? A compact, self-leveling laser transforms that fight into a smooth, repeatable process. It projects bright, unwavering references so every tile course follows the same path—no guesswork, no sagging guidelines, and far fewer do-overs.
This deep-dive explains how to choose the right laser level for tiling, how to plan and execute layouts with pro precision, and where a modest investment pays for itself in time and materials. Whether you are doing a bathroom floor, shower walls, or a herringbone backsplash, you will find step-by-step setups, advanced tricks, and troubleshooting tips that keep your installation dead straight.
Why Alignment Matters in Tile Installation
Tile installations exaggerate every deviation. A small error compounds as tiles stack and patterns repeat. The result can be misaligned corners, inconsistent joint widths, and cuts that feel obviously off-center. Precision matters for:
- Visual symmetry: Centered patterns, aligned grout joints, and balanced cut pieces around edges.
- Function: Level countertops or backsplashes prevent uneven transitions and trim gaps.
- Speed: A clear reference line means fewer course corrections and faster setting.
- Material savings: Cleaner cuts and fewer mistakes reduce tile waste.
Traditionally, installers used chalk lines, mason’s lines, and bubble levels. Those still work, but a self-leveling laser delivers an always-on, highly visible, and repeatable reference—especially helpful on walls, around corners, and across large rooms where a chalk line fades or shifts.
What Is a Laser Level and How Does It Work?
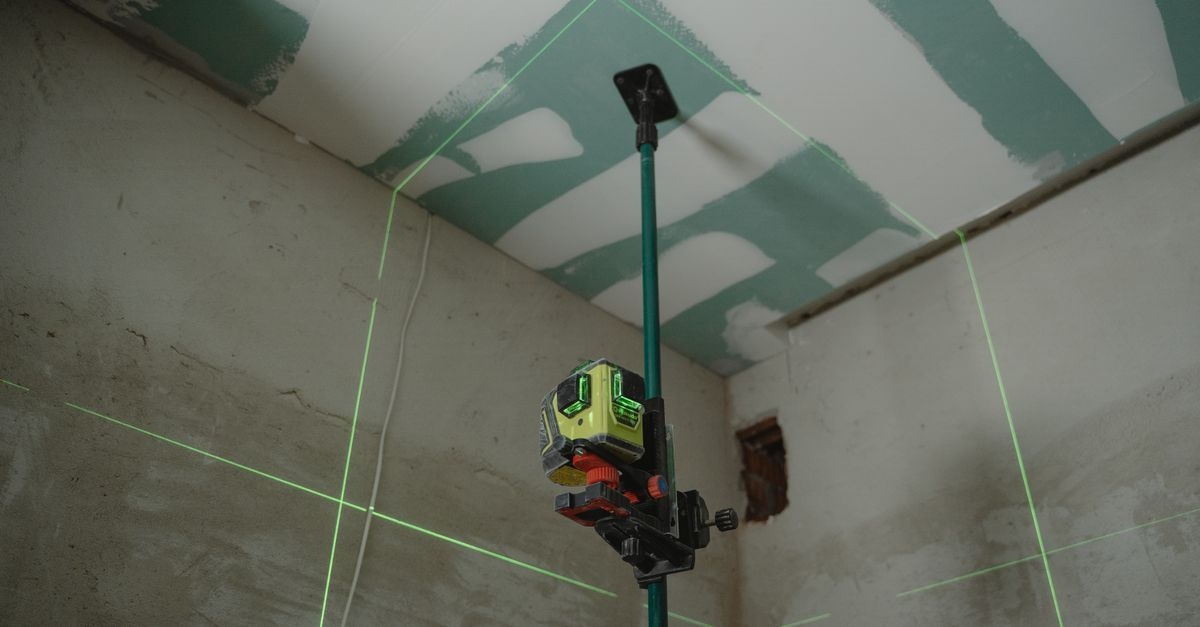
A laser level projects bright lines or points in a fixed plane. In tiling, most people use a cross-line laser (horizontal + vertical beam) or a 360-degree laser that wraps a line around the room. Inside, a pendulum or electronic gimbal self-levels the beam within a small range (commonly ±4 degrees). Once settled, the line represents a true level (horizontal) or plumb (vertical) reference relative to gravity.
Key elements to understand:
- Self-leveling: The tool automatically finds level/plumb; a flashing beam usually indicates it is out of range.
- Accuracy rating: Often stated as ±1/8 in at 30 ft (±3 mm at 10 m). Higher accuracy improves results in big rooms.
- Beam color: Green beams are more visible indoors than red (especially in bright rooms), though they may reduce battery life.
- IP rating: Dust/water resistance (e.g., IP54) matters on job sites with moisture and mortar dust.
- Mounting options: Magnetic brackets, tripods, poles, or suction mounts position lines exactly where you need them.
Types of Laser Levels for Tiling
Cross-Line Lasers
These project one horizontal and one vertical line that intersect at 90 degrees. Ideal for most wall work and backsplashes, they provide a plumb line for alignment and a level line to start courses. They are compact, affordable, and easy to set up at counter height.
360-Degree Line Lasers
These throw a continuous horizontal line around the room, plus one or two vertical planes. On a floor, a 360 laser lets you see the same level line at every wall simultaneously—excellent for controlling perimeter heights, balancing cuts, and moving quickly without re-positioning.
Dot Lasers
Dot lasers project points rather than lines. They are useful for transferring references from floor to ceiling (plumb points) but less convenient for actually running tile courses, where continuous lines shine.
Rotary Lasers
Overkill indoors for most tile jobs, rotary lasers are great for large, open spaces or outdoors with a receiver. If you also do patios or long runs, a rotary can pull double duty. Otherwise, a cross-line or 360 model is simpler.
Red vs. Green Beam
Green beam lasers are typically easier to see in brighter rooms and across longer distances. Red beam lasers are budget-friendly and perfectly fine for smaller, dimmer spaces. For tile work under kitchen lights or daylight streaming through windows, a green beam often saves eye strain and increases confidence.
Laser level–does it help with tile installation?
In a word: yes. A laser projects stable, precise references that remove ambiguity from setup and reduce error creep. It serves as the backbone of your layout—from the first ledger board on a backsplash to the perimeter lines that steer a large-format floor.
Measurable Benefits
- Speed: Instead of drawing, checking, and re-drawing pencil or chalk lines, you switch the laser on and start tiling. Expect meaningful time savings on every course.
- Accuracy: Perfectly level and plumb references catch issues early (like bowed walls or out-of-square corners) and keep grout joints true.
- Consistency: The same line is visible across the entire space, which means fewer cumulative alignment errors.
- Less waste: Fewer do-overs and cleaner layouts reduce extra cuts and broken tiles.
For many DIYers, those benefits collapse the learning curve and help deliver a finish that rivals professional tile installation—especially on complex patterns or when wrapping around corners.
Chalk Line vs. Laser Line
- Chalk line strengths: Inexpensive, fast for single straight references on floors.
- Laser strengths: Always-on, visible on walls, continues around corners, no dust, no wiping lines off finished surfaces.
- Best practice: Use both when helpful: snap a control line on the floor for permanent reference, and run the laser for live alignment as you set tile.
Plan Like a Pro: Layout With a Laser
Great tiling starts with planning. A laser helps you visualize centerlines, borders, and cuts before mixing any mortar.
Find Level and Plumb
Start by projecting the horizontal line at a practical height (e.g., the second course of wall tile if the first course sits on a ledger board). Then cast a vertical line to act as your plumb reference. On floors, you’ll also want to assess flatness with a straightedge; a laser shows level, but tiles need a flat substrate to avoid lippage.
- Check multiple walls and note deviations between the laser line and reference points (countertops, baseboards).
- Mark a benchmark line on painter’s tape if you’ll move the laser later.
Square the Room
Even a perfect level line won’t fix an out-of-square room. Use the 3-4-5 method (or 6-8-10) based on the Pythagorean theorem to check for square. You can also cross two laser vertical planes (or line plus a square) to test corners. If the room is out of square, plan your pattern to hide it—often by balancing cut sizes at opposing walls.
Establish Control Lines
Use the laser to create a network of control lines that guide your work:
- Centerlines: Run a vertical and horizontal line through the room or feature wall’s center. Shift the pattern so you avoid sliver cuts at edges.
- Perimeter lines: Project a level line around all walls (360 laser) to manage heights and trim transitions consistently.
- Ledger height: For wall tile above a countertop or tub, set a laser line where the first full visible course will start. A temporary ledger board just below this line keeps the first visible row perfectly straight.
Dry Layout and Joint Planning
With the laser on, dry-fit a row of tiles including spacers to preview grout joint spacing, corner terminations, and cuts. Adjust the starting point to balance cuts on both ends. Keep in mind:
- Grout joint width: Must be consistent and suit tile size/flatness (e.g., 1/16 in for rectified tiles, 1/8–3/16 in for pressed edges).
- Movement joints: Perimeter gaps and expansion joints (per industry guidelines) prevent tenting and cracking.
- Pattern repeats: For staggered or herringbone designs, pre-visualize where lines will fall at edges and around obstacles.
Step-by-Step: Laser Workflows for Common Tile Projects
1) Backsplash: Subway Tile Over a Countertop
Goal: Dead-level courses that align around corners and under cabinets.
- Assess and clean: Check the countertop for level. If it’s out, you must not follow the counter with your first course.
- Set a level control line: Project a horizontal line where the second course will sit. This line becomes the reference for a temporary ledger (straight 1x board) that supports the second course.
- Plumb reference: Project a vertical line at the center or at a visible edge to keep vertical joints aligned.
- Dry layout: Place tiles with spacers along the ledger to preview cuts at ends and under cabinets/outlets. Adjust to avoid tiny slivers.
- Set tiles: Apply mortar, set the second course on the ledger following the laser. Continue upward, checking that the horizontal line stays just kissing the top of each tile course.
- Fill the first course: After the upper set firms up, remove the ledger and cut the bottom row to fit the counter’s irregularities. This hides counter out-of-level beneath the bottom course.
- Wrap corners: If tiling around an inside corner, cut and continue the pattern on the adjacent wall. Use the vertical laser to keep the corner plumb and the pattern straight.
2) Shower Walls and Niches
Goal: Plumb walls, aligned liners, and perfect miters around openings.
- Check substrate: Ensure backer board is plumb and flat. Correct with shims or patching compound as needed.
- Establish a level line: Project a horizontal line for the first visible course and set a ledger board. Floors and pans are rarely perfectly level; let the bottom row be scribed later.
- Plumb lines: Cast vertical lines at key points: wall center, niche edges, and outside corners to guide trims.
- Tile to the laser: Keep edges kissing the beam. For miters at niches or edges, the laser helps visualize cut alignment before committing.
- Slope awareness: Niches and sills require a slight inward slope; use a separate small torpedo level for these while keeping adjacent wall lines true with the laser.
3) Large-Format Floor Tile (Grid Method)
Goal: Consistent joints and minimal lippage over a wide area.
- Subfloor prep: Verify flatness (e.g., within 1/8 in in 10 ft for large format). Use patch or self-leveling underlayment if needed.
- Establish grid: Use the laser to project perpendicular centerlines. Snap chalk over the laser lines to create a durable grid you can see under thinset.
- Dry fit: Test tile and spacers along both axes to confirm joint consistency and edge cuts. Balance cuts at opposite walls.
- Set in quadrants: Spread mortar within one grid square at a time. Keep the laser on to verify you are tracking along the control lines.
- Control lippage: Back-butter large tiles, use the proper trowel notch, collapse ridges, and consider a tile leveling system for flatter finishes.
4) Diagonal, Herringbone, and Chevron Patterns
Complex patterns benefit most from bright references.
- Diagonal (45 degrees): Align your first tiles to a laser line that runs at 45 degrees to the room. Some lasers can be tilted with an inclined mount; otherwise, mark two points measured off perpendicular lines and use the laser to sight through them.
- Herringbone: Use the vertical laser to keep the V points stacked and the horizontal to maintain course height. Establish a dead-true centerline—tiny drift becomes very visible.
- Chevron: The laser clarifies alignment at every apex. Mark a few checkpoints on tape so you can verify progress if the laser moves.
Advanced Tips Professionals Use
Run a Continuous Reference Around the Room
A 360-degree laser provides a wraparound line so you always know where the tile height will land at any wall. This is incredibly helpful for spaces that connect or have multiple focal points.
Manage Slopes and Transitions
Lasers define true level, but not every surface should be level. In shower pans, you need consistent slope to the drain. Use the laser to reference the perimeter height, then mark a slope line that drops appropriately to the drain location. On floors transitioning to hardwood or thresholds, the laser helps visualize and control final heights.
Use Receivers and Pulse Mode Outdoors
If you are setting exterior tile or pavers under bright sun, a laser with pulse mode and a receiver lets you detect the beam even when it is invisible to the eye. This is more common with rotary and some 360 models.
Combine With a Tile Leveling System
A laser sets alignment; a leveling system controls lippage on large-format tiles. The combination yields flat, straight, and visually seamless results—especially over long runs.
Anchor Your Ledger Like a Pro
When mounting a ledger for wall tile, align its top edge to the laser, then verify with the beam that the entire board tracks straight end to end. Use minimal fasteners and place them where holes will be covered by the row you add later or by trim.
Troubleshooting and Avoiding Mistakes
Laser Drift and Vibration
Mortar mixing, foot traffic, and bumping can shift the laser. Always verify positioning with small pencil marks or painter’s tape checkpoints so you can re-aim precisely. Consider a sturdier tripod or a pole mount that clamps between floor and ceiling for rock-solid stability.
Parallax and Beam Thickness
A laser line has width. Choose a consistent reference—either the top or bottom edge of the beam—to avoid creeping error. Stand square to the wall to avoid parallax misreads at oblique angles.
Bright Light and Reflective Surfaces
Glossy tiles and windows can wash out or reflect the beam. Dim lights if possible, switch to a green beam, or use a target card to enhance visibility. Avoid aligning directly into mirrors—reflections can be confusing and hazardous.
Calibration Checks
Even good lasers can go out of tune after drops. Periodically test by projecting a line across a wall, marking its height at two distances, rotating the laser 180 degrees, and verifying that the line returns to the same marks. Many models include a calibration routine; if yours is off, get it serviced or note the offset until repaired.
Safety
- Do not stare into the beam; avoid projecting at eye level where people are working.
- Use IP-rated tools around moisture to reduce shock risk.
- Keep cords and tripods out of walkways; tape down as needed.
Buying Guide: Features That Matter for Tiling
Must-Have Features
- Self-leveling with lock: Auto-level for accuracy; a pendulum lock protects the mechanism in transit.
- Accuracy: Aim for at least ±1/8 in at 30 ft (±3 mm at 10 m). Better accuracy pays off in big rooms and long runs.
- Visibility: Green beam for brighter spaces; consider higher output for larger rooms.
- Mounting flexibility: Magnetic bracket, tripod threads, and optional pole mounts keep lines where you need them.
- Battery life: Long runtime or rechargeable packs so you do not lose your reference mid-set.
- Multiple planes: Horizontal + vertical at minimum; 360 lines are a luxury that quickly becomes indispensable.
- IP rating: IP54 or better for dust and splash resistance in tile environments.
Accessories That Boost Productivity
- Tripod or pole system: Fine-tune height and keep the line steady across the whole job.
- Magnetic/suction mounts: Handy for backsplashes and glossy wall tiles.
- Target cards and glasses: Improve visibility under bright light.
- Laser receiver: For outdoor or long-distance work.
Cost-Benefit for DIYers
A reliable cross-line laser often costs less than the waste from a single botched wall. Factor in time savings—fewer re-do cuts, faster ledger setups, less measuring—and the return on investment becomes clear after one or two projects. If you plan multiple spaces (kitchen, bath, entryway), a 360-degree laser can be a lifetime tool.
Execution Details: Mortar, Movement, and Consistency
Lasers guide alignment, but craftsmanship still matters. Pair your laser strategy with solid technique:
- Trowel choice: Match notch size to tile format. For large-format tiles, use larger notches and back-butter to ensure coverage.
- Coverage: Aim for 95% coverage in wet areas, 80% minimum elsewhere. Pull a tile occasionally to check.
- Ridge collapse: Trowel in straight lines and move the tile perpendicular to ridges to collapse them fully.
- Movement joints: Leave perimeter gaps and honor expansion joints as per industry guidelines to prevent tenting.
- Consistency checks: Keep the laser on while setting; it’s an instant QC tool as you go.
Real-World Time Savers With a Laser
- Instant re-checks: Bumped your ledger? Flick your eyes to the line—no need to re-measure.
- Corner coordination: Align patterns across inside corners without juggling a level and tape measure.
- Cut planning: Cast a beam to visualize where a trim piece or bullnose will land before you commit.
- Room wrap: On floors, a 360 line helps you keep consistent base heights, so transitions to other rooms align.
Maintenance and Storage
Treat your laser like a precision instrument:
- Lock the pendulum when transporting to prevent knocks from de-calibrating the mechanism.
- Clean lenses gently with a microfiber cloth; mortar dust can scatter the beam.
- Store dry and charge batteries between jobs. Extreme temperatures shorten battery life and can affect calibration.
- Re-check calibration if the tool was dropped or after long storage.
FAQs
Do I still need a bubble level?
Yes. A small torpedo level is perfect for spot checks, short edges, and sloped features like sills. The laser gives the big picture; the bubble level refines local details.
Can I rely only on the laser for floors?
Use the laser for level references, but flatness is separate. Assess and correct substrate flatness before tiling to control lippage.
Red or green beam for tiling?
Green is easier to see in bright interiors. Red can suffice in smaller or dimmer spaces on a tighter budget.
What about uneven walls or counters?
Never follow an out-of-level counter with the first row. Use the laser to set a true reference, install above on a ledger, then scribe the bottom course to fit.
How often do I need to calibrate?
Check seasonally or after impacts. Follow the manufacturer’s test procedure and service if readings drift.
Conclusion: Turn DIY Into Pro-Level Results
If you have been wondering, "Laser level–does it help with tile installation?" the answer is a confident yes. A compact, self-leveling unit becomes your silent partner—keeping lines true, patterns aligned, and timelines tight. Pair it with smart layout, solid substrate prep, and consistent technique, and your tile work will look straight, balanced, and professionally finished. From the first ledger line to the final trim piece, a quality laser makes every decision clearer and every course faster.
Bottom line: Get a dependable cross-line or 360 laser with good visibility, mount it securely, and make it the backbone of your layout. Your eyes—and your finished tile—will thank you.