Tile Your Story: Create an Artful Feature Wall with Artistic Ceramic Tiles
Every home has walls; few have a wall that tells a story. An artful feature wall crafted with ceramic tile can condense your personality, memories, and style into a composed, tactile surface that endures. This in-depth guide walks you through how to design a wall with artistic ceramic tiles—from creative ideation and color strategy to layout, lighting, installation, and care—so that the finished surface feels curated, cohesive, and unmistakably yours.
Why Choose a Tiled Feature Wall?
Unlike paint or wallpaper, tile brings a unique blend of permanence, texture, and sheen that captures light and invites touch. When you build an accent wall with patterned or hand-crafted tile, you create a focal point that grounds a room and reframes how you experience the space every day.
- Visual drama: Pattern, relief, and glaze variation create depth and movement.
- Durability: Ceramic resists scuffs, splashes, and UV fade better than many surfaces.
- Easy care: Wipeable, water-tolerant, and long-lasting—ideal for kitchens and baths, but compelling in living areas too.
- Design range: From zellige shimmer to hand-painted motifs, mosaics, murals, and 3D forms.
- Sustainability potential: Many tiles feature recycled content, low-VOC glazes, and long service life.
Start with a Story: Define Purpose, Mood, and Message
Before you consider grout color or layout, sketch the narrative. This is the human core of how to design a wall with artistic ceramic tiles: the reason the wall exists. What should it say about you or the space?
Clarify the Function
- Backdrop vs. spotlight: Will the wall quietly support art and furnishings, or be the showstopper?
- High-contact vs. low-contact: In kitchens, entries, or kids’ rooms, emphasize durable glazes and easy-clean grout.
- Wet vs. dry: Bathrooms or laundry areas demand water-resistant substrates and grout.
Choose a Mood and Style Language
Gather a small set of guiding words: grounded, sunlit, artisanal, eclectic, mid-century, Japandi, or maximalist. These help filter every decision—hues, finishes, pattern scale, and composition.
- Calm minimalism: Matte, large-format ceramics, subtle tonal shifts, wide grout joints.
- Bohemian eclectic: Patchwork of hand-painted tiles, mosaic accents, warm off-white grout.
- Modern Mediterranean: Shimmery zellige, irregular edges, tight joints, white or sand grout.
- Graphic contemporary: High-contrast geometrics, crisp rectified edges, narrow joints.
Assign a Focal Point
Decide what the eye lands on first: a tiled medallion, a framed mural, a fireplace surround, or a rhythmic repeat. Build the composition around that anchor using classic compositional tools:
- Rule of thirds: Place the most dynamic element on a third line, not dead center.
- Scale hierarchy: Mix large fields with smaller accents to prevent visual fatigue.
- Negative space: Let quiet areas give relief to dense patterns.
Know Your Materials: Types of Artistic Ceramic Tiles
“Ceramic tile” is a wide category. Understanding subtypes will supercharge your ability to translate your story into surface.
Hand-Painted and Patterned Ceramic
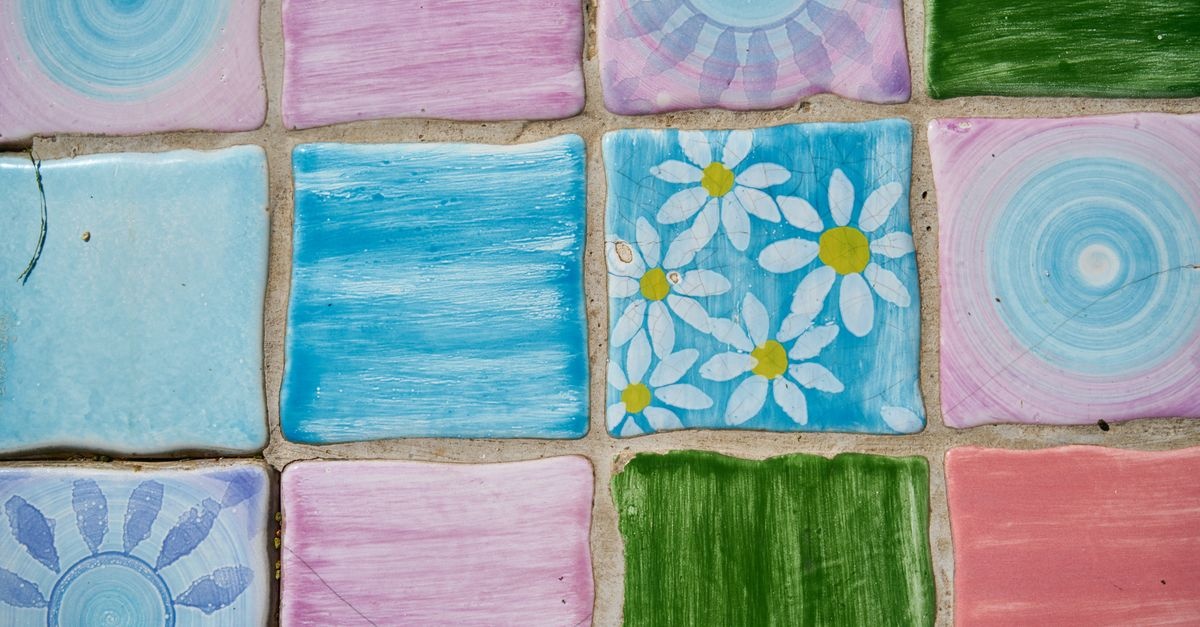
These tiles carry motifs—from florals to geometric tessellations—often applied via screen printing or hand glazing. They deliver instant character. Use them as a field or as accents within a calmer base tile.
Zellige and Textured Clay-Look Tiles
Characterized by variegated glaze and hand-formed edges, zellige-style ceramics sparkle with irregularity. They excel when lit from the side where facets gleam. Best for feature walls in living spaces, bars, or cozy nooks.
Mosaics
Tiny pieces mounted on mesh—perfect for gradients, murals, or curves. They allow detailed storytelling and subtle fades of color, ideal when you want to “paint with tile.”
3D Relief and Sculptural Tiles
Ridges, waves, flutes, and beveled forms add shadow-play and tactility. These shine under grazing light, turning a wall into kinetic art throughout the day.
Large-Format Ceramic
Big panels minimize grout lines, emphasizing color fields and sleek modernism. Combine with a slender accent band or mosaic inset to add narrative without busyness.
Glaze Finish and Sheen
- Matte: Soft, architectural, hides smudges; more understated.
- Satin: Balanced sheen, versatile across rooms.
- Gloss: Luminous, easy to clean, highlights slight surface undulations.
- Crackle glaze: Vintage charm; may require sealing.
Ethical and Eco Considerations
- Recycled content: Look for manufacturers who incorporate post-industrial materials.
- Low-VOC setting materials: Thinset and grout selections can support healthy indoor air.
- Longevity: A timeless design reduces replacement cycles—sustainability by endurance.
Color, Pattern, and Composition Strategy
This is where artistry meets intention. To master how to design a wall with artistic ceramic tiles, balance palette, pattern scale, and layout so the surface feels composed rather than chaotic.
Build a Palette
- Anchor hue: Choose one foundational color that relates to floors or major furnishings.
- Support tones: Two or three secondary shades that echo textiles, wood tones, or metals.
- Accent pop: A limited contrast hue (10–15% of the composition) for energy.
Use color theory: complementary pairs for drama (teal + rust), analogous schemes for calm (sage + olive), or monochrome with texture shifts for sophisticated minimalism.
Scale and Rhythm
- Large patterns read from afar, smaller ones reward up-close views.
- Vary scale thoughtfully: A big geometric field can host a fine mosaic border.
- Repetition builds rhythm; subtle disruptions (a tile flipped, a different glaze stripe) add intrigue.
Layouts That Tell a Story
- Stacked grid: Clean, modern; emphasizes grout alignment.
- Offset/brick: Friendly and familiar; softens strong patterns.
- Herringbone/chevron: Dynamic diagonal energy—great for tall walls.
- Basketweave or windmill: Vintage character, rich visual texture.
- Modular mix: Combine several sizes for a tapestry effect.
Framing, Borders, and Murals
Introduce intentional edges. Use bullnose pieces, metal trims, or contrasting borders to frame the field. Consider a mural approach: a central scene in hand-painted tiles framed by quiet field tiles, or a gradient mosaic that fades into neutral surroundings.
Create a Sample Board
Assemble tiles, grout swatches, hardware finishes, and fabric scraps. Pin them to a board and evaluate under the room’s actual lighting. This tactile rehearsal clarifies whether the palette harmonizes or clashes and is a core step in designing a wall with artistic ceramic tiles you won’t second-guess.
Lighting: The Invisible Design Partner
Light can elevate or flatten a tiled wall. Plan lighting early.
- Grazing light: Wall washers or sconces placed near the surface dramatize relief tiles and zellige shimmer.
- Ambient balance: Prevent harsh hotspots; even illumination helps patterns read true.
- Color temperature: Warm (2700–3000K) flatters earthy glazes; neutral (3500–4000K) sharpens cool tones and crisp whites.
Planning the Wall: Measurements, Substrate, and Details
Measure and Map
- Wall area: Height × width; subtract windows or obstacles; add 10–15% overage for cuts and waste.
- Grid layout: Mark a centerline; decide where full tiles land at eye level and corners.
- Mockup: Lay out a row or two on the floor to preview grout lines and pattern flow.
Substrate and Surface Prep
- Dry areas: Level, primed drywall is acceptable for many ceramics.
- Wet zones: Use cement backer board and waterproofing membranes (e.g., liquid or sheet systems).
- Flatness: A flatter wall = cleaner lines and less lippage; skim coat if needed.
Grout Joints and Trim
- Joint size: Handmade tiles want wider joints (3–5 mm) to accommodate variance; rectified tiles can run tighter (1–2 mm).
- Grout color: Matching grout quiets patterns; contrasting grout emphasizes geometry.
- Edges: Finish exposed sides with bullnose, quarter-round, or metal profiles for a crisp frame.
Budget and Timeline: Right-Sizing Your Vision
A stunning result starts with realistic planning. Artistic ceramic can range widely in price and availability.
- Tile costs: From budget-friendly basics to premium hand-crafted tiles; factor in waste and special trims.
- Labor: Complex layouts, murals, or small mosaics raise install time and cost.
- Lead times: Custom glazes and artisan tiles may require weeks; order early and add a buffer.
Set a contingency (10–15%) for surprises: substrate fixes, extra trim, or added lighting once you see the mockup lit.
DIY or Hire a Pro?
Determining how to design a wall with artistic ceramic tiles includes honest assessment of your skills and schedule.
- DIY friendly: Straight walls, simple grids, standard ceramic, clear access.
- Pro recommended: Hand-cut zellige, intricate mosaics, uneven substrates, waterproof assemblies, or tight deadlines.
A hybrid approach works well: hire for substrate, waterproofing, and the first few critical rows; DIY the field once the layout is locked.
Installation Playbook: From Box to Beautiful
Tools and Materials
- Notched trowels (size matched to tile)
- Tile saw or snap cutter; nippers for mosaics
- Level, laser, spacers, ledger board
- Thinset mortar suitable for ceramic; mastic only for approved dry interiors
- Grout (sanded or unsanded per joint width), floats, sponges
- Edge trims, sealers (if required), painter’s tape
Acclimate and Sort
Open multiple boxes and blend tiles to distribute shade and tone variation evenly, especially with hand-crafted or variegated glazes.
Dry Layout and Ledger
Snap a level line. For vertical runs, install a temporary ledger board to support the first full row so cuts fall at floor or ceiling rather than mid-wall. Confirm that cut tiles at edges feel intentional and symmetrical.
Set the Tile
- Keying and combing: Trowel thinset in one direction; back-butter larger or uneven tiles for full coverage.
- Beat-in: Use a rubber mallet or beating block to seat tiles, checking lippage with a straightedge.
- Check alignment: Laser lines and spacers maintain pattern integrity; step back frequently.
Cutting and Safety
- Use a wet saw for clean cuts on glazed ceramics; score-and-snap for simple straight cuts.
- Nippers and hole saws handle outlets and curves.
- Wear eye and hearing protection; manage dust per tool guidance.
Grouting and Finishing
- Allow tile to set per mortar guidance before grouting.
- Apply grout diagonally across joints; clean with damp sponges and buff haze when dry.
- Seal crackle glazes or porous grout if specified by manufacturer.
- Install trims, caulk plane changes, and touch up paint as needed.
Styling the Finished Wall
With the surface installed, integrate furnishings and decor so the wall sings with the rest of the room.
- Layered lighting: Pair ambient light with accent fixtures aimed to kiss the tile.
- Complementary textures: Balance hard tile with textiles—rugs, curtains, velvets, and woods.
- Selective decor: Let the wall breathe; choose fewer, larger pieces over many small items.
- Metal finishes: Repeat a metal hue (brass, blackened steel) in lighting, frames, or furniture for cohesion.
Maintenance and Everyday Care
- Routine cleaning: Mild pH-neutral cleaner and soft cloth; avoid abrasives on glossy glazes.
- Grout upkeep: Reseal porous grout as recommended; darker grout hides scuffs.
- Spot repair: Keep a few spare tiles for future chips or accidents.
Room-by-Room Inspiration
Living Room Feature
Fluted or ridged ceramics behind a sofa or media unit create subtle shadows and a modern profile. Use warm white or sand grout to keep the look soft. Add a long picture light to graze the surface and reveal relief.
Kitchen Backsplash Wall
Turn a standard backsplash into a statement by tiling from countertop to ceiling behind open shelves or a range hood. Combine a calm field tile with a hand-painted motif framed over the cooktop, echoing colors in dishware or bar stools.
Bathroom Mural
In a dry vanity zone, a mosaic gradient from deep teal at the bottom to misty gray at the top references ocean-to-sky. For showers, stick to glazes rated for wet areas, and ensure waterproof assemblies beneath.
Entryway or Stair Wall
Patterned ceramics on a stairwell wall offer a cinematic sweep as you ascend. Pick a motif with directional energy (chevron, herringbone) to amplify movement.
Fireplace Surround
Bold, glossy tiles around a hearth deliver glow-on-glow. Choose heat-tolerant ceramics and coordinate mantel finishes with trim colors for a tailored frame.
Common Pitfalls and How to Avoid Them
- Busy overload: If everything is bold, nothing is focal. Add negative space or unify grout color.
- Lighting mismatch: Test tiles under final light temperature and position; adjust fixtures before install.
- Edge neglect: Incomplete or rough edges cheapen the effect; plan trims from the start.
- Grout regrets: Always make a sample board with wet and dry grout to confirm contrast and texture.
- Ignoring substrate: Lippage and crooked lines stem from uneven walls; fix flatness early.
How to Design a Wall with Artistic Ceramic Tiles: A Step-by-Step Blueprint
- Write your brief: One paragraph on purpose, mood, and focal point.
- Collect references: 10–15 images; note what you love (color? texture? pattern?).
- Set palette: 1 anchor, 2–3 support tones, 1 accent; gather physical samples.
- Choose tile type: Hand-painted, zellige, mosaic, 3D relief, or large-format.
- Decide layout: Grid, offset, herringbone, or modular; sketch options.
- Plan lighting: Add wall washers or sconces to enhance texture and sheen.
- Detail edges and grout: Trim profile, joint width, and color selection.
- Measure and budget: Area, overage, labor; order with lead-time buffer.
- Mock up: Dry-lay a section; verify spacing and pattern flow.
- Install or schedule pro: Prepare substrate, set tiles, grout, and finish edges.
- Style and maintain: Layer furnishings and lighting; adopt simple care routine.
Advanced Design Moves
Color Blocking and Ombre
Compose broad swaths of color that meet at a crisp vertical line, or graduate hues from baseboard to ceiling. Use mosaics or multiple shades of the same tile line to control steps in the gradient.
Inlays and Niches
Recessed shelves or picture-frame insets hold artwork or plants, lined with a contrasting tile. A brass trim border adds jewelry-like precision.
Mixed Materials
Juxtapose ceramic with limewash paint, wood slats, or plaster to modulate temperature—cool sheen beside warm grain. Keep transitions intentional with reveals or trims.
Pattern “Breaks”
Interrupt a repeat with a solid band, or rotate orientation mid-wall to create a visual riff—subtle enough to feel designed, not accidental.
Frequently Asked Questions
Will a bold tile wall date quickly?
Choose a motif that resonates personally and anchor it with timeless neutrals nearby. Restraint in surrounding decor extends longevity.
Can I put heavy art on a tiled wall?
Yes, with proper anchors and planning. Ideally add blocking in the wall before tiling or use specialty anchors rated for masonry surfaces.
Gloss or matte for living spaces?
Gloss amplifies light and texture; matte feels soft and architectural. Try samples under your room’s lighting to decide. Many designs blend both for contrast.
What grout color is safest?
Match grout to tile for cohesion, or go slightly darker than the lightest tile tone to hide wear. Always test with a sample board.
Case Study: From Concept to Completion
Objective: Create a serene yet artful living-room feature behind a low-profile sofa.
- Mood: Sun-washed coastal calm with artisanal character.
- Tiles: 4-by-4-inch zellige-look ceramics in three close shades (cloud, seafoam, mist).
- Layout: Stacked grid for modern clarity; subtle checker of shades for movement.
- Lighting: Two wall washers set 8 inches from the surface to graze and highlight variation.
- Grout: Warm white to blend; 2 mm joints.
- Trim: Slim brushed-brass profile framing the field.
- Styling: Linen sofa, oak side tables, sea-glass accents, and a neutral rug.
Result: A luminous plane that changes subtly throughout the day, supporting art and conversation without overpowering the room—an elegant demonstration of how to design a wall with artistic ceramic tiles that is both personal and practical.
Checklist: Before You Order
- Purpose and mood defined in writing
- Palette approved under actual lighting
- Tile type, size, and finish selected
- Layout drawing with centerlines and edge conditions
- Grout color and joint width chosen
- Trim profile and end details confirmed
- Substrate plan (drywall, backer board, waterproofing) set
- Lighting positions and specs finalized
- Accurate measurements + 10–15% overage
- Lead times and budget buffer accounted for
Conclusion: Craft the Wall That Speaks You
The most compelling tile feature walls succeed because they start with intention and end with care. They transform light, carry narrative, and withstand daily life with grace. Now that you understand how to design a wall with artistic ceramic tiles—from story and palette to layout, lighting, and installation—you’re ready to compose a surface that is as durable as it is deeply personal. Tile your story, and let the wall speak every time you walk into the room.