Few projects are as satisfying as transforming raw materials into a glowing hearth that sends out fragrant loaves and shared meals. If you have ever wondered how to move from sketches to steaming boules, this in-depth tutorial covers everything you need to know about how to build a firebrick bread oven at home. You will find clear planning guidance, practical material lists, and a complete build sequence that balances thermal mass, insulation, and ease of use. Even if you have never laid a brick, you can complete this project with patience, careful measuring, and respect for heat and gravity.
Why a Wood-Fired Bread Oven Belongs in Your Backyard
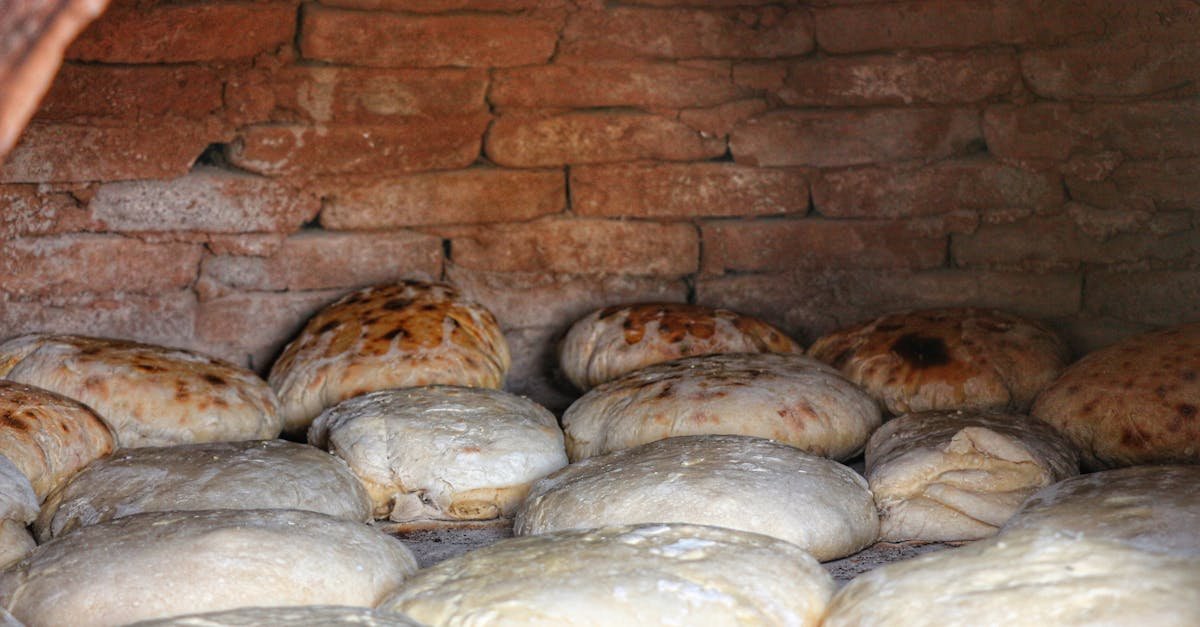
A well-built masonry oven stores a tremendous amount of heat in its firebrick core. After a firing, that stored heat bakes bread evenly, producing a springy crumb and blistered crust that standard ovens struggle to match. Beyond bread, these ovens handle pizza, roasted vegetables, seared steaks, and slow roasts in the falling heat. Advantages include:
- Unmatched crust and steam: The chamber reaches high temperatures and traps natural steam, setting a crisp, caramelized crust.
- Thermal mass and stability: Thick brick walls radiate heat slowly, perfect for multiple batches.
- Efficiency: One firing fuels a full day of cooking: pizza at peak heat, bread as it tapers, then braises and dried fruit overnight.
- Durability: With proper insulation and weatherproofing, a brick oven is a long-term backyard upgrade.
Roadmap: What You Will Build and What You Will Learn
In this guide, you will build a fully insulated, flued, wood-fired bread oven using standard masonry techniques and common materials. Expect to learn:
- Site selection, permits, and safe clearances
- Choosing a dome or barrel vault form and right-sizing the interior
- Pouring footings and a reinforced hearth slab
- Insulating with ceramic fiber or perlite based mixes
- Laying firebricks for the hearth and chamber
- Fitting a chimney for clean draw and smoke management
- Curing, firing, and baking schedules for bread
Planning First: Design Choices That Make or Break Your Oven
The best time to solve problems is on paper. Before you lift a trowel, make the key design decisions that define performance and build complexity.
Site Selection, Codes, and Safety Clearances
- Distance to structures: Keep the oven at least several feet from buildings, eaves, fences, and low branches. Follow local fire codes and HOA rules.
- Prevailing winds: Place the mouth of the oven where cross breezes will not blow embers out. A sheltered spot helps maintain draft consistency.
- Level, well-drained base: Avoid frost heave and ponding. A compacted gravel pad under your footing is a strong start.
- Access and ergonomics: Plan walkways, wood storage, and prep counter height. The hearth floor should sit roughly at waist height for comfortable loading.
Dome vs Barrel Vault: Which Chamber Suits Your Baking
Two classic forms dominate backyard ovens:
- Dome oven: A hemispherical or low dome. Efficient, even heat distribution, and strong compression. Great for pizza and bread. Requires careful brick tapering or a sand form.
- Barrel vault: An arched vault spanning sidewalls. Easier to cut and stack for some builders. Offers a long, rectangular floor ideal for multiple loaves in lines.
Both can deliver top-notch bread. The choice often comes down to aesthetics and your comfort with cutting bricks for the dome.
Right-Sizing the Interior
Pick an inside diameter or length that matches your baking style and firewood habits:
- Small, 24 to 30 inches: Heats quickly with modest wood, handles 2 to 3 loaves, great for small families.
- Medium, 32 to 36 inches: A balanced choice for bread and pizza parties, supporting 4 to 6 loaves in a batch.
- Large, 40 inches plus: Community bakes and large roasts, but needs more fuel and longer heat-up times.
For most home bakers, an internal diameter of 32 or 36 inches is the sweet spot. Door height should be about 63 to 65 percent of internal dome height to optimize heat retention and draft.
Tools and Materials Checklist
A precise build begins with solid tools and correct materials. Gather before you start:
- Tools: Masonry saw or angle grinder with diamond blade, mixing buckets, trowels, masonry level, square, rubber mallet, tape measure, rebar bender, wheelbarrow, shovel, PPE including gloves, eye and ear protection, dust mask, and steel-toe boots.
- Foundation: Gravel, rebar, form boards, concrete mix suitable for slabs.
- Stand: Concrete blocks or brick, mortar, or cast-in-place concrete forms.
- Hearth slab: Rebar or welded wire mesh, high-strength concrete.
- Insulation under hearth: Calcium silicate board, or a perlite or vermiculite insulating slab.
- Firebox and hearth: Firebricks rated for high temperature, refractory mortar or fireclay sand mix.
- Chimney: Flue liner or double wall stainless flue, chimney cap, and a smoke chamber transition.
- Exterior insulation: Ceramic fiber blanket, and a vermicrete or perlcrete render.
- Finish: Lime render, stucco, or brick cladding and a waterproof breathable seal.
Foundation and Stand: A Solid Base for Decades
An oven is only as stable as the ground beneath it. A frost resistant foundation and sturdy stand prevent cracks and settling.
Footing and Slab
- Excavate and compact: Mark a rectangle larger than your oven footprint. Excavate to frost depth if required locally. Add and compact 4 to 6 inches of gravel.
- Form and reinforce: Build square forms with level tops. Place rebar grid or mesh on chairs so it sits mid slab, not on the bottom.
- Pour and cure: Pour concrete, vibrate or tap forms to release air, screed flat, and trowel. Keep moist for several days. Let it cure before heavy loads.
Stand Options: Block or Cast
- Concrete block stand: Stack blocks with mortar to a comfortable height, add rebar in cores, and fill with concrete for strength. Leave openings for wood storage and ventilation.
- Cast-in-place stand: Build a reinforced box form and pour. This option demands careful forming but yields a clean monolithic base.
Top the stand with a reinforced concrete hearth slab that spans the opening and supports the oven mass. Use adequate rebar and ensure overhangs are modest.
Insulated Hearth: Where Your Loaves Will Rise
The hearth is the heat sink that browns your bread base. Insulating under the firebrick ensures heat stays where it belongs: in the baking chamber.
Pouring the Structural Hearth Slab
- Build forms on the stand: Create a flat, level formwork the size of your intended oven base plus finish layers.
- Rebar and mesh: Tie a grid and maintain cover from slab edges and bottom. Plan penetrations for a flue anchor if needed.
- Pour, screed, and cure: Achieve a smooth, level surface. This slab must be fully cured before adding insulation layers.
Underfloor Insulation
- Calcium silicate boards: High compressive strength, low thermal conductivity, quick to install. Lay boards dry on the slab and tape seams with high temp tape.
- Vermicrete or perlite slab: Mix vermiculite or perlite with Portland cement and water at roughly 5 to 1 ratio by volume for a lightweight insulating screed. Pack and level to the target thickness, then allow extended drying time.
A 2 to 4 inch insulation layer under the hearth is common. Do not skip this step. Poor insulation drains heat right out of your chamber and makes baking more difficult.
Laying the Hearth Firebricks
- Set a dry bed: Place a thin leveling bed of dry fireclay and fine sand mix. This allows precise leveling without permanent mortar under your hearth bricks.
- Orient bricks tightly: Stagger joints and keep the hearth flat. Tap with a rubber mallet and check frequently with a long level.
- Maintain a smooth field: Flush joints reduce drag on your peel and keep flour from burning in crevices.
Chamber Construction: The Heart of the Oven
This is where your oven becomes a heat engine. Whether you choose a dome or a barrel vault, accuracy and patience pay off.
Build the Entry and Door Arch
- Mark the center: Scribe your interior circle on the hearth with a pencil and string compass. Mark entry width and depth.
- Dry fit the arch: Cut firebricks for a semicircular or segmental arch. Use a plywood arch form to hold bricks while you mortar.
- Set the arch: Butter joints with refractory mortar and keep consistent joints. The entry arch ties into the dome and carries the chimney, so keep it square and firm.
Forming the Dome: Sand Form or Templated Courses
- Sand form method: Create a damp sand mound that matches your interior dome profile. Cover with plastic to prevent sticking. Lay the dome bricks over it. This is approachable for first timers.
- Course by course method: Cut tapered bricks and use a jig to set consistent angles. Build one ring at a time, stepping inward until you close at the apex.
Either way, maintain tight joints and check that each course aligns with the intended curvature. Keep mortar thin and even; the firebrick and geometry do the heavy lifting, not thick seams.
Mortar, Jointing, and Structural Logic
Use a true high temperature refractory mortar rated for firing. Ordinary masonry mortar fails under heat. Tips:
- Thin joints: Aim for tight fits with minimal mortar. Thick mortar can crack and shrink.
- Compression paths: The dome works in compression. Each brick leans into the next, forming an arch that grows stronger under load.
- Clean as you go: Remove squeeze out from the interior immediately. A smooth interior reduces soot pockets and improves airflow.
Closing the Dome: The Keystone Moment
- Final rings: The last two or three rings require patience and well cut bricks. Test fit without mortar.
- Keystone brick: Shape a wedge that locks the dome. Butter thinly, tap in, and leave the form or sand support in place until mortar cures.
- Remove the form: After cure, gently remove internal supports. Sweep the interior and inspect for gaps.
Barrel Vault Alternative
- Sidewalls: Build parallel firebrick walls to the desired height with straight mortar joints.
- Centering form: Erect a wooden arch form spanning the walls.
- Lay the vault: Set arched courses across the form, then lock with a central keystone.
For bread bakers who prefer rows of loaves, a vault can be ideal. It is also friendly to rectangular hearth layouts and straightforward cut patterns.
Chimney and Flue: Clean Draft, Clear Air
The flue system carries smoke out without stealing heat from the chamber. A well placed chimney at the entry arch captures smoke while keeping the baking dome hot.
Placement and Size
- Front mounted flue gallery: Create a smoke chamber above the door arch. The flue draws from this gallery, not directly from the dome, which preserves heat.
- Flue diameter: For ovens in the 32 to 36 inch class, a 6 to 8 inch diameter flue often works. Larger ovens may need 8 to 10 inches. Check manufacturer guidance for stainless systems.
- Height and cap: A taller flue improves draft and carries smoke away from faces. Top with a spark arresting cap.
Seal the flue to the gallery with refractory mortar and leave a small expansion joint where metal meets masonry, packed with fiber gasket to absorb movement.
Wrap It Warm: Exterior Insulation and Shell
Insulation on top of the dome is critical. It reduces wood use, improves heat retention, and protects against thermal shock.
Ceramic Fiber Blanket
- Wrap the dome: Apply two to three layers of ceramic fiber blanket over the dome, overlapping seams. Wear gloves and a mask; fibers can irritate skin and lungs.
- Hold in place: Use stainless wire mesh or expanded lath to hold the blanket snugly without compressing too much air space.
Vermicrete or Perlcrete Render
- Mix lightweight render: Combine vermiculite or perlite with cement and water to a workable but not soupy consistency, often 5 to 1 aggregate to cement.
- Apply a thick coat: Trowel on 2 to 3 inches over the blanket. This adds another insulation layer and shapes your final silhouette.
Weatherproof Finish
- Lime stucco: Breathable and crack tolerant. Finish with a limewash or breathable seal.
- Brick or stone cladding: Beautiful and tough, though heavier. Leave expansion breaks and tie mechanically to the base, not the dome.
- Water management: Add eaves or a small roof to shed rain. Standing water shortens oven life.
Curing, Firing, and First Bakes
Even the best masonry needs gentle introduction to heat. Trapped moisture and rapid firing can cause steam spalling and cracks. Cure slowly for longevity.
Curing Schedule
- Passive dry: Let the oven air dry for at least a week, more if you used wet mixes like vermicrete.
- Small curing fires: Over 5 to 7 days, build a series of small, progressively hotter fires. Begin with kindling only, then add a few small splits. Keep the door open.
- Monitor moisture: Expect beads of water and damp patches to appear and fade. Do not rush this stage.
Firing for Bread
- Build a bright fire: Use dry hardwood splits. Light near the center, then move the fire to one side as coal bed builds.
- Heat soak: Maintain flames for 60 to 120 minutes depending on mass and size. The interior will go from sooty to clean as carbon burns off, a sign of proper temperature.
- Rake and mop: Spread embers to even the floor temperature, then rake them out if baking with retained heat. Mop the floor with a damp, natural fiber mop to liven steam and clean ash.
Loading and Baking
- Door management: Seal the door after loading to trap steam. A tight fitting insulated door helps maintain chamber pressure and heat.
- Thermal cues: Use an infrared thermometer at first, then learn visual cues: clean interior, shimmering air, and slight flicker at the arch edges.
- Batch flow: Bake larger loaves first when heat is highest, then rolls and smaller boules, followed by desserts and finally slow roasts as the oven falls to lower temps.
Doors, Tools, and Accessories That Make Life Easier
While you can bake with minimal gear, a few tools raise quality and reduce frustration:
- Insulated door: Wood or metal faced with insulation inside. Fit to the arch and add a gasket for steam tightness.
- Peels: A wooden peel for launching dough and a metal peel for turning and retrieval.
- Infrared thermometer: Quick checks of hearth and dome temperatures.
- Brass bristle brush and damp mop: Sweep and clean the hearth safely.
- Rake and coal shovel: Manage fire location and ash removal.
Safety First: Build and Use With Care
Masonry ovens involve heavy materials and high heat. Protect yourself and your home with simple precautions:
- PPE always: Gloves, eye protection, dust mask, and hearing protection for cutting and mixing. Long sleeves and non synthetic clothing when firing.
- Stable ladders and supports: Use solid forms and centering. Never work under an unsupported arch.
- Fire safety: Keep an extinguisher nearby, maintain clear spark areas, and use dry seasoned wood. Never use accelerants.
- Expansion joints: Allow metal flues and doors to move relative to masonry to prevent cracking.
Costs, Timeline, and Skill Level
Budgets vary with size, finish choices, and local prices, but you can estimate ranges:
- Materials: Firebricks, insulation boards, ceramic blanket, refractory mortar, flue parts, and finish materials often total from modest to significant sums depending on scale and finish. Scavenged or reclaimed brick for the stand can save cost, but do not substitute common brick for the firebox.
- Tools: Renting a saw and buying PPE is often the most cost efficient approach. Hand tools are modest investments.
- Time: A diligent weekend builder might finish in several weekends, not counting curing time. Rushing rarely saves time overall.
Common Mistakes and How to Avoid Them
- Skipping insulation: Results in long heat times and poor baking. Always insulate under and over the dome.
- Thick mortar joints: Lead to cracks. Aim for tight brick fits.
- Undersized flue: Causes smoke spillage. Size generously and ensure smooth transition to the chimney.
- Door too tall: Loses heat and steam. Keep door height around two thirds of dome height.
- Insufficient curing: Moisture trapped in mass can spall. Take your time with small fires.
Step by Step Summary: How to Build a Firebrick Bread Oven You Will Use Every Week
- Plan the site: Check codes, set clearances, and map workflow from woodpile to prep bench.
- Pour footings: Stable, level, and reinforced against frost and load.
- Build the stand: Block or cast, with room for storage and a top surface at waist height.
- Cast the hearth slab: Reinforced and well cured.
- Install underfloor insulation: Calcium silicate board or vermicrete.
- Lay hearth firebricks: Flat and tight on a dry leveling bed.
- Construct the entry arch: Solid and square, the anchor of your front face.
- Build the dome or vault: Course by course with refractory mortar and tight joints, closing at the keystone.
- Add chimney: Front flue gallery with proper diameter and height.
- Wrap in insulation: Ceramic blanket and vermicrete shell.
- Finish weatherproofing: Stucco or cladding, plus a cap or rooflet.
- Cure, fire, bake: Gentle drying, then your first pizza and loaves.
Variations and Upgrades You Can Consider
- Hybrid fuel: Add a gas assist for preheating. Check local regulations and professional installation requirements.
- Thermal breaks: Place insulating strips between the inner arch and outer gallery to reduce heat loss through the face.
- Additional mass: Add a cast refractory layer over the dome if you bake back to back large batches often.
- Decor: Mosaic tiles, brick soldier courses, or a timber shelter transform utility into centerpiece.
Pro Tips for Better Bread in a Masonry Oven
- Control steam: For lean doughs, loading several loaves at once and closing a tight door generates natural steam. Some bakers atomize water on the walls or use soaked towels behind a heat shield, but take care to avoid thermal shock.
- Mind the floor: Floor temperature dictates bottom crust. If scorch happens, cool the floor with a quick mop, or load on a thin wooden peel for the first minute.
- Use a test loaf: A small boule gives instant feedback on heat and timing before you commit a full batch.
- Rotate evenly: Even in a well designed oven, hot spots exist. Turn loaves halfway through for perfect color.
Frequently Asked Questions
Can I use common clay bricks for the dome
For the inner chamber and hearth, use genuine firebricks designed for high temperatures. Common bricks can crack and spall. You can use common brick for the outer cosmetic shell once you have a proper refractory core and insulation.
Do I really need a chimney
Yes. A front mounted flue gallery and chimney capture smoke, improve draft, and preserve heat in the baking chamber. Without it, smoke will spill from the entry and you will lose heat rapidly.
What wood should I burn
Seasoned hardwoods like oak, maple, ash, or fruit woods burn hot and clean. Avoid softwoods with resins, treated lumber, or painted wood. Dry fuel means less smoke and faster heat soak.
How thick should the walls be
Firebrick thickness of 2.5 inches is common for the dome, sometimes paired with an additional cast layer for more mass. The insulation blanket and vermicrete layer add thickness but not much weight to the structure below.
Can I bake bread and pizza in the same oven
Absolutely. Fire hot for pizza with live flame and high dome temps. For bread, rake coals, clean the floor, and bake with retained heat. Many bakers dedicate days for each to optimize workflow.
How to build a firebrick bread oven if I have limited tools
You can rent a masonry saw for a day to make precise cuts and rely on basic hand tools for the rest. Choose a design that minimizes complex angles, such as a barrel vault with standard arch cuts.
Troubleshooting Performance
- Oven will not reach temperature: Check for insufficient insulation, a door leak, a small flue causing poor draft, or damp wood. Extend fire time and use smaller splits for more active flame.
- Uneven browning: Rotate loaves and verify dome symmetry. Add a little more heat soak time before raking out coals.
- Cracks appeared: Hairline cracks are common and often cosmetic. If wide or growing, look for rigid connections between hot and cold parts. Add expansion joints and repair with refractory paste if needed.
Respecting the Craft: From Blueprint to Breadboard
You are now equipped with the knowledge to turn a plan into a working oven. You have learned the essentials of how to build a firebrick bread oven that bakes reliably, uses fuel efficiently, and stands up to the seasons. The remaining ingredient is your steady hand and time spent at the hearth. Start with a realistic schedule, choose quality materials, and lean on good construction practices. The reward will arrive as a crackling crust and a fragrant loaf split open on your table.
Next Steps
- Sketch your design: Pick dome or vault, size the interior, and draw the stand.
- Source materials: Order firebricks, refractory mortar, insulation boards, ceramic blanket, and flue parts.
- Schedule the build: Break the work into weekends: foundation, stand, hearth, chamber, insulation, and finish.
- Plan your first firing: Set aside a calm day, gather seasoned hardwood, and follow the curing steps.
Whether you document every course or build by feel, your project will teach you about heat, mass, and patience. Before long, your backyard will be perfumed with smoke and fresh bread, and friends will ask for your secret. You can smile and say it starts here, with a clear plan and a careful approach to how to build a firebrick bread oven.
Appendix: Material Quantities for a Mid Size Dome
Quantities vary, but the following ballpark list suits a 36 inch internal dome with a typical entry and flue:
- Firebrick: Approximately 180 to 220 standard firebricks for dome and hearth
- Refractory mortar: 3 to 5 large bags depending on joint thickness and waste
- Calcium silicate board: 2 to 3 sheets to cover under hearth
- Ceramic fiber blanket: 2 to 3 rolls for 2 to 3 layers over the dome
- Vermiculite or perlite: Enough for a 2 to 3 inch shell, usually several large bags
- Concrete and rebar: For footing, stand fill, and hearth slab, quantities based on footprint and thickness
- Flue liner or stainless kit: 6 to 8 inch diameter with cap
Final Word
The path from first sketch to first loaf is a true craft journey. Along the way you will master layout, leveling, and heat management, then turn those skills into a steady supply of bread that tastes like the countryside. If you ever forget why you started, open the door during a quiet moment of a cooling fire and listen to the soft ticking of brick releasing its stored heat. That sound is your home built machine doing what it was designed to do. And that is the essence of learning how to build a firebrick bread oven that becomes part of your daily life.